DFS Replicationon Windows Server 2016 | Setup and Replacement
Full guide of DFS Replication on Server 2016 is here for you! Additionally, if you want to find another way, you may get a surprise from this article!
By Maggie Updated on August 22, 2023
Overview of DFS Replication
DFS Replication, known as Distributed File System Replication, stands as a robust technology geared towards the duplication of files and directories within a distributed file system framework. Its primary domain of application lies within the Microsoft Windows ecosystem, notably finding a pivotal role within the Windows Server operating milieu.

The core functionality of DFS in Windows Server 2016 revolves around the seamless propagation of files and folders across disparate servers, thereby accentuating the facets of data redundancy, heightened accessibility, and an enriched performance paradigm. This technology orchestrates a symphony of data synchronization, bolstering the overall integrity and utility of the system.
If you want to use DFS Replication Windows Server 2016, then you can continue to read!
How to install and configure DFS Replication in Server 2016
Procure 1. Install DFS Replication
DFS Replication is efficient but not set up by default, thus you need to install DFS replication and then perform folder replication in Windows Server 2008/2012/2016/2019/2022 and its R2 version effortlessly.
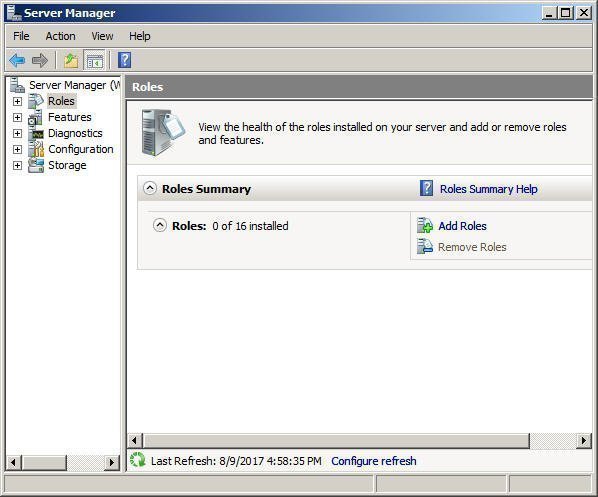
Step 1. Open Server Manager and click Role on the left panel; tag on Add Roles on the right panel, then click Next.
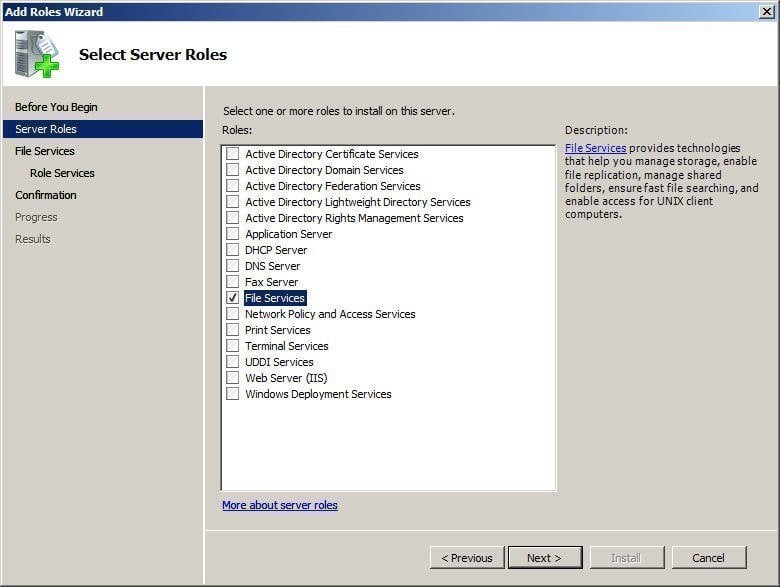
Step 2. Then, tick File Services role in the Select Service Roles page and click Next.
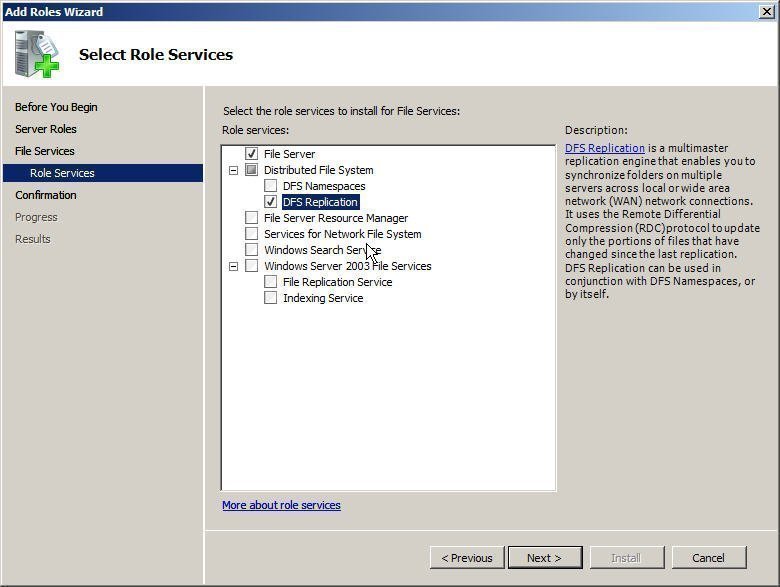
Step 3. Select DFS Replication in the Role Service section and click Next.
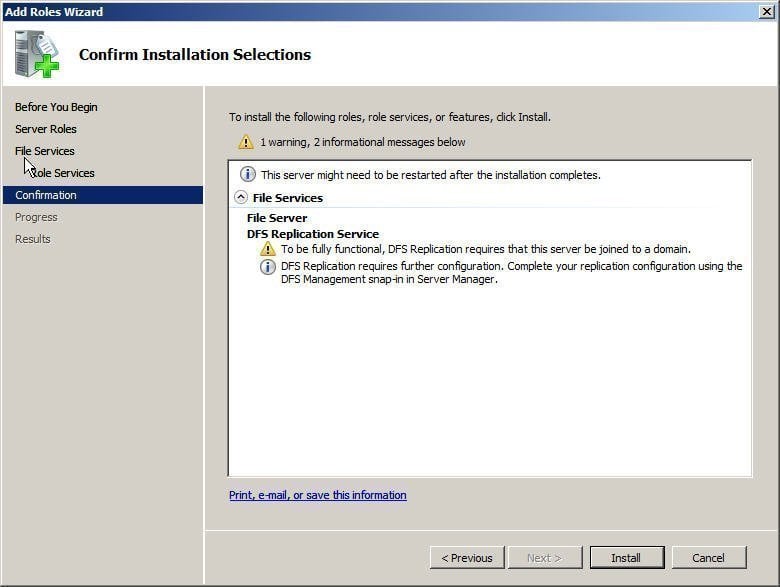
Step 4. Confirm this installation and click Install to ensure your configurations.
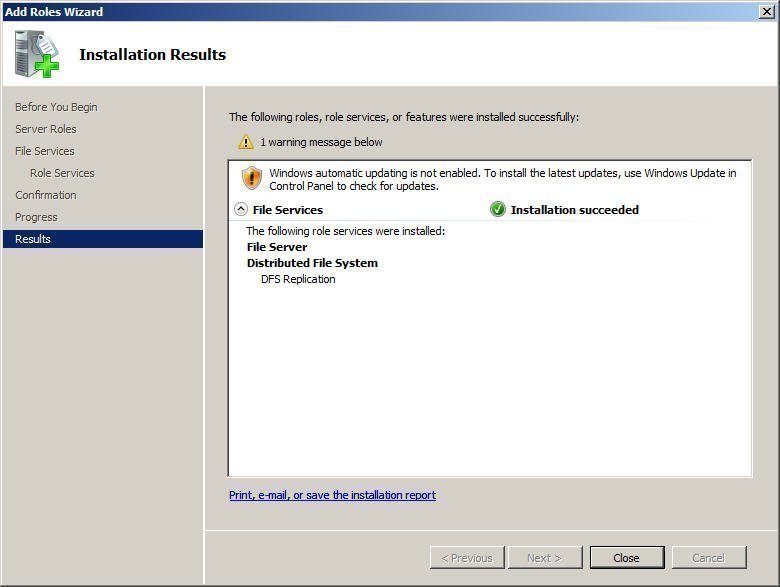
Step 5. Wait for a while, the installation process will be completed with the words Installation succeeded displayed, and then click Close.
Procure 2. Configure DFS replication
Installing DFS Replication does not mean your can use it, instead, another procure is configuring it correctly. Here is how you can do:
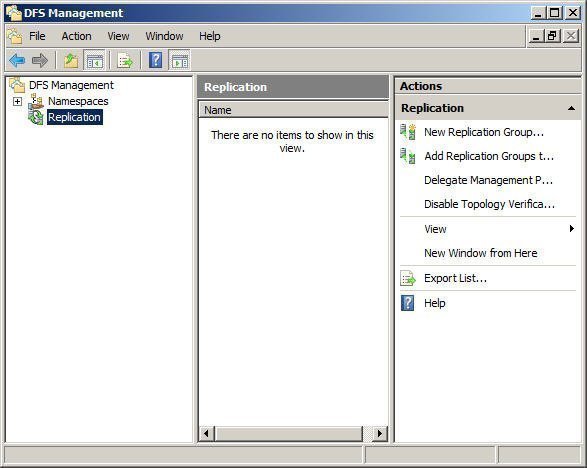
Step 1. Start new replication. Click Start > Administrative Tools > DFS Management subsequently, then right click Replication and choose New Replication Group… in the DFS Management console.
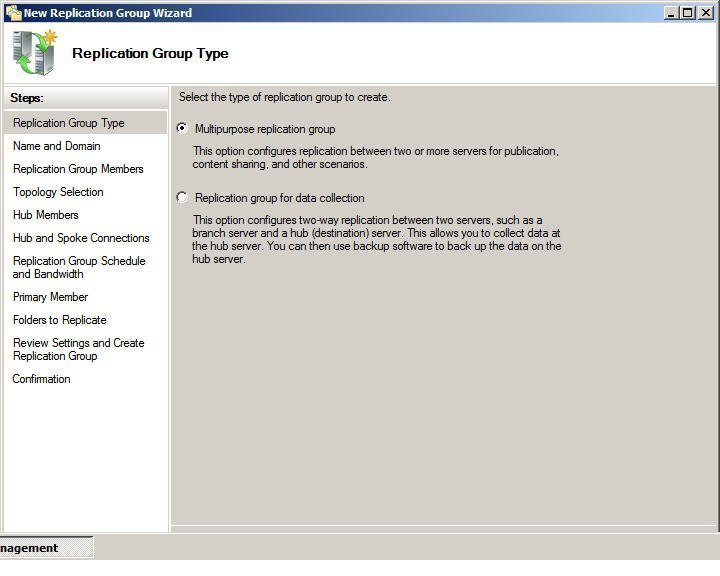
Step 2. Choose Replication Group Type.
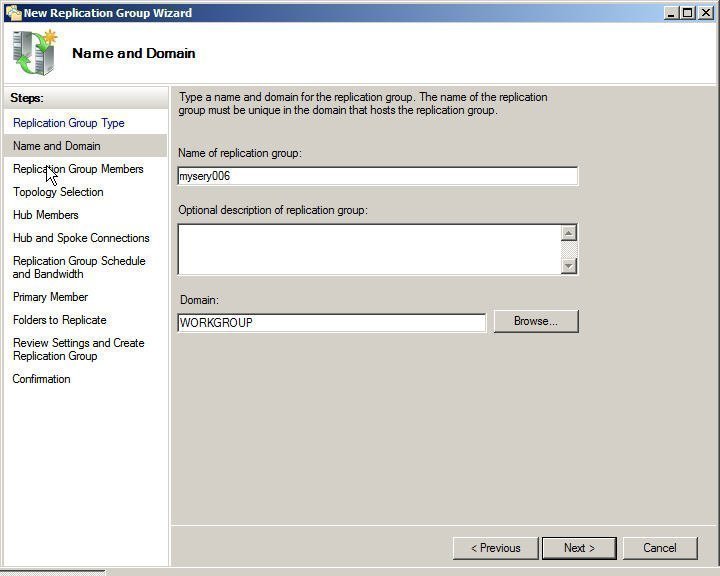
Step 3. Set name and domain for Replication group.
Step 4. Click Add and look up the Servers in ACTIVE Directory, then select the servers you want to share files or folders and hit Next.
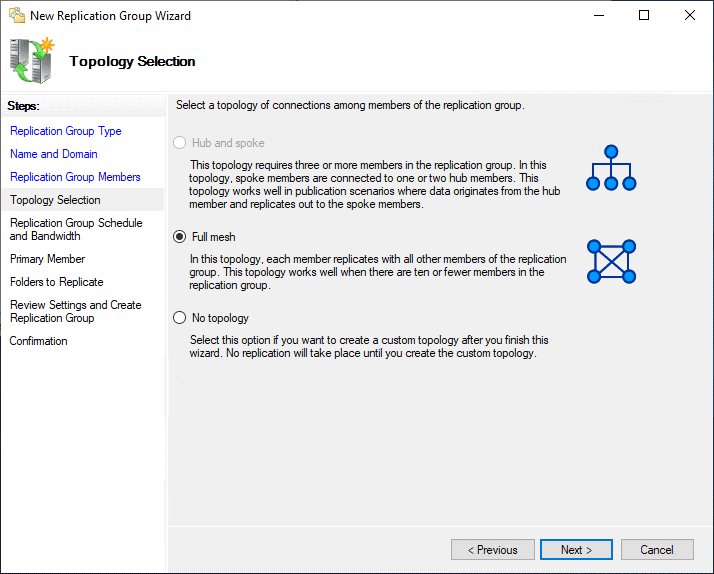
Step 5. Select Full mesh Topology and click Next.
♥Tip: This feature makes the shared files or folders stay synced among all of the servers regardless of where the files are updated.
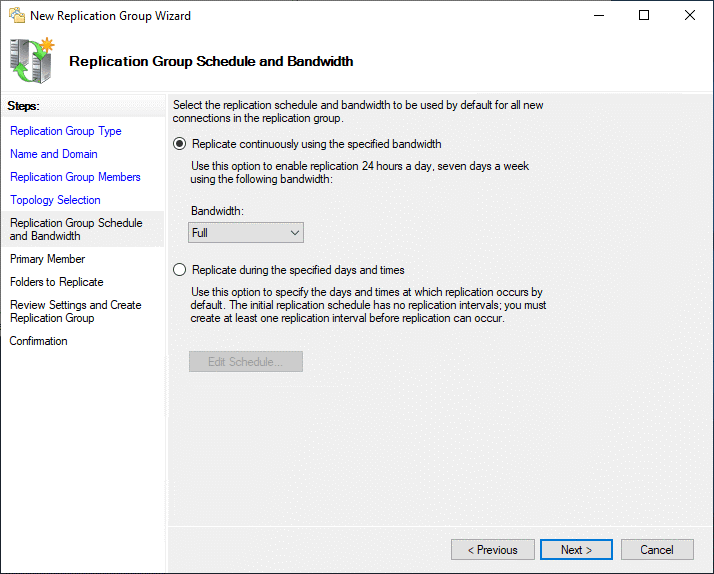
Step 6. Choose Full bandwidth to keep the files in sync all the time.
Step 7. Set a Primary member on which we have stored the data initially and hit Next.
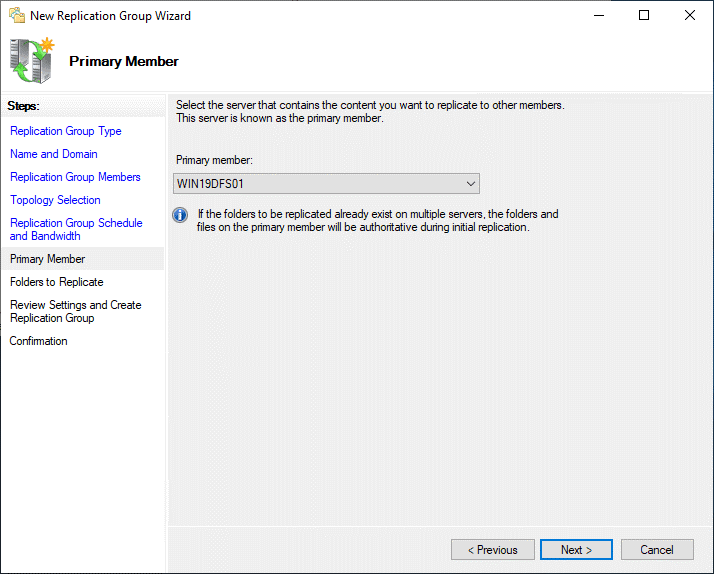
♥Note: During the first sync, the primary member is quite handy. It sorts out any conflicts in its own files just once. After that, all files get synced super quickly because all servers are treated equally in the Full Mesh setup.
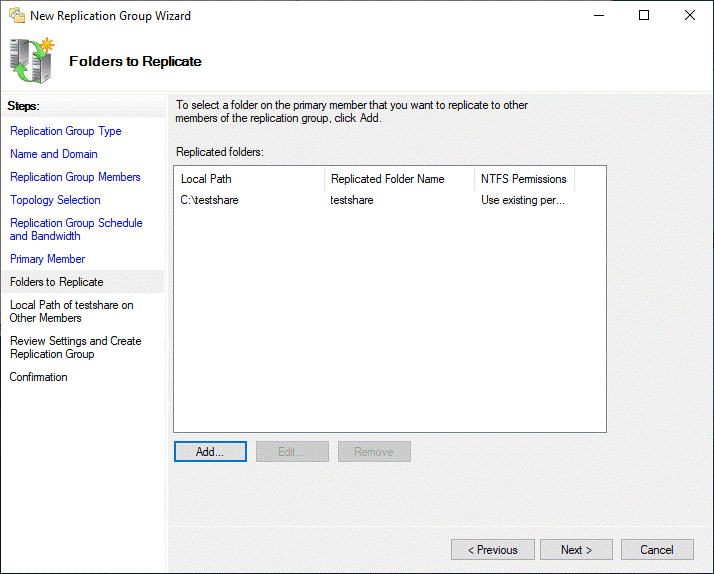
Step 8. Select files or folders you want to sync. Click Add… button to add these folders.
Step 9. Specify the local path on the Replication members where the replicated folder will be replicated.
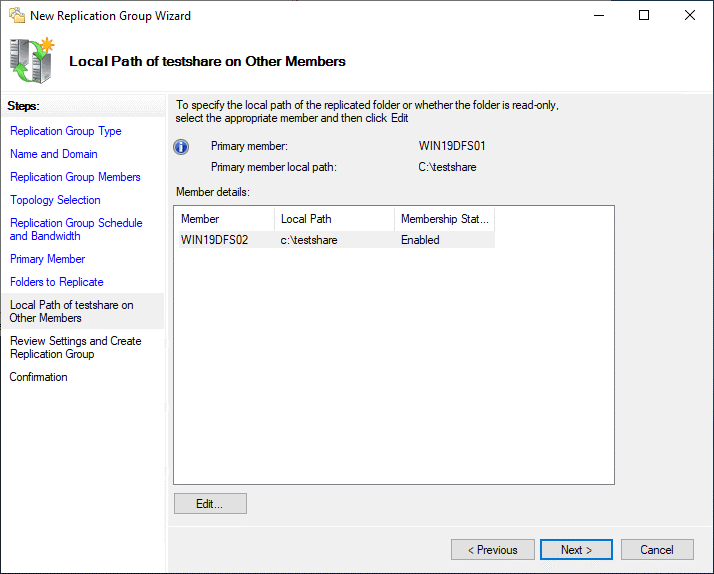
Step 10. Review whatever you have selected and click Create to start the first initial replication. It may take 15 minutes or longer. Now setup DFS Replication Server 2016 has been done successfully.
Alternative: sync files between Windows Servers via AOMEI Backupper
Synchronizing files among Windows Servers is a regular practice, especially for IT technicians and small to medium companies aiming for effective file sharing. Various methods exist for file synchronization. One option is to utilize the built-in DFS Replication role services, which come at no cost. Alternatively, for more advanced functionalities, there's the option of using third-party file sync software like AOMEI Backupper Server. Here are some distinguished features of this software:
✔Resourceful sync options: it offers four kinds of sync options ad Basic sync, Two-way sync, Real-time sync, and Mirror sync as you like.
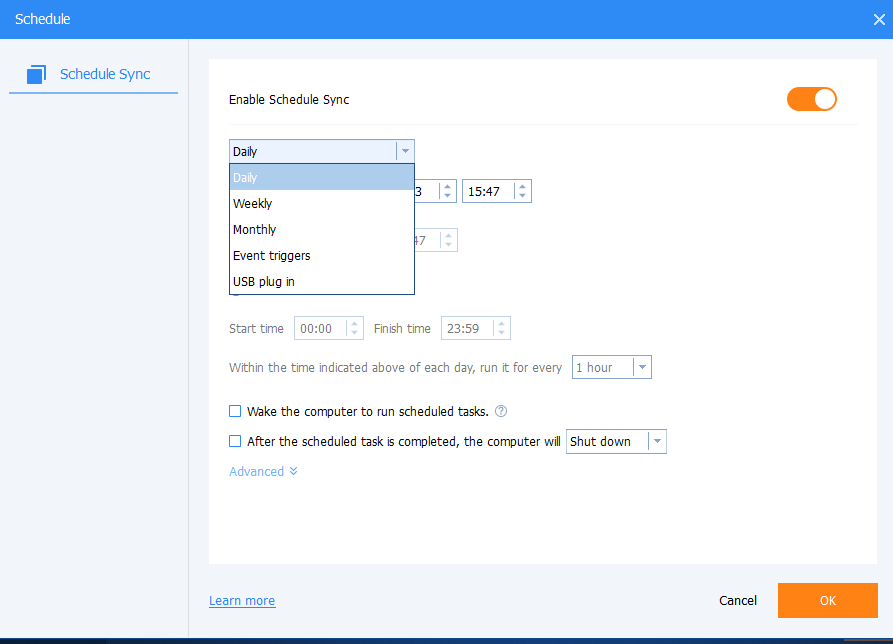
✔Schedule Sync: You can sync files with daily, weekly, monthly, event trigger and USB plug-in mode so that you don't need to worry about forgetting to sync someday. And more precisely, you can set the backup date, backup time, and backup intervals.
✔Various sync locations: You can choose to use it to sync files to network drive, NAS, external hard drive and AOMEI Cloud as well.
Here is the full guide to sync your Windows server 2016 files, please download the software and install it on your PC.
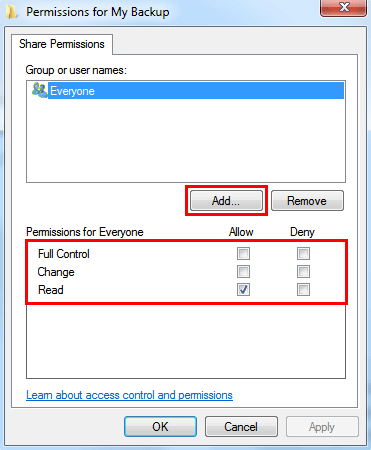
Step 1. Create a shared folder.
To replace DFS Server 2016, you need to create a shared folder as middleman and set access permission for other servers, so you can share files with them. Please refer to sync folders over network to get an idea.
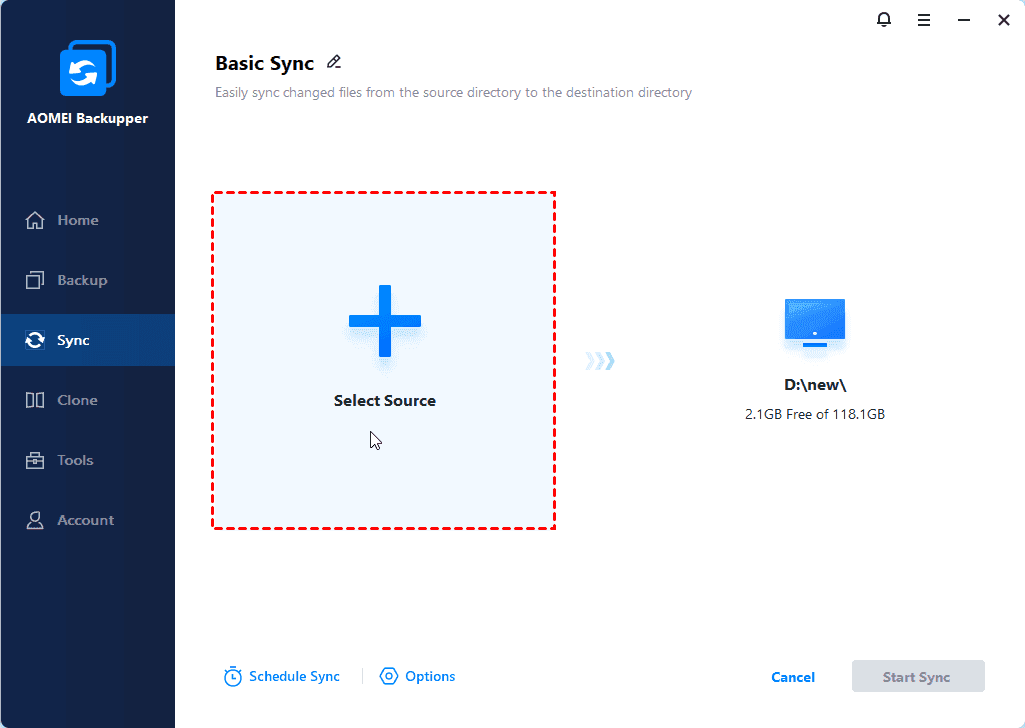
Step 2. Open AOMEI Backupper. Then, select Basic Sync under the Sync tab.

♥Tip: As we mentioned before, you can also use other sync modes as you need.
✿ Real-Time Sync: It will monitor and sync files and its changes in real-time, so you can reduce data loss as much as possible in a disaster.
✿ Mirror Sync: It helps you to avoid arbitrarily adding, modifying or deleting files in the destination folder.
✿ Two-Way Sync: It monitors changes in both the source directory and destination and syncs to the other side if any change is made in either one of them.
Step 3. Click Add Folders to select files you want to sync.
♥Tip: You can set a certain file extension while backing up, such as,*.doc;*.xls;*.ppt.*.temp;*.tmp;*.bak;*~*. *temp;temp*.
Please separate multiple masks with semi-colons.
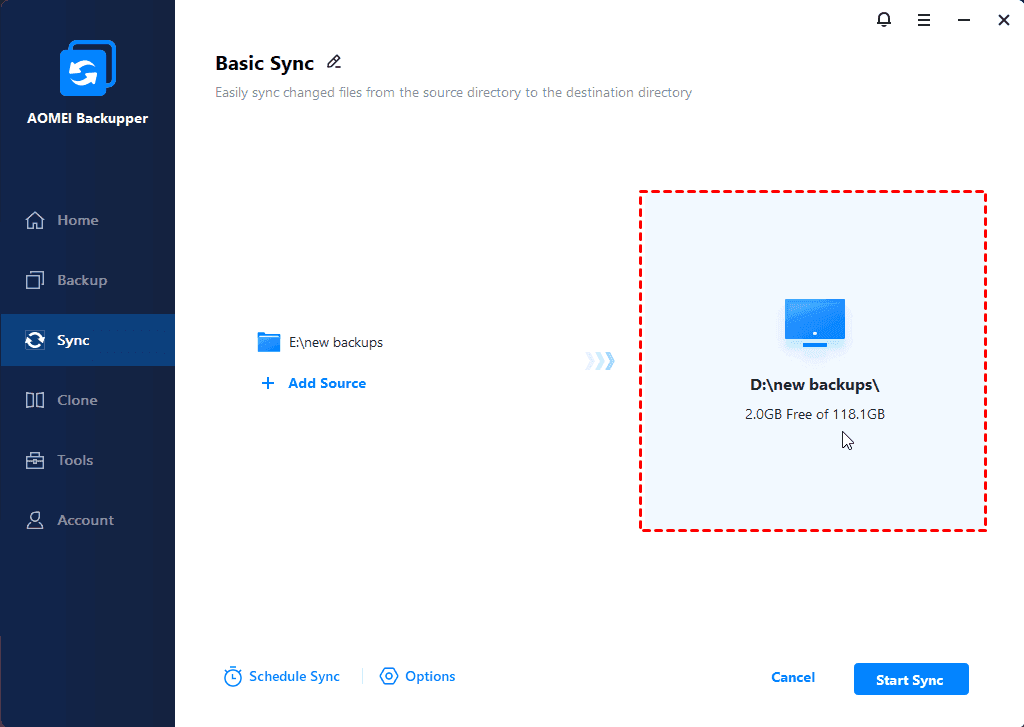
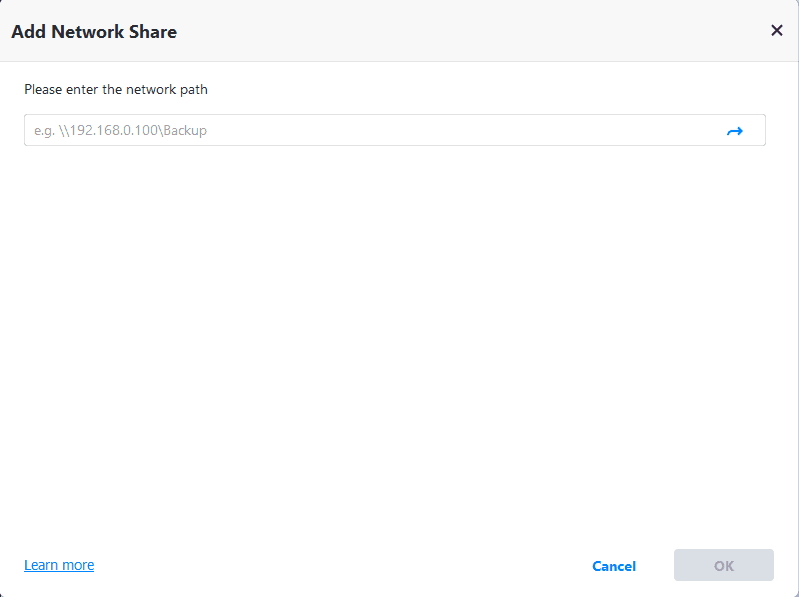
Step 4. Then move to the destination section. Please expand the drop-down menu of the second bar to select Add Share or NAS Devices. And then, type network path and select the shared folder you make before in the network location.
Step 5. (Optional). If you want to automatically sync the Server files, please click Schedule Sync>Enable Schedule Sync and select Daily. Then, you can further set backup date, backup time or intervals.
Step 6. Confirm the operations and click Start Sync to automatically sync folders between Windows Server 2016. Then, you can access data in the shared folder by its network path.
♥Note: Apart from Windows 2016, it can run smoothly on all file systems, such as NTFS, FAT32, FAT, ReFS, etc. And all the Windows systems, including Windows Server 2003, 2008, 2011, 2012, 2019, 2022, SBS (including the R2 version), and Windows 11/10/8/7/XP/Vista. So you can still use it when you are tired of Windows Server 2019 DFS Replication setup.
Conclusion
So you understand DFS Replication windows server 2016 is not the only way to synchronize files between Windows Servers. AOMEI Backupper Server is more strongly endorsed owing to its abundant features and user-friendly operation. Utilizing AOMEI Backupper Server empowers you to sync files according to your preferences, while simultaneously enhancing operational efficiency through automated execution.
FAQ:
1. What are the supported limits of DFS Replication?
The following list provides a set of scalability guidelines that have been tested by Microsoft and apply to Windows Server 2012 R2, Windows Server 2016, and Windows Server 2019
→Size of all replicated files on a server: 100 terabytes.
→Number of replicated files on a volume: 70 million.
→Maximum file size: 250 gigabytes.
2. When should I not use DFS Replication?
Avoid employing DFS Replication in scenarios where multiple users concurrently update or modify identical files on separate servers. Such usage may lead to DFS Replication inadvertently relocating conflicting file duplicates to the concealed DfsrPrivate\ConflictandDeleted directory.
3. Why is a schema update required for DFS Replication?
DFS Replication integrates new objects into the domain-naming context of Active Directory Domain Services to house its configuration data. These objects materialize when updates are applied to the schema of Active Directory Domain Services.

