Enable Windows 11 Backup to Local Drive with Top 3 Ways
In this article, you will be able to learn 3 easy ways to enable Windows 11 backup to local drive. With a Windows 11 backup image in hand, you can restore it if there are some errors occur.
By Maggie Updated on January 19, 2024
Why need to enable Windows 11 local backup?
Backing up your data is an important step in protecting your computer and ensuring that you don't lose important files. While there are many ways to backup your data, one of the most reliable and convenient methods is to backup to a local drive. Making local backup in Windows 11 is important for several reasons:
![]()
☞ Protection against data loss: Backing up your data to a local drive ensures that you have a copy of your important files in case of a hard drive failure, system crash, or other disaster.
☞ Convenient and quick access: Backing up to a local drive means that you have quick and easy access to your data whenever you need it.
☞ Low cost: Both external hard drives and cloud services cost a lot, and the greater the memory requirements, the higher the cost. And if you have a limited number of files to backup, local backup is a good and affordable option.
In the following part, we will cover the methods available, and provide step-by-step instructions on how to do it.
3 methods for local backup on Windows 11
There are several methods to backup to a local drive in Windows 11. They are Windows File History, Backup and Restore, and best third-party backup software. Learn about them and choose one that suits you most.
#1. Make Windows 11 backup to local drive with File History
Windows File History is a backup and restore feature in Windows 8 and later versions. It creates backup copies of files and folders on a regular basis and allows users to restore previous versions of those files if necessary.
The feature is designed to protect important files from accidental deletion, data loss due to system crashes, or other issues. File History also supports external drives and network locations as backup destinations. Follow the steps below to backup Windows 11 using this tool:
1. Type File History in the Windows 11 search box and select it. It will open the Control Panel and direct you to Control Panel > All Control Panel Items (change View by option to Larger icon) > File History.
2. Then, click Select Drive to select local drive, external drive or network location.
3. Then, click Exclude folders to add folders that you don’t want to backup.

4. Afterward, click the Turn on button to local backup files automatically with Windows 11 File History.
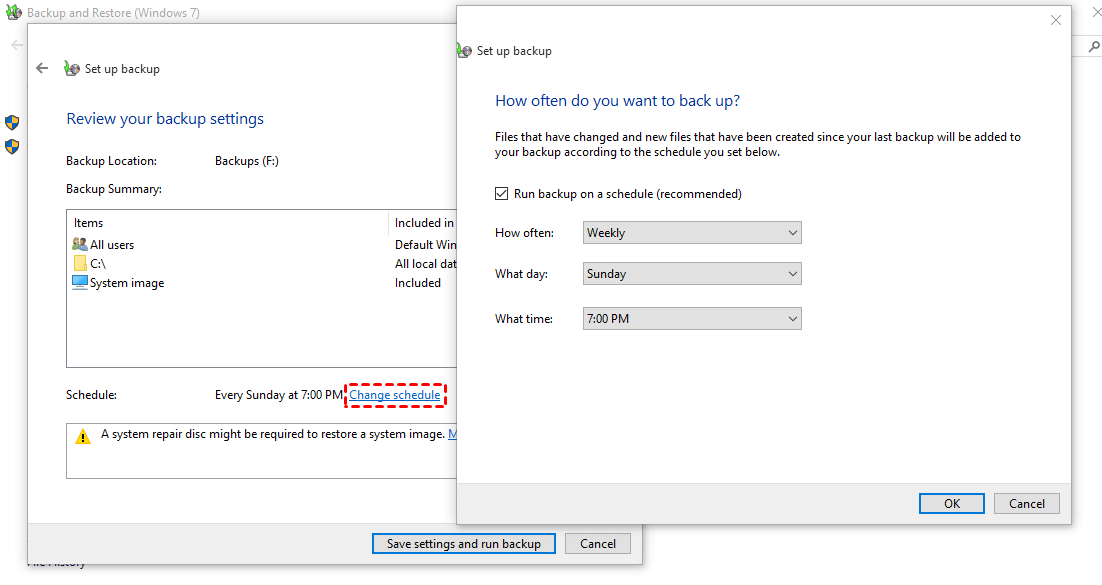
#2. Enable Windows 11 local backup via Backup and Restore
Windows Backup and Restore is a feature that allows users to create backups of their important files and system settings. Users can schedule regular backups and choose where to store them, such as an external hard drive or network location.
By default, File History is set to save backups to an external drive or network location. However, you can change the backup destination to a local drive on your computer. To do this, follow the steps below:
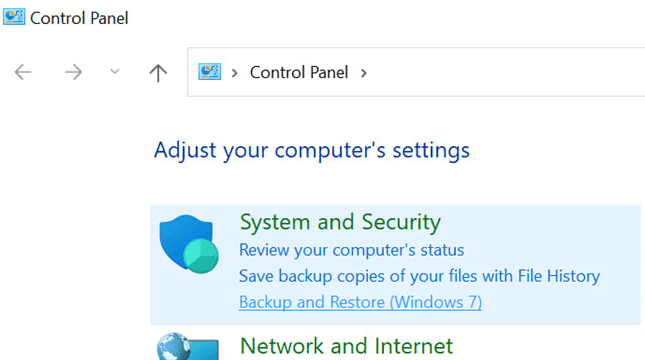
1. Go to Control Panel > System and Security > Backup and Restore (Windows 7).
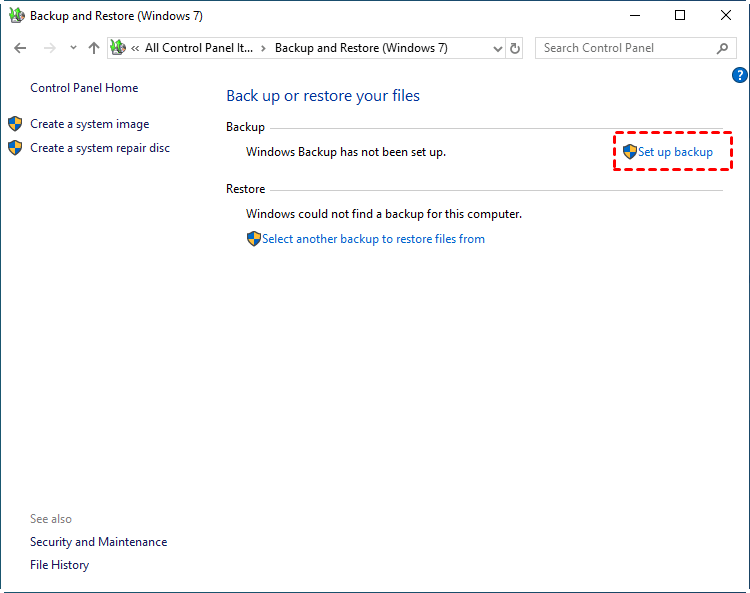
2. Select the Set up backup option under the Backup section.
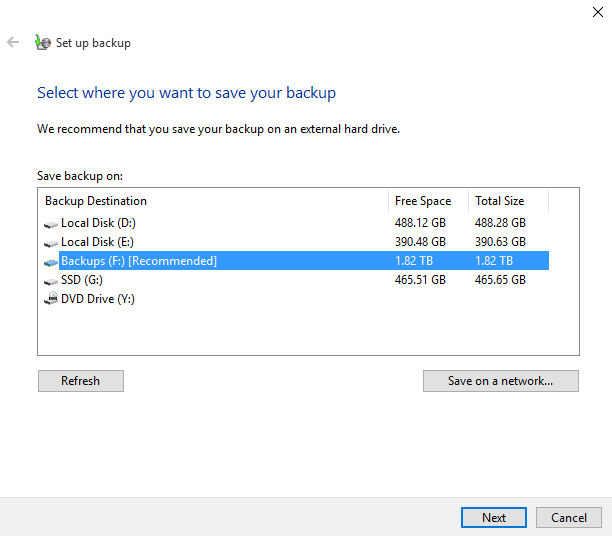
3. If prompted, enter your admin password. And then select your local disk to store your backup and click Next.
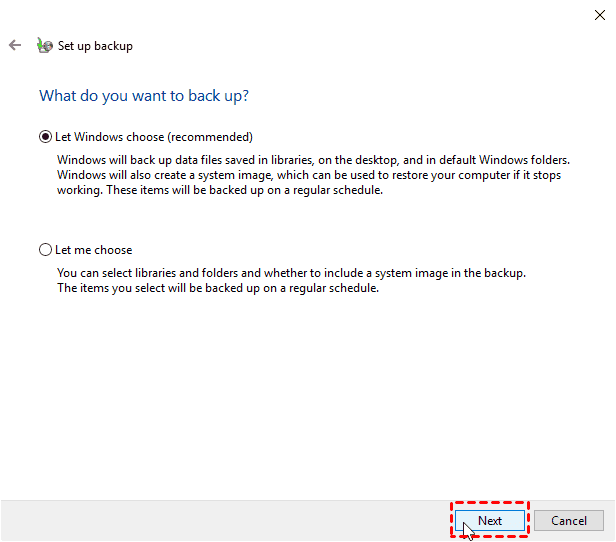
4. Select Let Windows Choose option and click Next. It will backup files about users, such as files saved in libraries, on the desktop, and default Windows folders.
5. Click Save settings and run backup button.
#3. Enable local backup in Windows 11 with best backup freeware
In addition to the Windows built-in tools, you can also try to use the best free backup software – AOMEI Backupper Standard to backup your data to a local drive whether you want to backup the system, disk, partition, or files according to your needs. You can set the destination not only as local drive, but also internal or external hard drives, USB flash drives, cloud drives, network location and NAS devices. In addition, you can enjoy the following advantages in all backup types:
★ Schedule Backup: You can create local backups based on a fixed interval, such as, daily, weekly, monthly, event triggers, USB plug in.
☆ Save disk space and improve backup efficiency: By default, this software backup changed data only using Incremental Backup after a full backup.
★ Other powerful backup features: And you can enjoy more space-saving features, including Normal compression, Automatic splitting, Intelligent Sector Backup, etc.
☆ High compatibility: It runs well on all Windows operating systems including Windows 11/10/8.1/8/7/Vista/XP.
How to make Windows 11 backup image with this freeware? Download AOMEI Backupper Standard and install it on your computer. For server users, try AOMEI Backupper Server.
Step 1. Launch AOMEI Backupper Standard, click on Backup and select System Backup. Here I take System Backup as an example, you can also choose other backup types to enable Windows 11 local backup.

Step 2. The required system partition(s) is (are) selected by default. Choose your local disk as the the destination path to store the backup files.
▶ Note: It is important to note that backing up files to a local drive may not be the most secure backup solution, as the drive could be lost, damaged, or stolen along with the backed-up data. It is recommended to make Windows 11 backup to external hard drive, in an offsite location or cloud-based backup service.

Step 3. Confirm the operation and click Start Backup.

Notes:✎...
Options: You can write comments, compress or split an image file and enable email notifications.
Schedule Backup: It can run the backup task automatically at fixed intervals, such as Daily, Weekly, Monthly, Event trigger, and USB plug in.
Backup Scheme: It provides 3 backup methods (Full/Incremental/Differential). You can also enable the automatic backup cleanup feature to save disk space (available in Pro edition).
Wrapping up
To conclude, you can enable Windows 11 backup to local drive by referring to the listed solutions from this page. Whether Windows built-in tools File History, Backup and Restore, or the best free backup software AOMEI Backupper can help you effectively protect your important data.
It is suggested that you use AOMEI Backupper to enable Windows 11 local backup, for it offers you various backup tools such as automatic backup, clean old backup tasks, etc. to customize your task. Meanwhile, it also allows you to transfer files from external hard drive to PC or vice versa easily with its sync feature. Now it’s your turn to have a try!

