How to Backup Laptop to External Hard Drive on Windows 11
Learning to backup files to an external hard drive in Windows 11 is easy with three methods: the built-in tools "File History" and "Backup and Restore," along with the free backup software "AOMEI Backupper."
By Maggie Updated on January 4, 2024
User case: Back up to an external devices
I'm using Windows 11 Pro.
I have not found a way to perform automatic periodic backup of my documents to an external device.
I would be happy for appropriate guidance.
- Question from BR, Shlomo.
Like the previous user case, if you want to know how to backup laptop to external hard drive Windows 11, you are in the right place. This article have 3 methods for you. The Windows built-in File History and Backup and Restore, along with well-functioning third-party software AOMEI Backupper Standard.
The benefits to backup laptop hard drive to external drive
Before we learn the stepwise guide to backup your laptop to external hard drive, let’s explore some benefits from doing this:
☞ Expand Storage Space: The need for additional storage space as data accumulates over time.
☞ Prevent Data Loss: Guarding against data loss caused by system crashes, computer viruses, malware intrusion, etc.
☞ Prevent Accidental Deletion: Safeguarding important documents from accidental deletion.
☞ Access Anytime, Anywhere: Ensuring the ability to access files and data anytime and anywhere as needed.
By backing up files to an external hard drive, individuals can address these concerns and ensure the safety and accessibility of their valuable data.
Windows 11 has built-in backup utilities? Is it enough?
As I mentioned above, windows 11 provides two backup options: Backup and Restore, and File History.
Backup and Restore create a full-image backup, allowing recovery of the entire image. And File History will back up and recover selected files and folders.
For comprehensive data recovery (full-image and specific files/folders), both Windows 11 options need to be utilized. It's essential to store backups in a location separate from your PC to mitigate risks associated with disasters like fire or flood, which could potentially destroy both your computer and local backups. However, Windows 11 has limitations, such as no option for cloud storage of file backups and no straightforward adherence to the 3-2-1 backup rule. This limitation is significant even for home users.
Alternatively, third-party solutions can offer the flexibility of creating a full-disk image and recovering either the entire PC image or specific files and folders to and from diverse storage locations.
How to backup Windows 11 laptop to external hard drive
In this section, I will show you backup computer to external hard drive Windows (10)11 with File History, Backup and Restore, and AOMEI Backupper Standard. Before you start, please connect the external hard drive to your laptop and make sure it can be detected.
Method 1. Via File History
File History in Windows 11 automatically backs up files in the documents, music, pictures, videos, and desktop folders. Follow these steps to ensure multiple backup copies and easy restoration in case of file loss, damage, or deletion
Step 1: Connect External Hard Drive
- Connect an external hard drive to your computer.
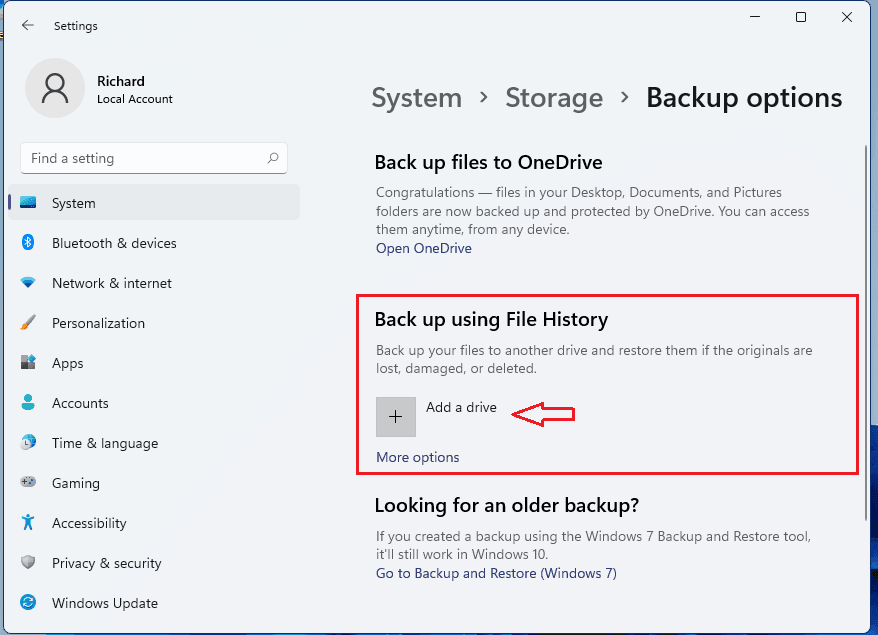
- Open System > Storage > Advanced storage settings > Backup Options.
- Click "Add a drive" under "Back up using File History."
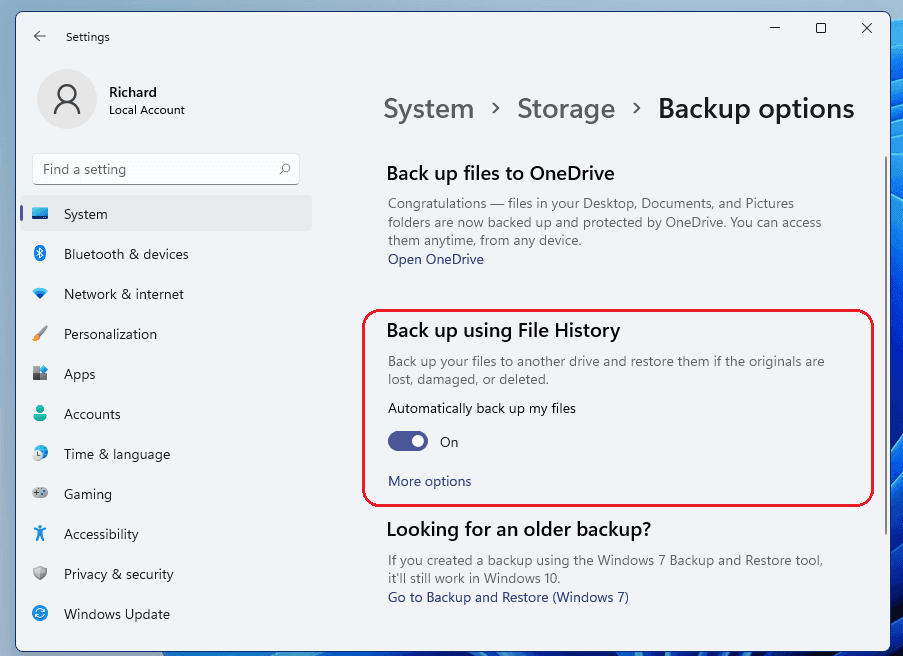
Step 2: Enable Automatic Backup
- Turn on "Automatically back up my files."
Step 3: Configure Backup Settings
- Select "More options" to customize backup settings.
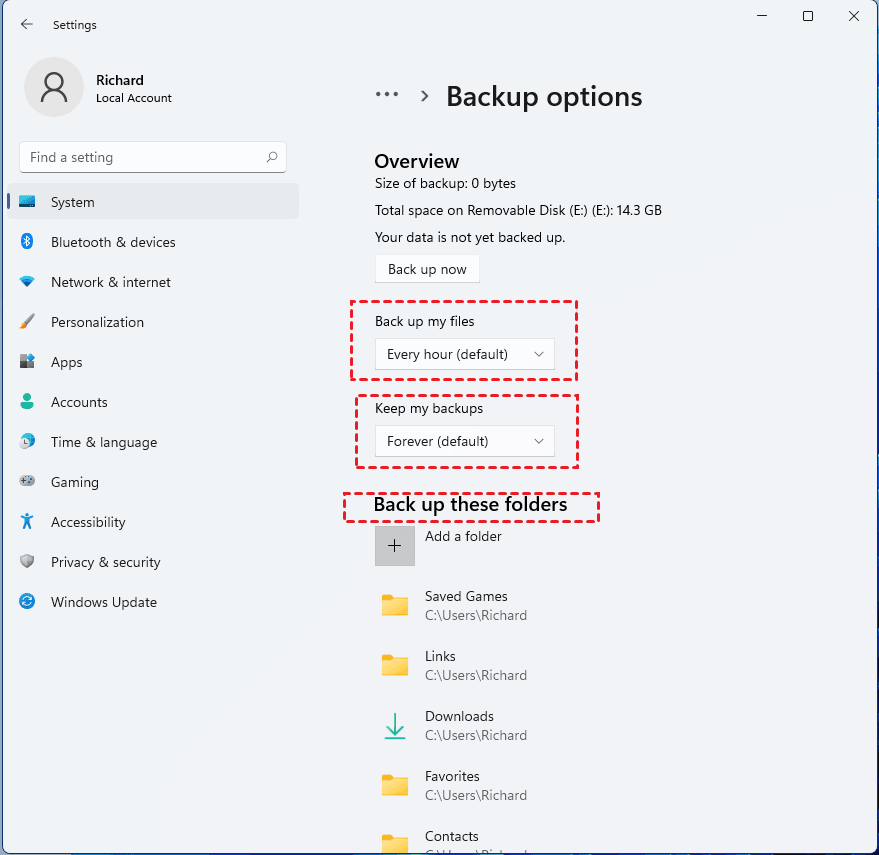
☞ "Back up my files": Adjust the frequency of backups (default is every hour).
☞ "Keep my backups": Choose the duration to retain backup copies (default is forever).
☞ "Back up these folders": Manage folders to be backed up; add or delete folders as needed.
Step 4: Save Settings and Initiate Backup
- Save and exit the settings.
- Click "Back up now."Windows 11 will automatically back up your files to the connected external drive.
By following these steps, your files will be regularly backed up, providing a safeguard against potential data loss.
Extra Tip: How to Restore the Backup Using File History
To restore files from your external drive using File History, follow these steps:
Step 1: Access Backup Options
- Go to the Backup options window of File History.
- Select "Restore files from a current backup" at the bottom.
Step 2: Choose Backup Version
- Use the left or right arrows to find the backup version you want to restore.
- Utilize the search box to locate specific files.
Step 3: Initiate Restore
- Click the "Restore" button.
- Optionally, click the gear icon and select "Restore to."
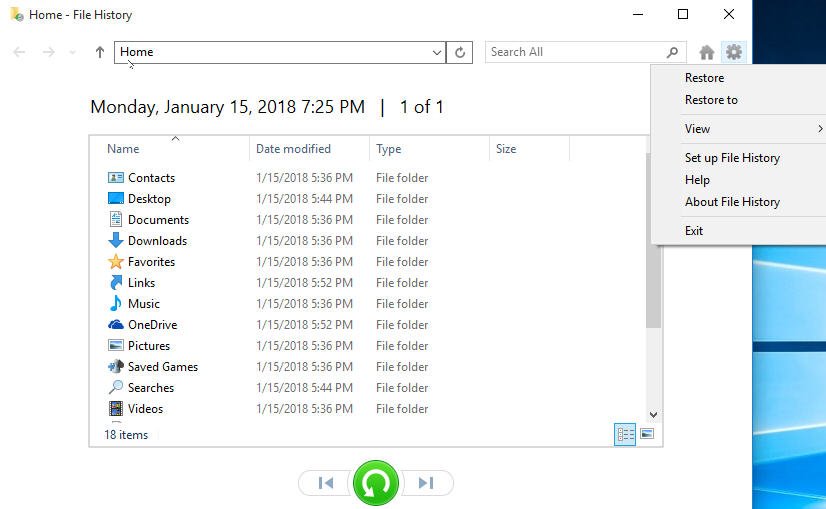
☞Tips:
- If restoring to the original location, click the restore button below.
- For restoring to a new location, click the gear icon and choose "Restore to."
Method 2. Via Backup and Restore
Backup and Restore in Windows 11 can back up data files saved in libraries, on the desktop, and in default Windows folders. It also offers the capability to create a backup image of the entire system, including the operating system, applications, and settings.
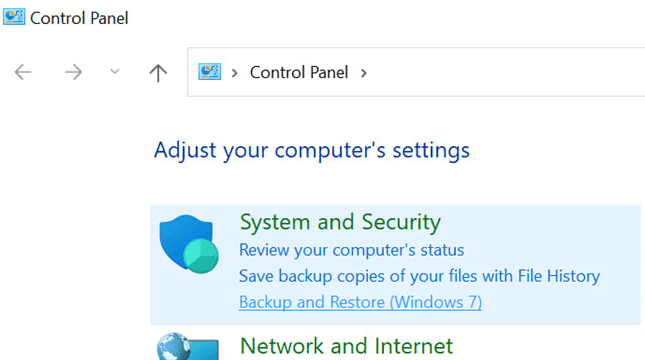
Step 1: Access Backup Settings
- Go to Control Panel > System and Security > Backup and Restore (Windows 7).
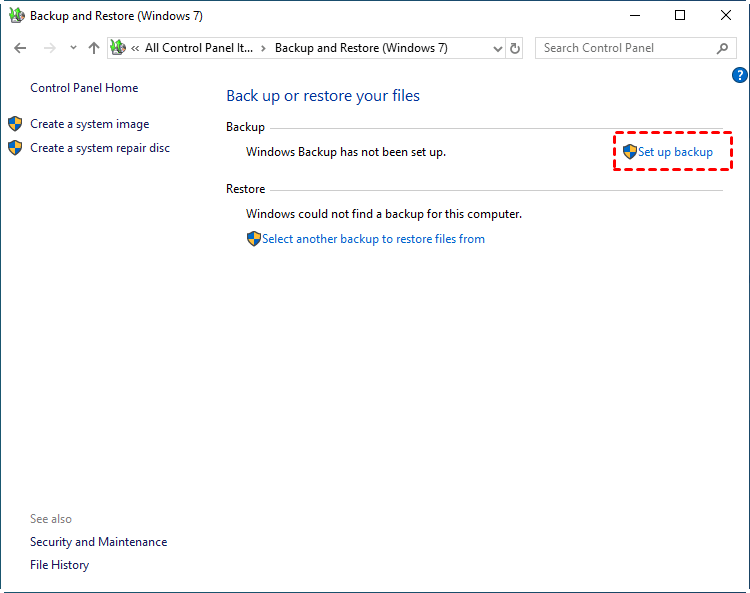
Step 2: Set Up Backup
- Select the "Setup Backup" option under the "Backup" section.
Step 3: Authentication
- Enter your admin password if prompted.
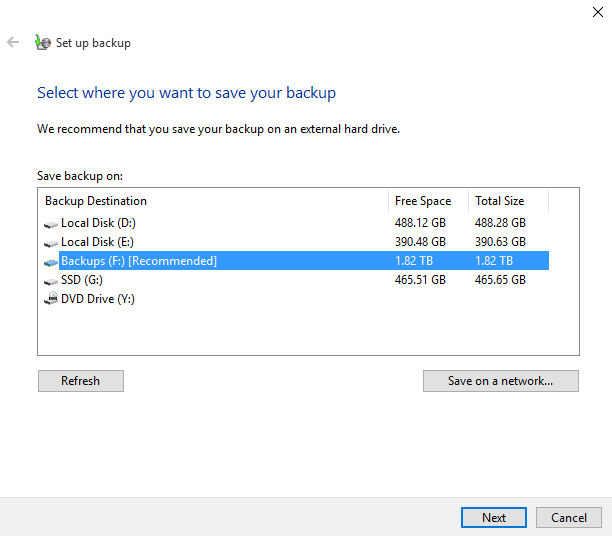
Step 4: Choose Backup Drive
- Select your backup drive and click "Next."
Step 5: Automatic File Backup
- Choose "Let Windows Choose" to automatically backup files about users, including those in libraries, on the desktop, and default Windows folders.
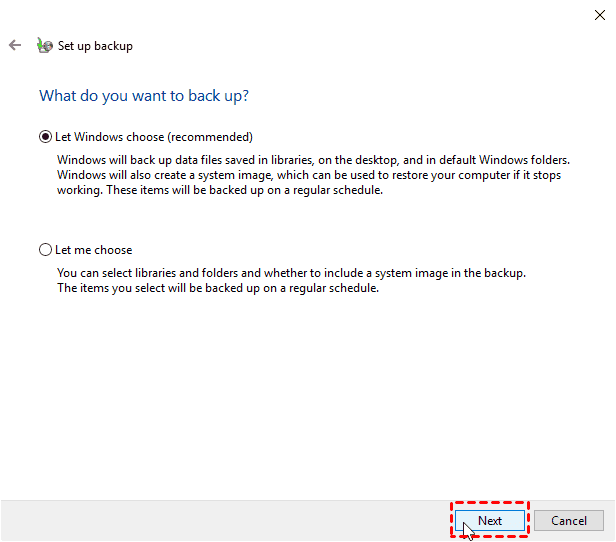
☞ Note:
- Optionally, you can choose the second option to manually select libraries and folders and decide whether to include a system image in the backup. The chosen items will be backed up on a regular schedule.
Step 6: Save Settings and Initiate Backup
- Click "Save settings and run backup."
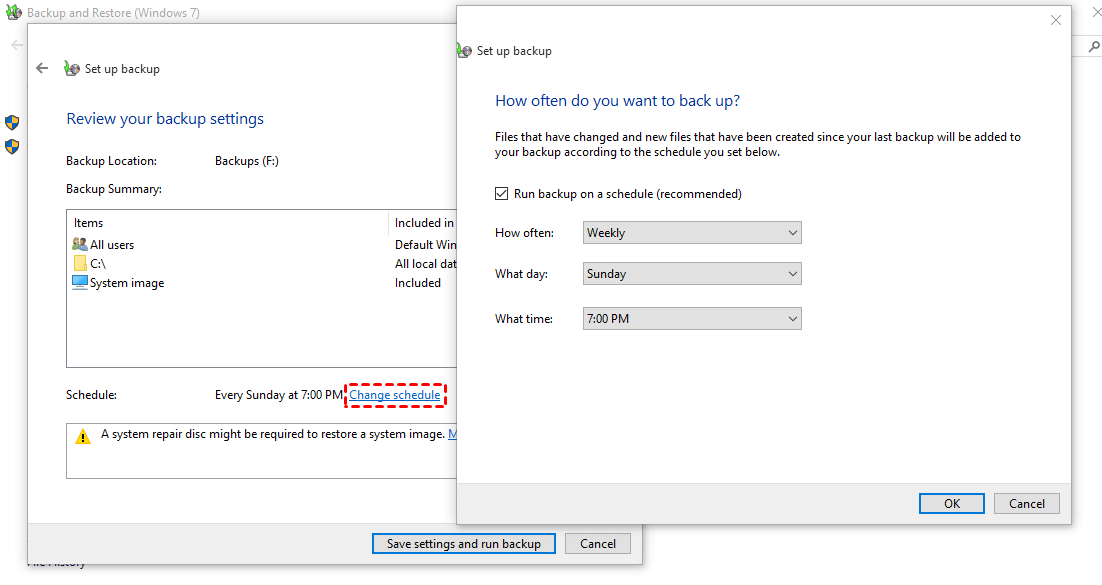
☞Note:
By default, backups are scheduled for every Sunday at 7 p.m., but you can customize this schedule by clicking "Change Schedule" to suit your preferences.
Extra tip: Restore Using Backup and Restore (Windows 7)
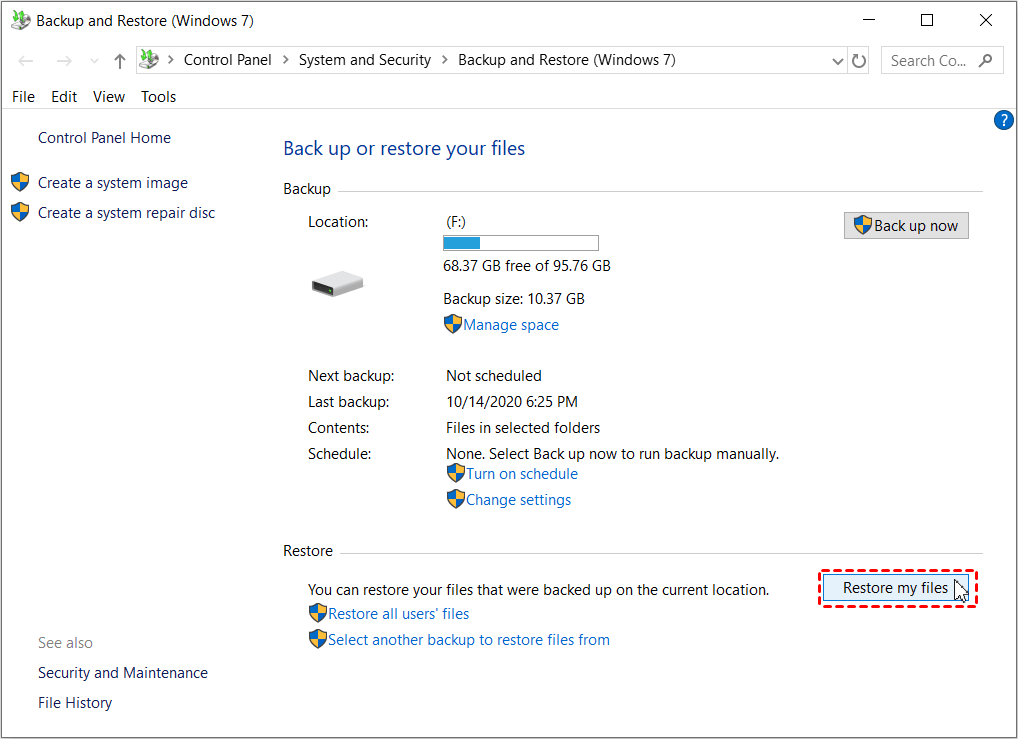
Step 1: Access Backup Settings
- Go to Settings > Update & Security > Backup > Backup and Restore (Windows 7).
Step 2: Initiate Restore
- Click on "Restore my files" under the "Restore" section.
Step 3: Choose Folders to Restore
- Click "Browse for folders" to select the folders from the backup that you want to restore.
- After selecting folders, click "Next" to start the process of restoring.
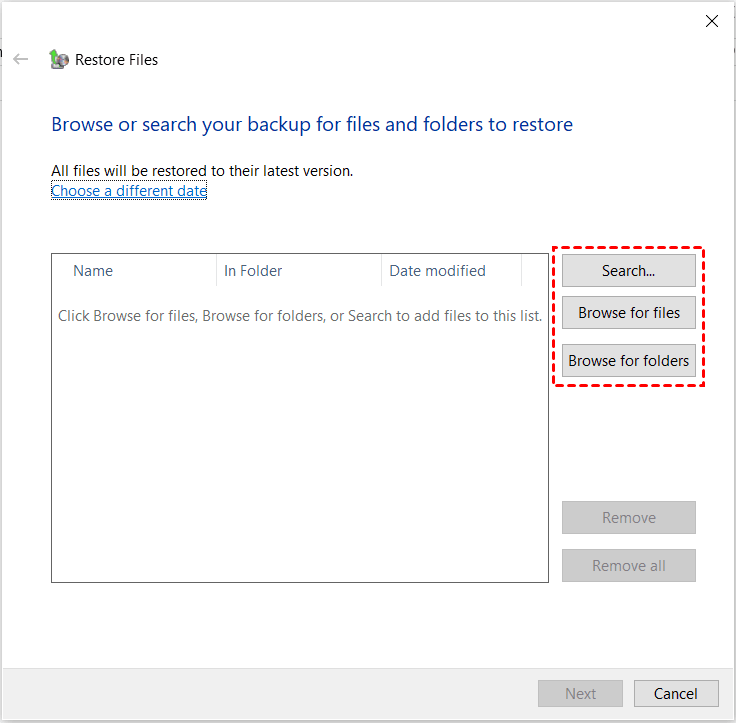
☞Options:
- Browse for files: Select specific files to restore and click "Add files."
- Browse for folders: Choose folders to restore and click "Add folder."
- Search to add files: Directly search to find the file or folder you need to restore.
Method 3. Via third-party freeware----AOMEI Backupper🚀
While Windows 11 offers a built-in tool for creating a backup image, it has some minor drawbacks. such as File History drive disconnected, Windows 11 backup cannot add folder, File History not working, and The system cannot find the file specified so on.
Some free third-party backup solutions, like AOMEI Backupper Standard, provide more features for comprehensive Windows 11 protection. Here are the advantages:
☞ Supports file backup, partition backup, system backup, and disk backup.
☞ Allows adding comments to backups and setting up email notifications.
☞ Provides options for scheduled backups at fixed intervals (daily/weekly/monthly), supporting both full and incremental backups. Differential Backup in the Pro version is provided to cater to different;needs.
☞ Compatible with various storage devices, you can backup files to NAS and Share, local and external hard drives and various Cloud services.
☞ Compatible with multiple operating systems (Windows 7, 8, 8.1, 10, 11, XP, Vista, etc.).
Here I will show you how clear and easy to backup files to your external hard drive via this software, before you start, please download this software.
Best free Windows backup software for personal use.
Step 1. Open AOMEI Backupper Standard, and go to “Backup”> “File Backup.”

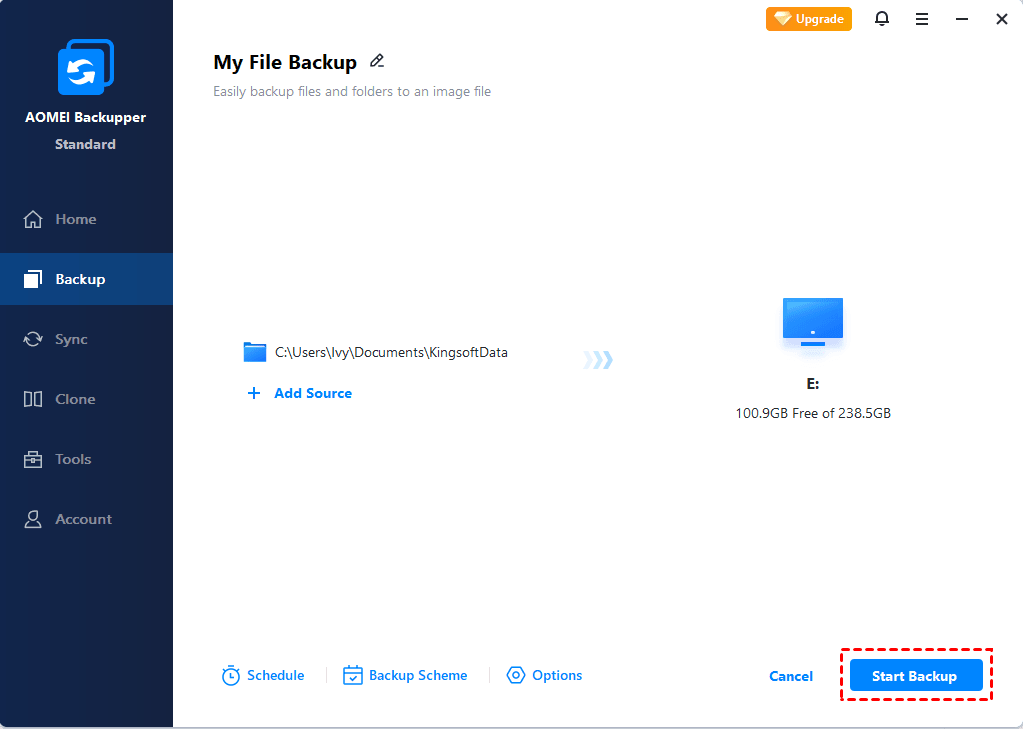
Step 2. Click “Add File” or “Add Folder” to select files you want to backup. Also, you can modify task name in the box if you want to distinguish it from other backups.

Step 3. Then click the second box to find the connected external hard drive as the destination path.
Step 4. To backup files to external hard drive automatically, click “Schedule Backup” > "Enable Schedule Backup"and select "Daily", "Weekly", "Monthly", "Event trigger", "USB plug in". The last two options are only available on the professional version.

Step 5. Afterward, click "Start Backup" to back up files to external hard drive.
Extra Tip: How to Restore the Backup Using AOMEI Backupper
If you have lost your data, you can use the restore function of this software to restore your previously backed-up files. Here are the specific steps.
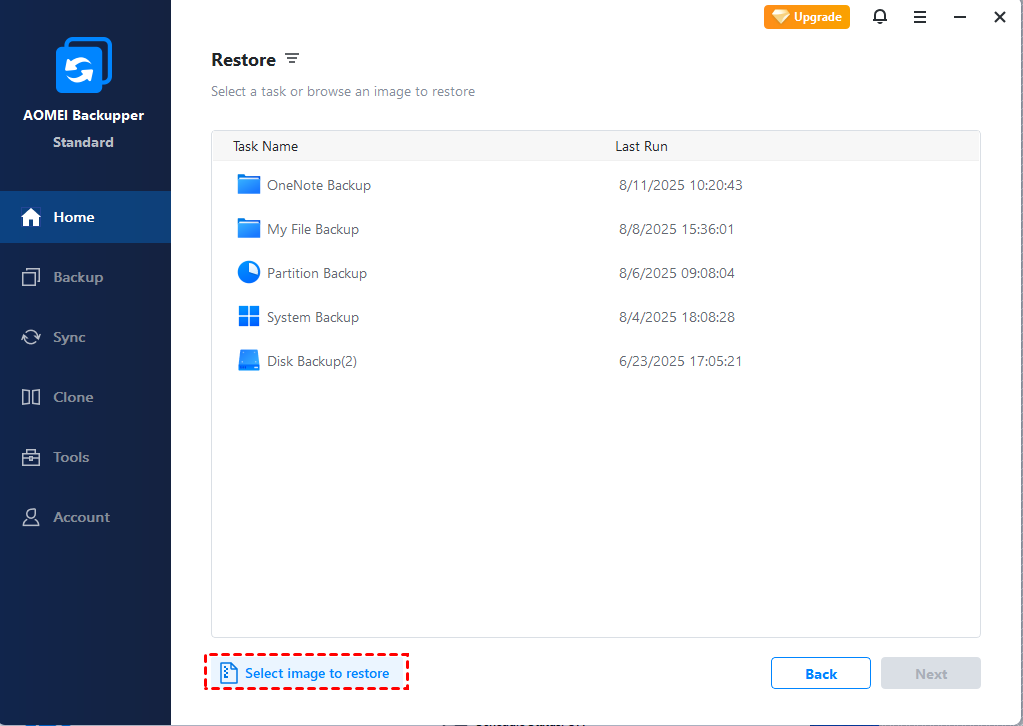
Step 1. Connect the external disk containing backup image first. Then open the software. Go to Restore > Select Image File to find backup files.
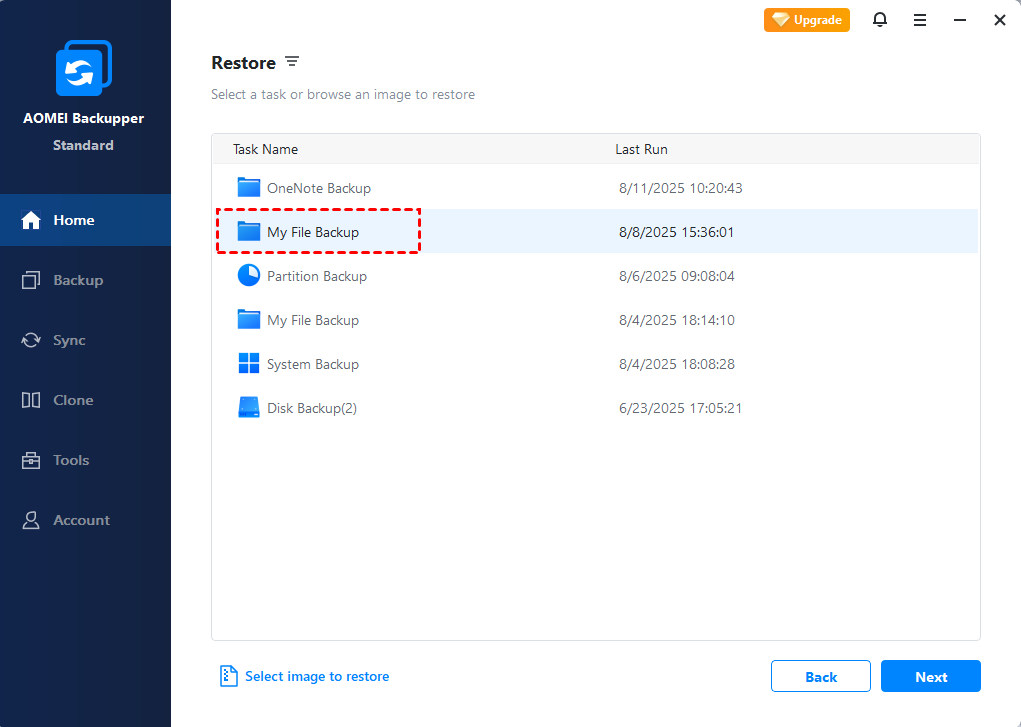
Step 2. Choose the backup that you want to restore in the Backup List, after that click “Next”.
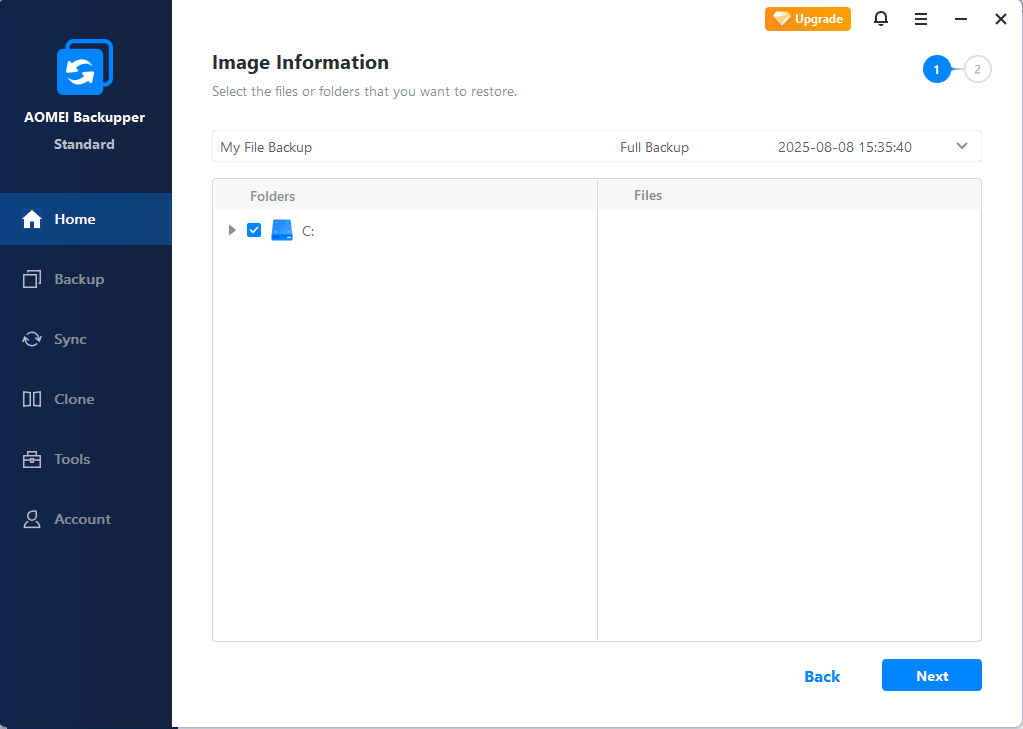
Step 3. Select the files or folders you need to recover and click "Next".
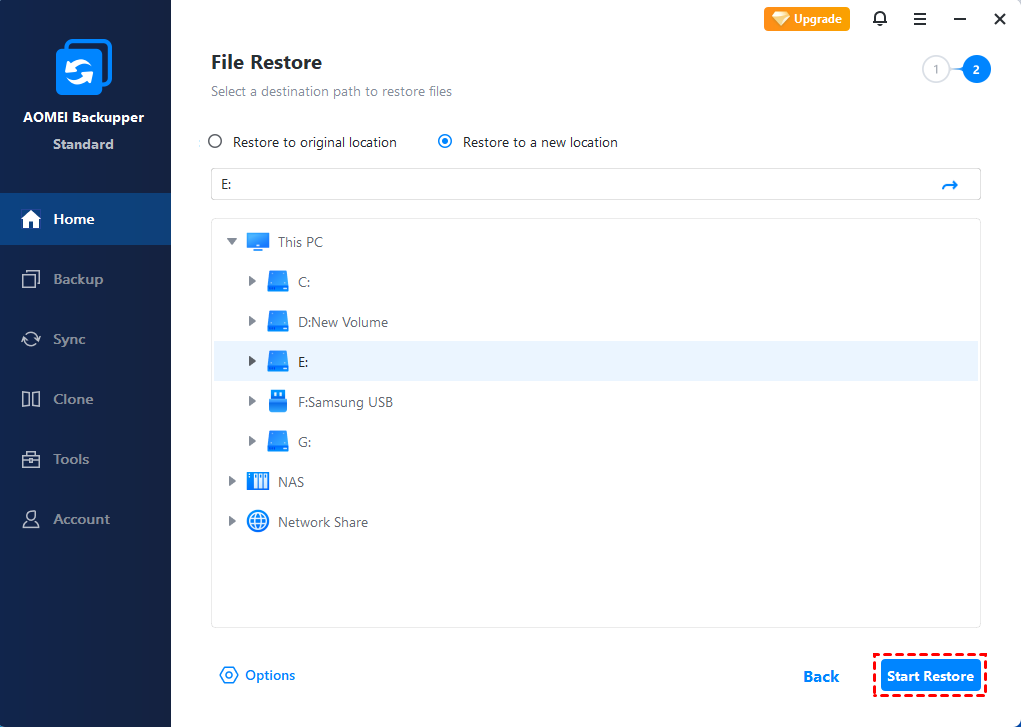
Step 4. You can choose Restore to original location, or choose Restore to a new location specify the path you want. Then Start Restore.
Summary
In this article, we have 3 different ways to learn how to backup laptop to external hard drive Windows 11. You can choose the built-in tool “File History” or “Backup and Restore” which comes with Windows system. You can also choose the reliable and free file backup software AOMEI Backupper as well. That depends on you. For clarity, I will list the pros and cons of the below 3 methods:
|
|
Pros |
Cons |
|
File History |
√Schedule backup frequencies √Ease of Use |
×Limited to user libraries ×Dependency on external drive |
|
Backup and Restore |
√Comprehensive system backup |
×Complexity for regular file backup ×Resource intensive |
|
AOMEI Backupper Standard |
√Flexibility: It supports system/disk/partition/file and folder backup |
×Some features(like Differential Backup and File Filter) are not free. |

