Solved: Office 365 Email Encryption not Working (5 Ways)
You can learn why Office 365 email encryption not working issue occurs and get five detailed solutions! Finally, we recommend backup Office 365 emails to prevent any data loss!
By Miya Updated on August 1, 2023
User Case: Office 365 Email Encryption not Working
“Hey folks, I'm having some trouble with email encryption on my Office 365 account. It just doesn't seem to be working. I'm using a Windows 10 PC and accessing my email through the web browser (Chrome). Has anyone else experienced this issue before? Any ideas on how I can fix it? Thanks in advance!”
If you are experiencing Office 365 email encryption not working like this user, it means you may be experiencing one of three cases:
- It's not possible to access encrypted email messages in Microsoft Outlook or Outlook on the web. In other words, your Office 365 encrypted email not opening.
- Sending encrypted email messages isn't possible.
- In both Outlook and Outlook on the web, the "Encrypt" button is not visible.
But don't worry, let's take a look at the reasons why these problems may occur and how we can fix them.
Why Office 365 Encryption not Working?
There are several potential causes for these issues above, including:
- The Microsoft 365 subscription used by your organization may not support Microsoft Purview Message Encryption.
- The tenant used by your organization might be misconfigured.
- The affected users' accounts, used to sign in to Outlook or Outlook on the web, may not be assigned a valid license to utilize the Microsoft Purview Message Encryption feature.
Five Ways to Solve Office 365 Email Encryption not Working
In this section, we will provide five ways to address these issues. Try them one by one and see if your problem such as Office 365 encryption not working is solved!
Method 1. Check Your Microsoft 365 Subscription
In order to utilize Microsoft Purview Message Encryption, your organization's subscription must include support for this feature. To get started, follow these steps:
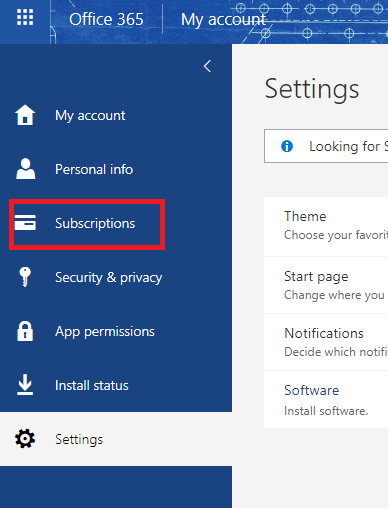
Step 1. Log in to the Microsoft 365 Portal and from the menu on the left-hand side of the screen, click on Subscriptions.
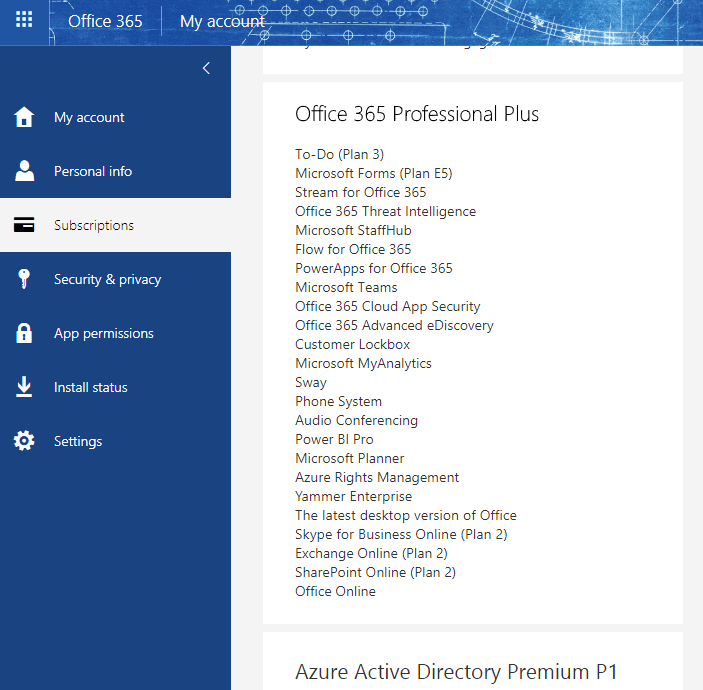
Step 2. Scroll down the list of subscriptions and licenses until you reach the Office 365 section, and then locate the entry for The latest desktop version of Office. If this item appears in the list, it means that your Office subscription has been assigned properly.
Method 2. Verify Sensitivity Labels
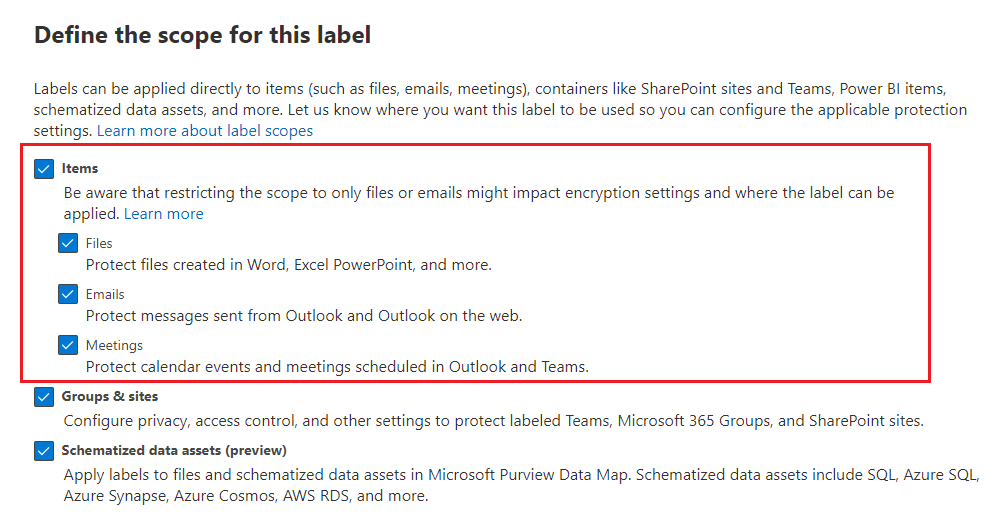
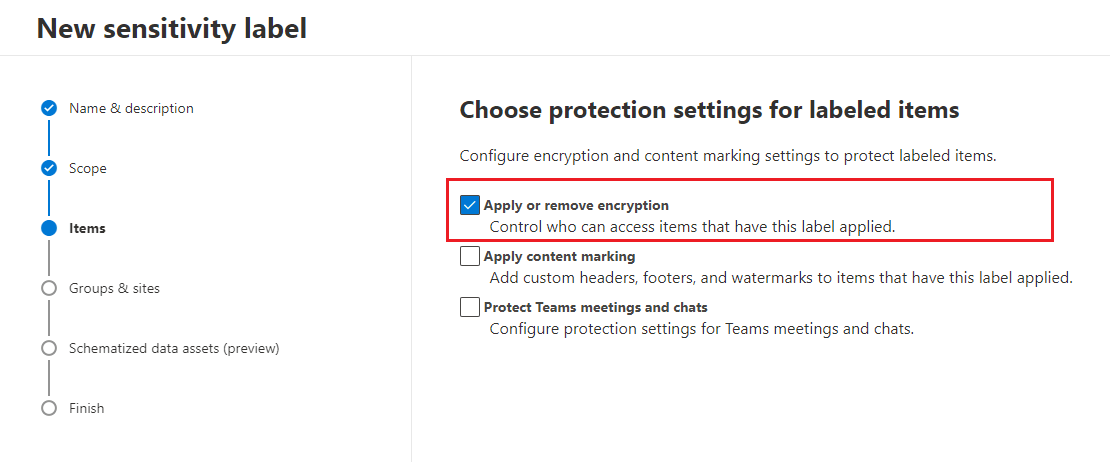
If sensitivity labels are applied to email messages, permissions must be assigned correctly so that recipients can access the messages. To create or modify a sensitivity label, simply follow the standard guidelines and ensure that the label's scope is set to Items.
Step 1. Once you've reached the Choose protection settings for labeled items page, be sure to select the option for Apply or remove encryption.
Step 2. When you reach the Encryption page, you can choose from the following options:
- Remove encryption if the file or email is encrypted: If you opt for this setting, applying the sensitivity label will remove any existing encryption, even if it was previously applied outside of a sensitivity label.
It's important to note that this choice can lead to situations where users lack the necessary permissions to eliminate existing encryption, rendering it impossible to apply the sensitivity label. For more information on this scenario, please refer to the "What happens to existing encryption when a label's applied" section.
- Configure encryption settings: Selecting this option will activate encryption and allow you to adjust the encryption settings as needed.
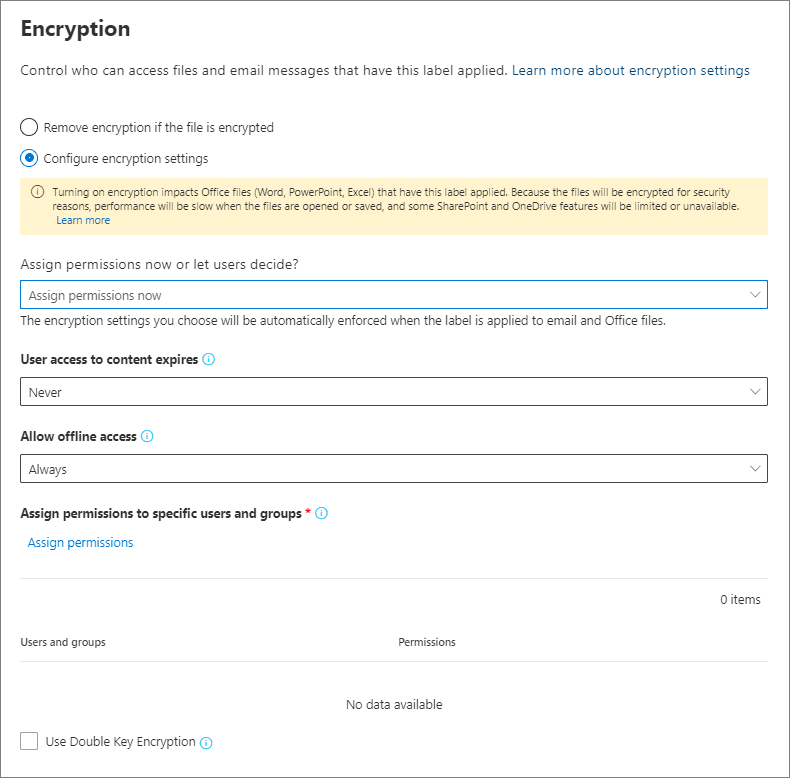
For specifics on how these settings can be adjusted, you can click here.
Method 3. Check Your Tenant Configuration
To confirm that your tenant has been configured correctly for Microsoft Purview Message Encryption, you can utilize Exchange Online PowerShell.
Use the following cmdlet to determine whether Outlook on the web has Information Rights Management (IRM) features enabled:
- Get-OwaMailboxPolicy | fl *IRMEnabled*
If the value of IRMEnabled is set to False, execute the following cmdlet:
- Set-OwaMailboxPolicy -Identity OwaMailboxPolicy-Default -IRMEnabled $true
If you're unable to locate the "Encrypt" button in Outlook on the web, use the following cmdlet:
- Set-IRMConfiguration -SimplifiedClientAccessEnabled $true
Method 4. Check Your Connection to the Azure Rights Management Service
To check whether the user's email client is able to establish a connection with the Azure Rights Management service, execute the following PowerShell commands:
- $request = [System.Net.HttpWebRequest]::Create("https://admin.na.aadrm.com/admin/admin.svc")
- $request.GetResponse()
- $request.ServicePoint.Certificate.Issuer
The output should confirm that the issuing Certificate Authority (CA) is a Microsoft CA. Here's an example:
CN=Microsoft Secure Server CA 2011, O=Microsoft Corporation, L=Redmond, S=Washington, C=US.
If the CA that appears isn't from Microsoft, it's likely that your secure client-to-service connection has been terminated and needs to be reconfigured on your firewall.
Method 5. Check the Licenses for Affected User Accounts
It's essential for affected users to verify that the account they utilize to sign in to Outlook or Outlook on the web has been assigned the correct license to utilize the Microsoft Purview Message Encryption feature. If users are unsure about this, they should complete the following steps on their device:
First, sign out of Office. Then, follow these steps to remove cached credentials from Windows Credential Manager:
Step 1. Open Control Panel and navigate to User Accounts, then click on Credential Manager. Next, select Windows Credentials.
Step 2. Remove all Outlook or Office credentials by expanding each credential and then selecting Remove.
Step 3. If the device is not Azure AD-joined, proceed to remove the unlicensed account from the device:
- Go to Start, then select Settings > Accounts > Access work or school.
- Choose the account you want to remove, and select Disconnect.
Finally, sign in to Office using a user account that has the necessary license to utilize the Microsoft Purview Message Encryption feature and enable Office 365 email encryption.
You can try any of the five methods above to see if the Office 365 email encryption not working problem is solved, I sincerely hope this article can help you!
Backup Your Office 365 Emails to Prevent Data Loss
You can back up your Office 365 emails in advance to prevent nagging issues such as email encryption problems that prevent you from opening your emails. Here I recommend you the best email backup software - AOMEI Backupper Pro.
☀ This software simplifies the process of backing up your Office 365 data, including emails, contacts, notes, calendars, and tasks.
☀ You can choose from a variety of storage devices, such as external hard drives, local disks, USB flash drives, and NAS devices, as backup locations for your Outlook emails.
☀ The Schedule Backup feature allows you to establish automated backup routines based on your preferences, which can be set to run daily, weekly, monthly, or event triggers or USB plug in.
☀ This software is compatible with multiple versions of Windows, including Windows 11, 10, 8.1, 8, 7, Vista, and XP.
☀ It supports backup for Microsoft Office 365, as well as popular email services such as Gmail, Outlook Mail, Yahoo! Mail, iCloud Mail, Zoho Mail, Hush Mail, GMX Mail, Hot Mail, and more.
Download AOMEI Backupper today and explore its comprehensive selection of user-friendly backup tools. Protect your data with ease and peace of mind!
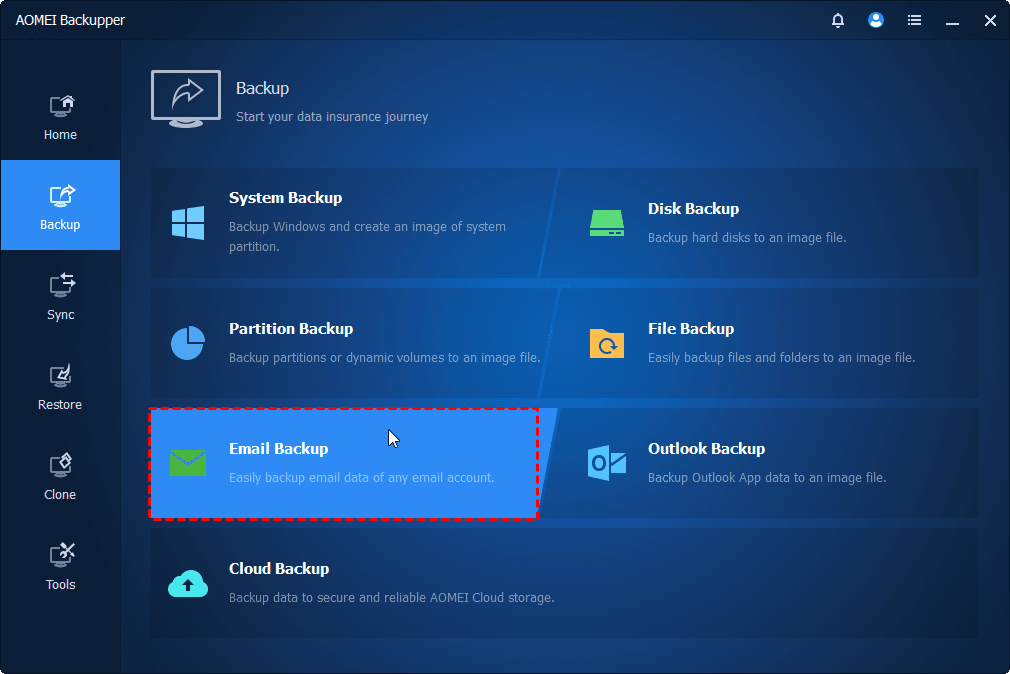
Step 1. Open AOMEI Backupper and select the Backup option, then choose Email Backup.
Step 2. In the Task Name field, provide a unique name for the backup, such as Email Backup (1), to differentiate it from any previous backups.
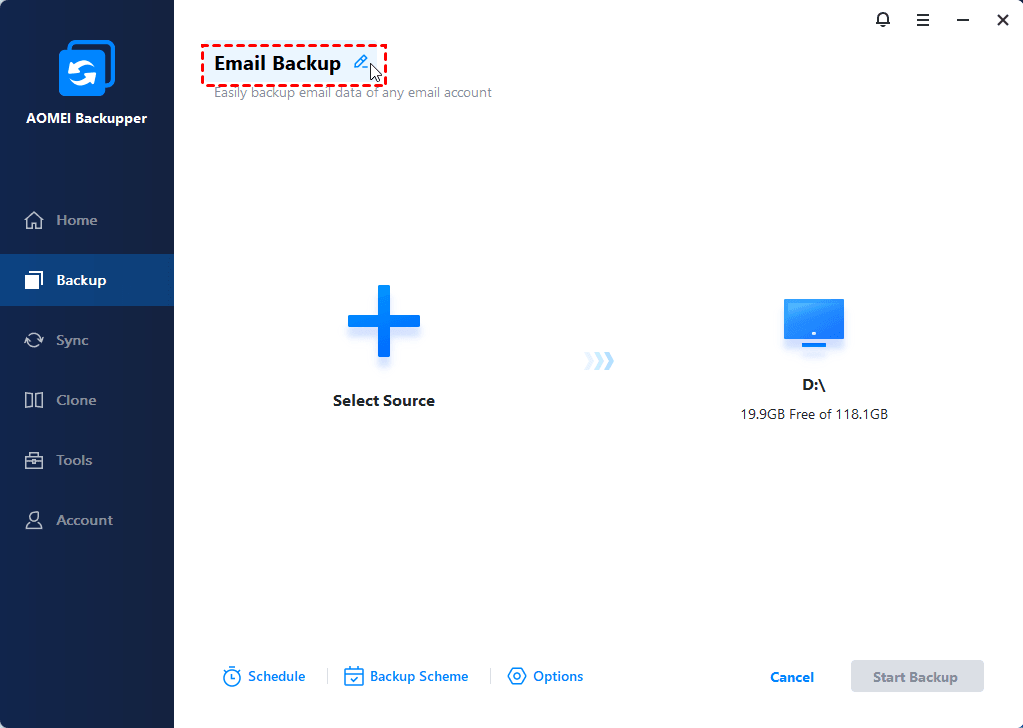
Step 3. Click on Add Email Data to access all the directories within your mailbox, such as Inbox, Starred, Sent Mail, Trash, and other folders, organized in the same hierarchy as your mailbox. Choose the directories you want to backup, either in their entirety or selectively, and then click OK.
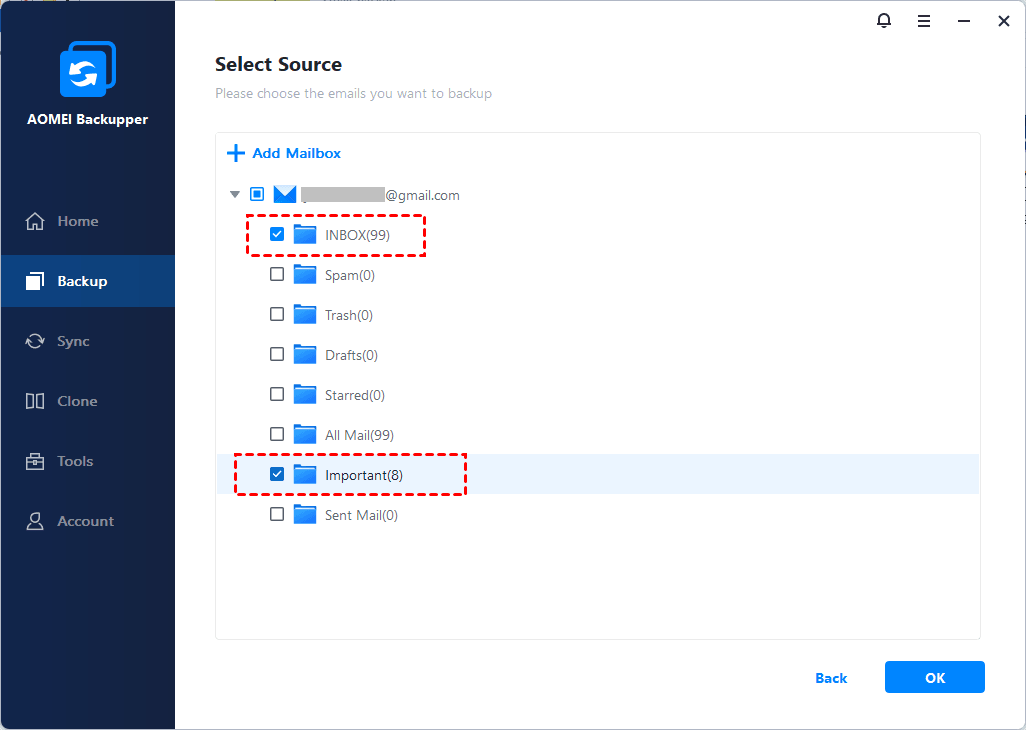
Tip: If you've added multiple mailboxes, you can choose to back them up all at once.
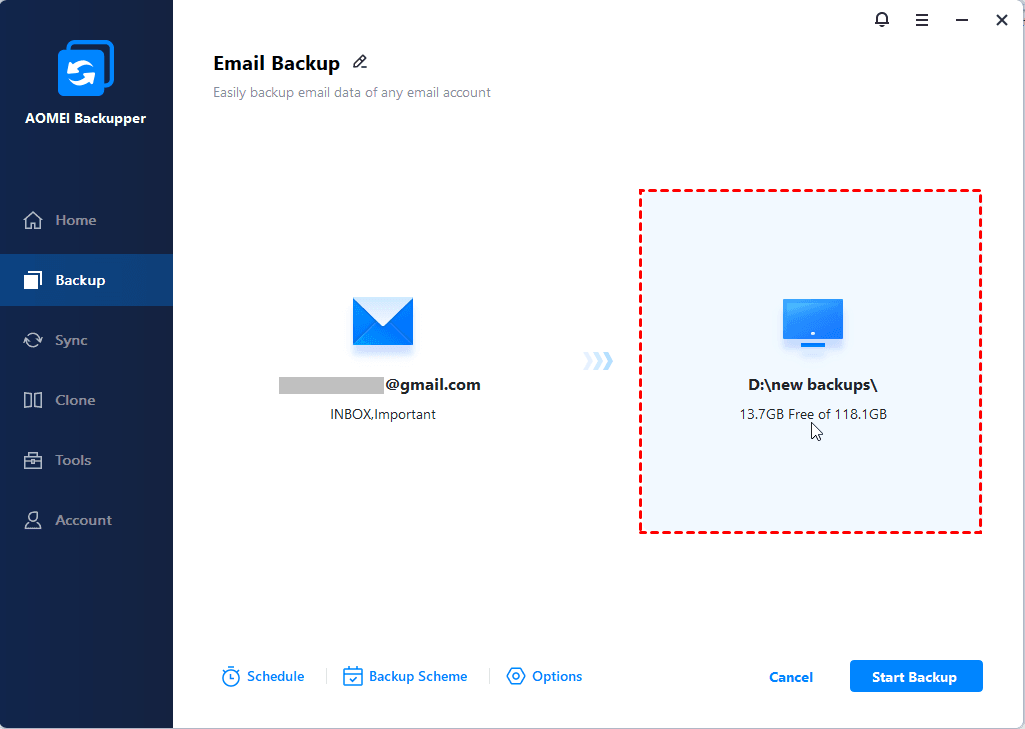
Step 4. Choose a destination path where you want to save the backup image file, either by selecting one or entering it manually.
Step 5. Click the Start Backup button and wait for the process to complete. Once it's finished, click Finish.
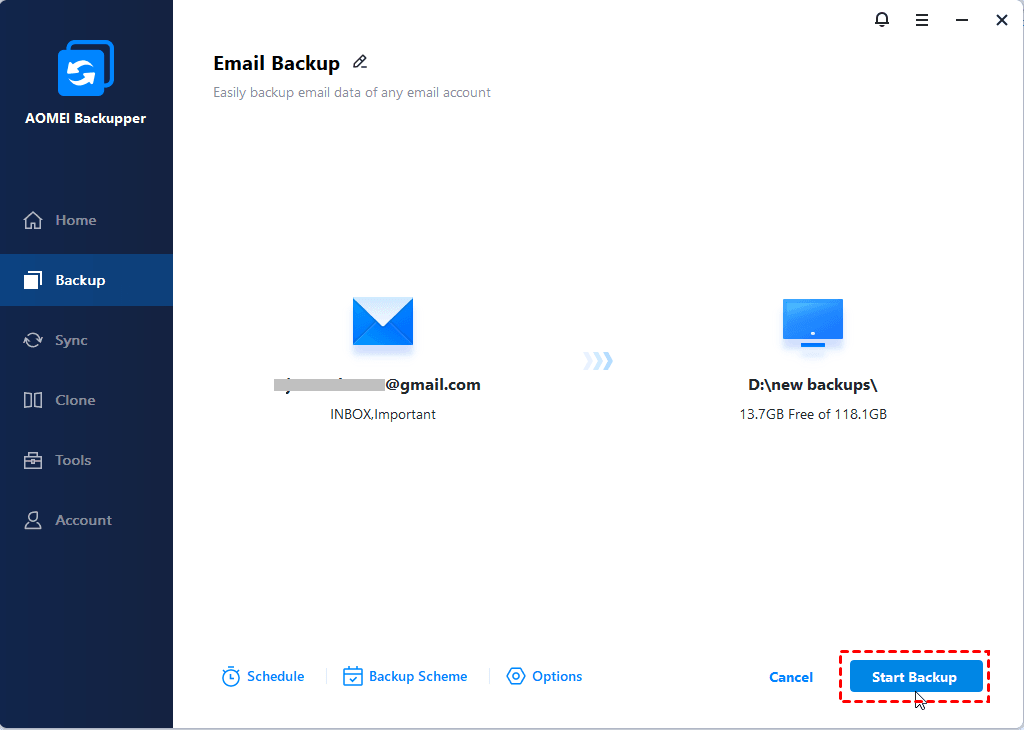
Note: During the backup process, you can click on the icon located at the lower-left corner to verify the backup's integrity or configure the computer to shut down, restart, hibernate, or sleep once the backup is complete.
It's important to keep in mind that backup operations can only be performed while the system is logged in. If any backup schedules are missed, they will be executed automatically once the system is logged in.
Summary
This article outlines five solutions to resolve the issue of Office 365 email encryption not working, allowing you to successfully open and save all encrypted emails. For a more comprehensive approach to safeguarding your Office 365 account, you may want to consider using AOMEI Backupper Pro, the leading email backup software available. The backup function of this software is very powerful, it can not only backup contacts on Gmail, but also backup Gmail emails and attachments, try it now!

