How to Export 365 Mailbox to PST | Easy 2 Ways!
Looking to back up your Office 365 mailbox to PST? This post outlines two methods to achieve this, along with a straightforward approach for effortlessly backing up your Office 365 emails to any desired location.
By Maggie Updated on September 4, 2023
The need to backup office 365 mailbox
Backing up Office 365 mailboxes is a crucial practice to ensure the security and availability of your important email data. Microsoft provides robust data protection and redundancy measures, but they do not offer comprehensive backup and recovery solutions. Here are some reasons why you should consider export 365 mailbox to PST:
☏Data Loss Prevention: Accidental deletion of emails, files, or entire mailboxes can happen. Having backups ensures you can recover lost data easily.
☏Retention Policy Gaps: Microsoft retention policies may not cover all your data protection needs. Backup solutions allow you to set custom retention policies and preserve data for longer periods.
☏Security Threats: Ransomware attacks, malicious deletions, and data breaches can impact your data. Backups serve as a last line of defense against these threats.
☏Compliance Requirements: Many industries and organizations have strict regulatory compliance requirements. Regular backups help you meet these obligations by ensuring data preservation and availability.
☏Email Migration: If you need to migrate to a different email system, backups simplify the migration process, ensuring no data is left behind.
How to export 365 mailbox to PST
Way 1. Backup Office 365 mailbox to PST via Outlook
Microsoft Outlook provides various built-in options to set up Office 365 accounts in Outlook and create backups of Office 365 mailboxes by exporting PST from Office 365.
Step 1. Launch the Outlook desktop app on your computer.
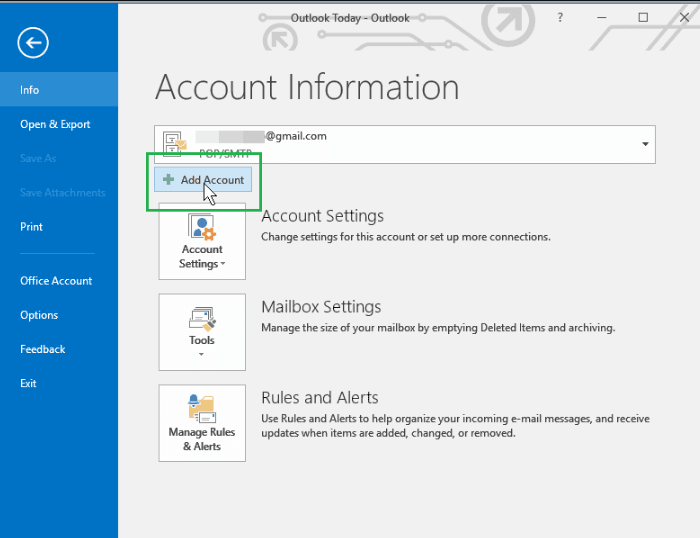
Step 2. Head to File > Add Account to add your Office 365 email address to it.
Step 3. Proceed to select the File > Open & Export Option. Choose the Import/Export option.

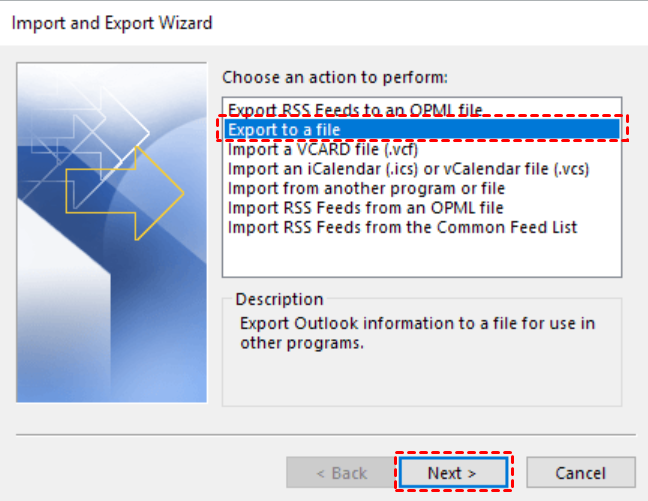
Step 4. Select Export to a file from the available list and click Next.
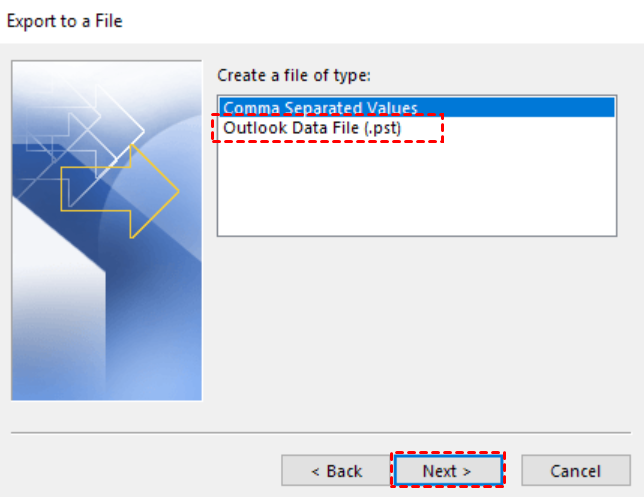
Step 5. Opt for the Outlook Data File(.pst) and then tap on Next.
Step 6. Select the mailboxes or folders you want to export. Remember to tick the box of include subfolders if you want to export everything in the mailbox. Click Next.
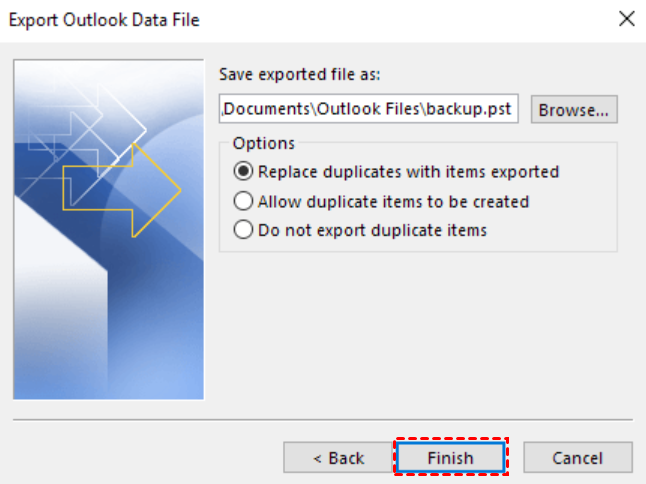
Step 7. Select a destination to store the exported PST file, and then click Finish to complete the process of exporting365mailboxtoPST.
Way 2. Export Office 365 Mailbox to PST using eDiscovery Tool
Inside the Exchange Admin Center (EAC), you'll find the eDiscovery Export Tool, which offers a useful feature. This tool allows you to export the outcomes of an In-Place eDiscovery search to an Outlook Data File, also known as a PST file.
✍Note: Before you proceed, it's crucial to set up permissions within the Microsoft 365 Compliance Center. Failing to configure these permissions will prevent you from creating a content search and subsequently hinder the process of exporting PST from Office 365.
Part 1. Assign eDiscovery Permissions in Microsoft 365
Step 1. Log in to the Microsoft 365 Compliance Center and navigate to the Permissions section in the left menu. Then, expand the Compliance center section and click on Roles.
Step 2. Next, search for eDiscovery within the Roles section. Once you find the eDiscovery Manager role, click on it to select it.
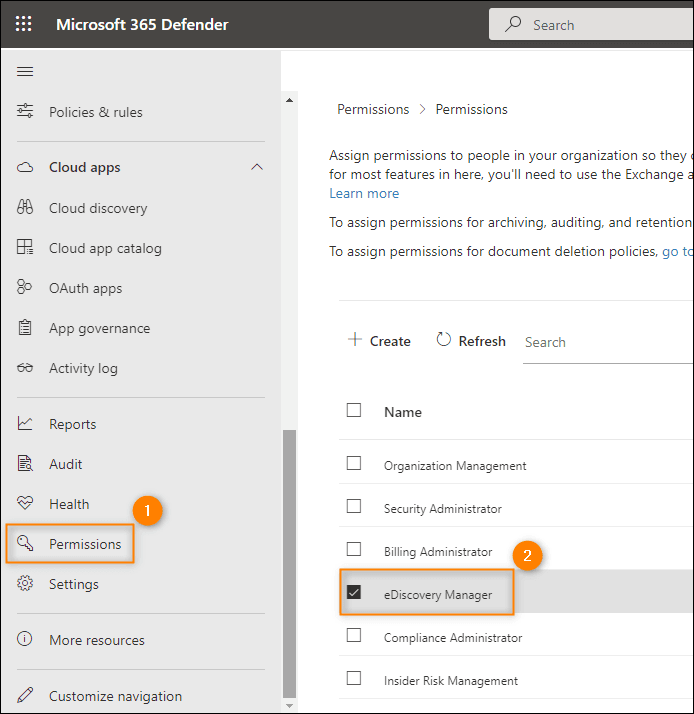
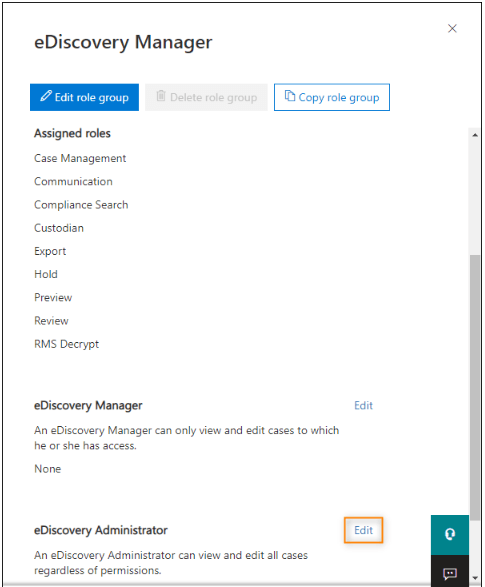
Step 3. In the eDiscovery Manager role group, add your account to the eDiscovery Administrator list by clicking on Edit and following the provided steps.
Part 2. Create Content Search in Microsoft Office 365
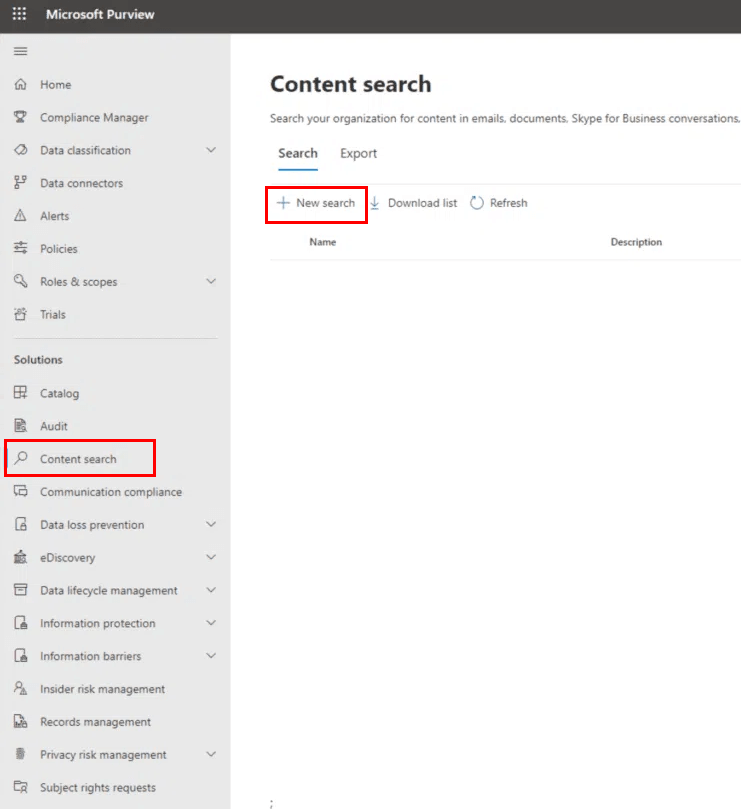
Step 1. In the same portal, go to the Solutions section and choose Content search. Then, click on the + New search button.
Step 2. Give a Name and Description according to your preference.
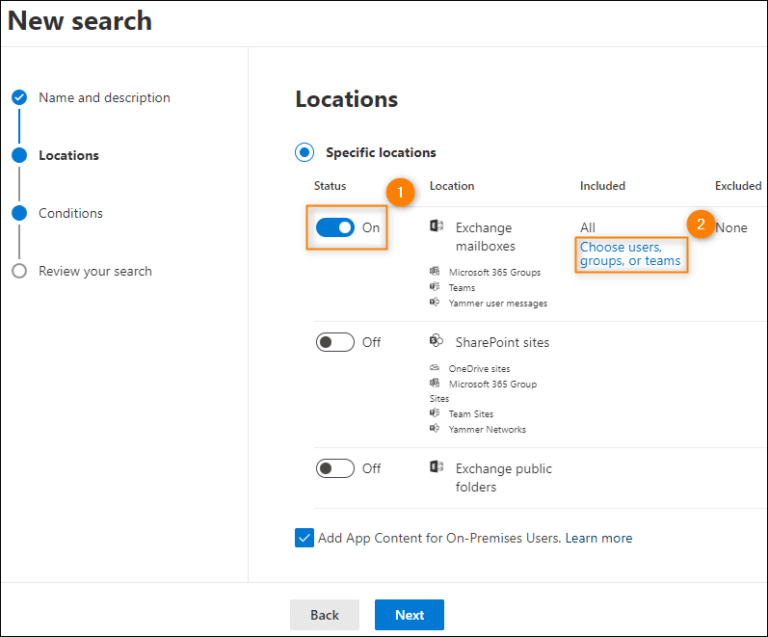
Step 3. Turn on the switch next to Exchange mailboxes in the Locations wizard. Then, click the Choose users, groups, or teams link to select your mailbox and then click Done.
Step 4. Then, you will find a wizard to define search conditions. As we want to export the entire Office 365 mailbox, we will keep the Conditions screen empty.
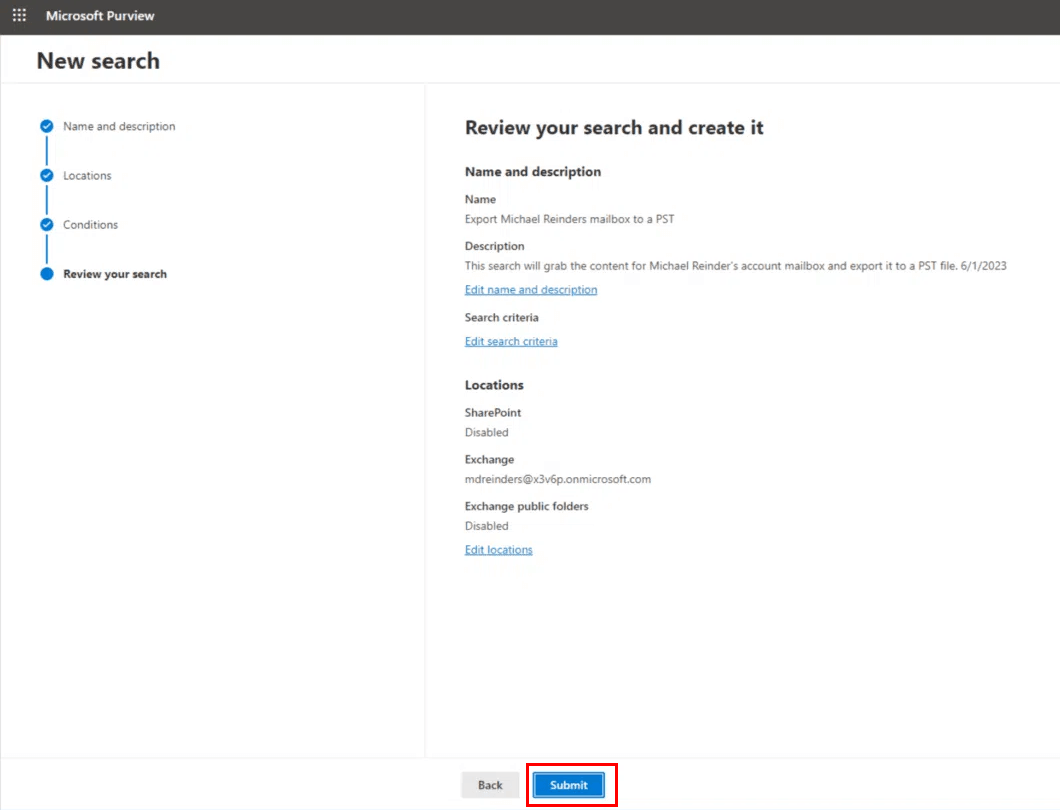
Step 5. On the Review your search window, confirm that everything looks good and click on Submit to initiate the creation of a new search.
Part 3. Export Office 365 to PST File Format
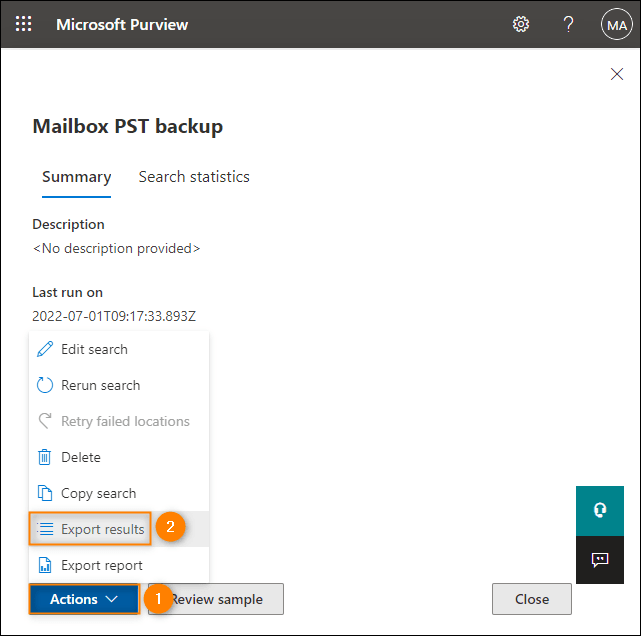
Step 1. In the list of Content searches, find and click on the name of the search you performed in the previous step. Once you do this, you'll notice that the search status indicates that it's completed.
Step 2. Click on the Action button and choose Export results. From there, select the desired output option, which is Export Exchange content, and then click on the Export button.
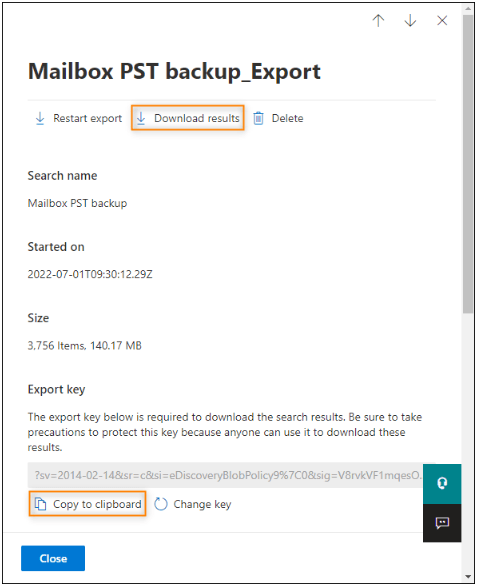
Step 3. Go back to the content search list and click the Export button once again. Then, choose Download Report. Make sure to also create a copy of the export key for your reference.
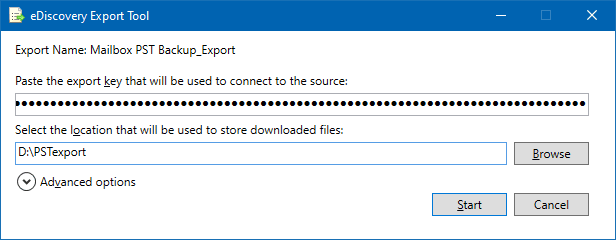
Step 4. Afterward, install the Microsoft Office 365 eDiscovery Export Tool on your system.
Step 5. Paste the export key that you copied in the previous step. Then, specify the location where you want to save the PST file. Finally, click the Start button to initiate the process of Office 365 export mailbox to PST.
An easier way to backup Office 365 mailbox
To avoid the inconvenience of manually exporting Office 365 emails for backup and to save both time and effort, you can utilize AOMEI Backupper Professional, a dependable and user-friendly Outlook backup software. With this tool, you can automate the process of creating backups for your important Office 365 emails.
The software offers an Outlook Backup feature that allows you to back up your emails, contacts, notes, calendars, and tasks from Outlook to your computer, local and external drives, network drives, or cloud storage.
🎉 Its capabilities extend beyond just Outlook – you can also use it to back up email accounts like Gmail, Hotmail, and any other accounts that you've added to your Outlook client.
🎉 You can benefit from its automatic email data backup through the Schedule Backup feature, which offers options like daily, weekly, and monthly backups, as well as triggers based on specific events or when a USB drive is connected.
🎉 It supports multiple Windows systems including Windows 11, 10, 8.1, 8, 7, XP, Vista, etc. If you are a Windows Server user, try AOMEI Backupper Server.
To get started with effortlessly backing up your Office 365 emails, simply follow these steps after adding your Office 365 account to Outlook and installing the AOMEI Backupper software on your computer:
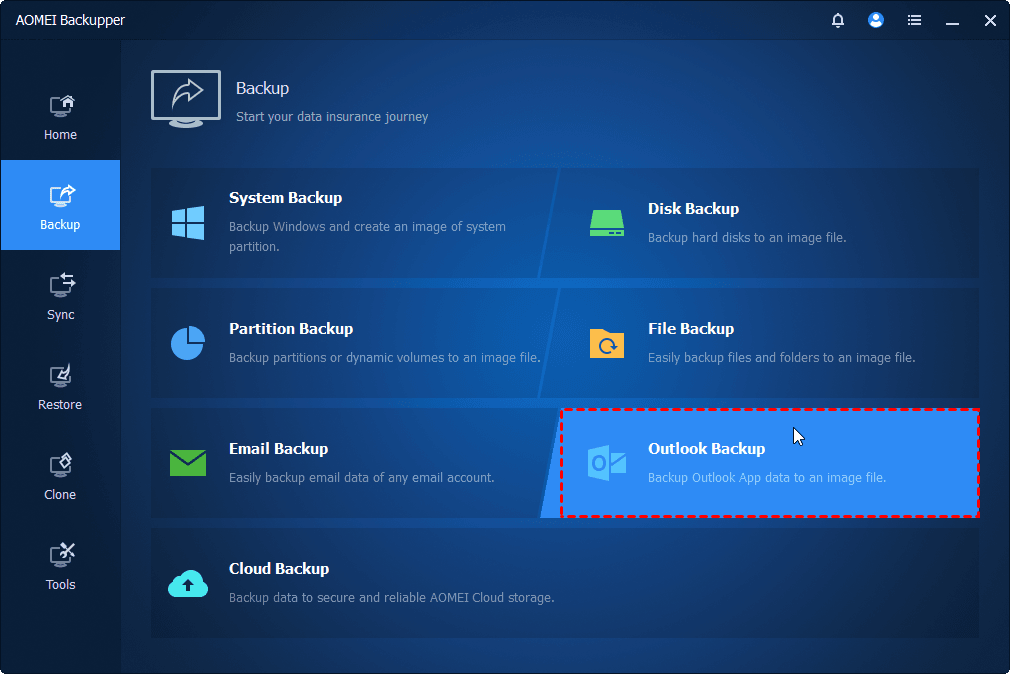
Step 1. Launch AOMEI Backupper, click Backup, and select Outlook Backup.
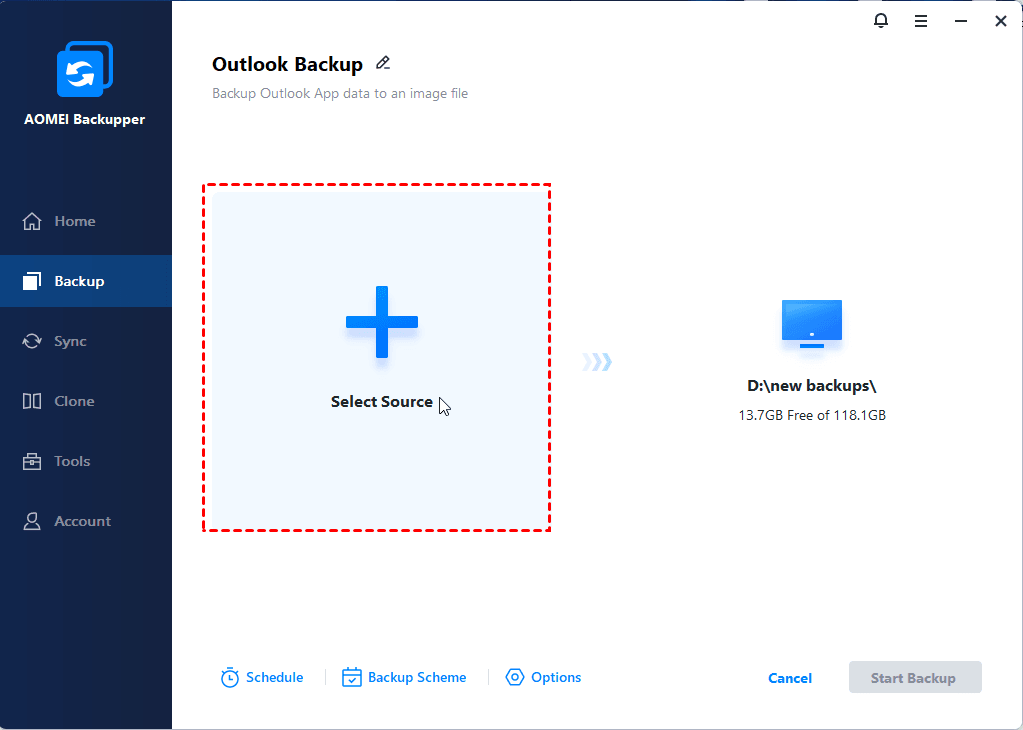
Step 2. Tap Add Outlook Data. In the popup window, select the mailboxes under your Microsoft 365 email account as the backup source.
Step 3. Choose a destination path where you'd like to store the backup image. You have three choices: you can opt for a local path, add Share or NAS Devices, or select a cloud drive.
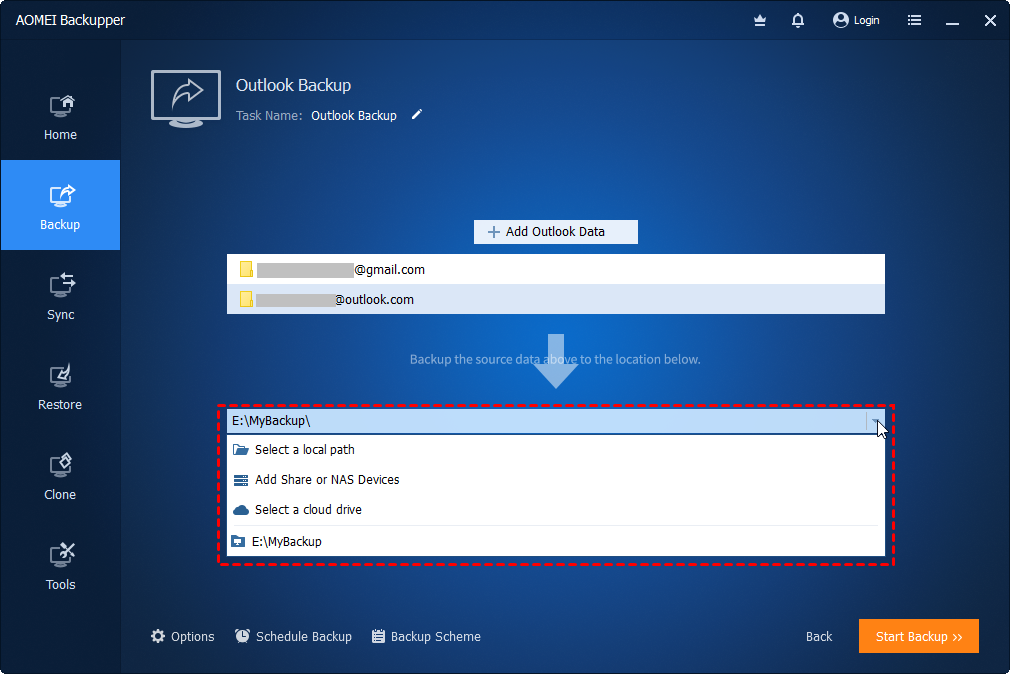
Step 4. For an automated email backup task, simply click on Schedule Backup to set up the scheduling preferences. Once you've done that, click Start Backup to initiate the process of backing-up Office 365 mailbox to PST.

To sum up
In the realm of business, the loss of crucial data and emails can reverberate across the entire organization. Therefore, it's imperative to opt for the most secure and dependable method to safeguard your emails.
In addition to the manual approach of exporting 365 mailbox to PST files, employing professional email backup software like AOMEI Backupper offers a simpler and more efficient way to preserve essential emails and other important folders. Furthermore, this software equips you with the capability to conveniently back up your Outlook emails to USB drives, external hard drives, and various locations.

