How to Backup Exchange Mailbox to PST
You can learn how to backup Exchange mailbox to PST by eDiscovery. Finally, we recommend you to use professional mail backup software to backup your whole Exchange mailbox.
By Miya Updated on August 25, 2023
Overview of Backing up Exchange Mailbox to PST
Exporting Exchange 365 mailbox to PST is essential for tasks like backup, migration, archiving, and meeting legal and compliance requirements. However, exporting Exchange online backup mailboxes to PST is not straightforward with native Microsoft 365 options, similar to on-premises Exchange. In our blog, we provide a detailed explanation of a native workaround using eDiscovery to back up Exchange mailboxes to PST.
How to Backup Exchange Mailbox to PST Using eDiscovery
To export your on-premises Exchange mailbox, you can utilize the New-MailboxExportRequest cmdlet. However, this option is not available for online Exchange. Instead, you can use the eDiscovery feature as an alternative solution.
Here's how you can export your Exchange Online mailbox to a PST file:
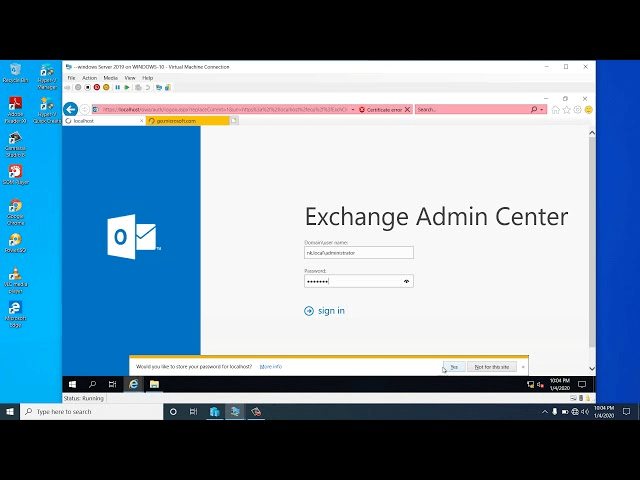
Step 1. Log in to your Microsoft 365 account and navigate to the Exchange Admin Center.
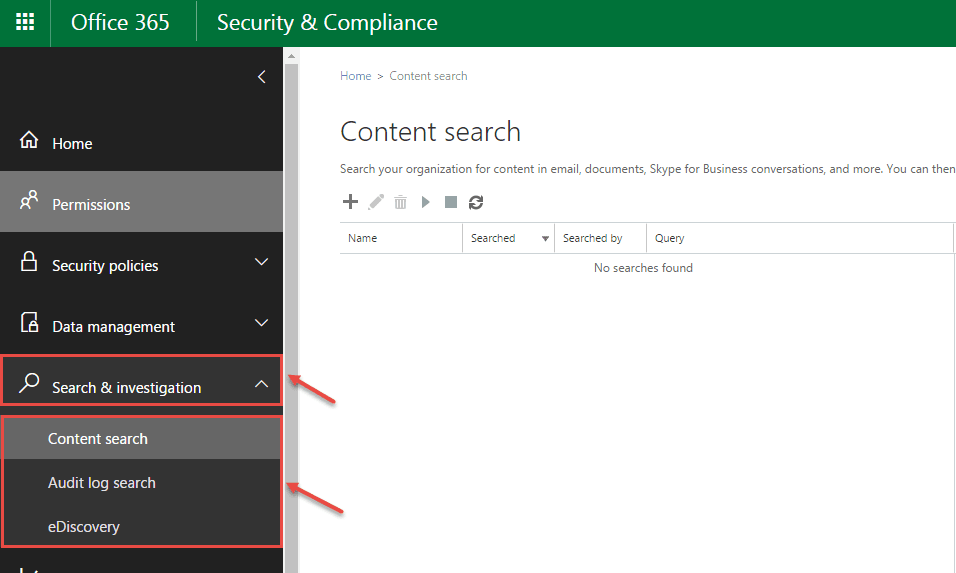
Step 2. Click on Admin Center and then select Security and Compliance. Use the Content search and eDiscovery tool to search for and locate the desired mailbox.
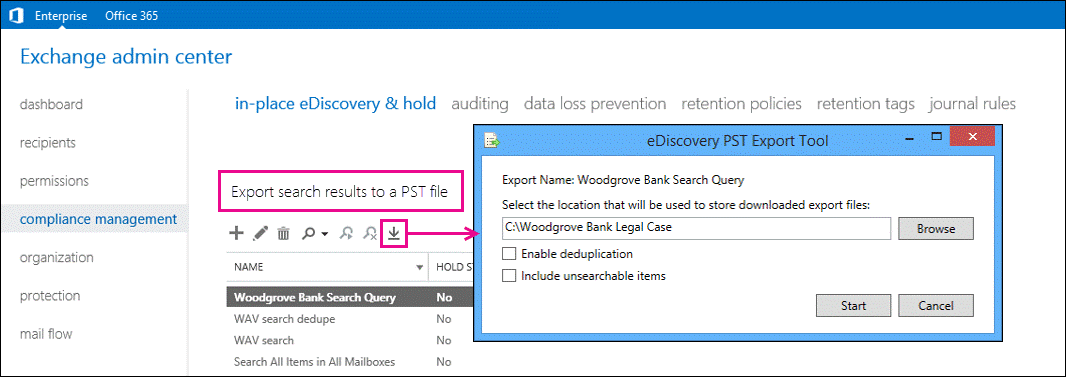
Step 3. Once located, export the mailbox to a PST file.
Tips:
♫You have the flexibility to export the entire mailbox of a specific user or a group of users. Additionally, you can apply filters to the export based on criteria such as date received, subject, and type.
♫During the export process, you can choose to include encrypted files and select other options for exporting the Exchange content. The default settings usually work best.
Step 4. After applying the necessary filters, click on Save and run and provide a name and description for the search. The wizard will then initiate the search in the background. Once the search is completed, a popup notification will appear. Click on Export results.
Step 5. Once the export is finished, another popup will notify you to Download results. Make sure to copy the Export key to ensure access to the download. Finally, use the Export key to download the PST file to your desired location.
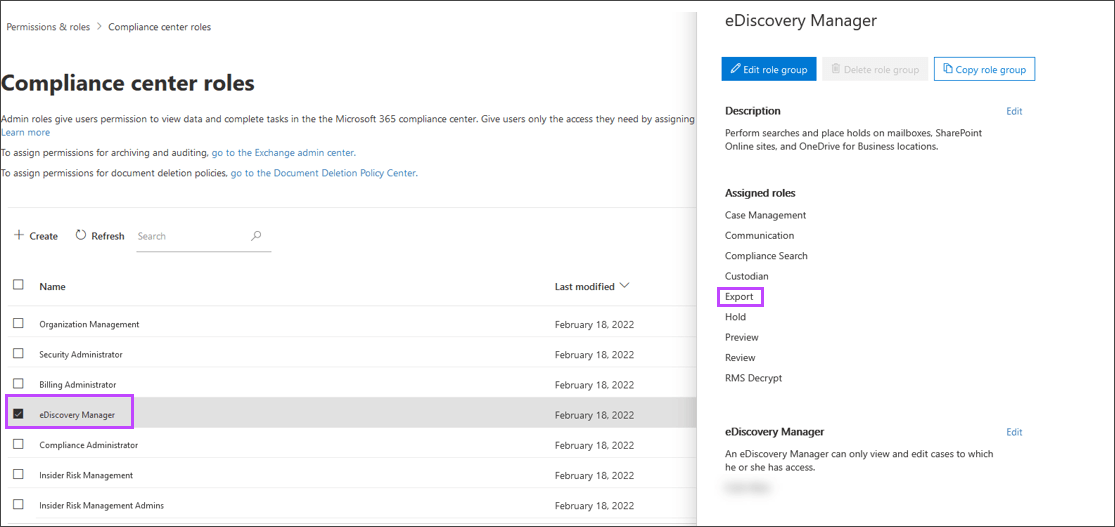
Note:
You need to be part of the eDiscovery Manager role group to perform this task. If your account does not have the mailbox import/export role assigned, you can backup Exchange mailbox to PST by PowerShell. you can quickly add it using the following PowerShell command:
◉ New-ManagementRoleAssignment –Role "Mailbox Import Export" –User "username"
Auto Backup Your Exchange Mailbox with Best Email Backup Software
In addition to the above, you have the option of automatically backing up your Exchange mailbox. For automated backup of Exchange mailbox data, you can rely on the trustworthy third-party software, AOMEI Backupper Professional. It provides comprehensive solutions for backing up your mailbox:
✍It allows you to back up all data in your Exchange 365 mailbox, including emails, contacts, notes, calendars, and tasks.
✍You can choose from various backup devices such as backup emails to external hard drives, local disks, USB flash drives, and NAS devices to store your backed-up Exchange mailbox emails.
✍The software offers the Schedule Backup feature, enabling you to automatically back up your email data.
✍You have the option to perform incremental or differential backups, which help reduce backup time and the size of the backup image.
Once you have added your Microsoft 365 email account to Outlook, you can follow these steps to backup emails from Outlook 365 using this software:
Download and install AOMEI Backupper Professional on your PC. (If you are server users, please down AOMEI Backupper Server.)
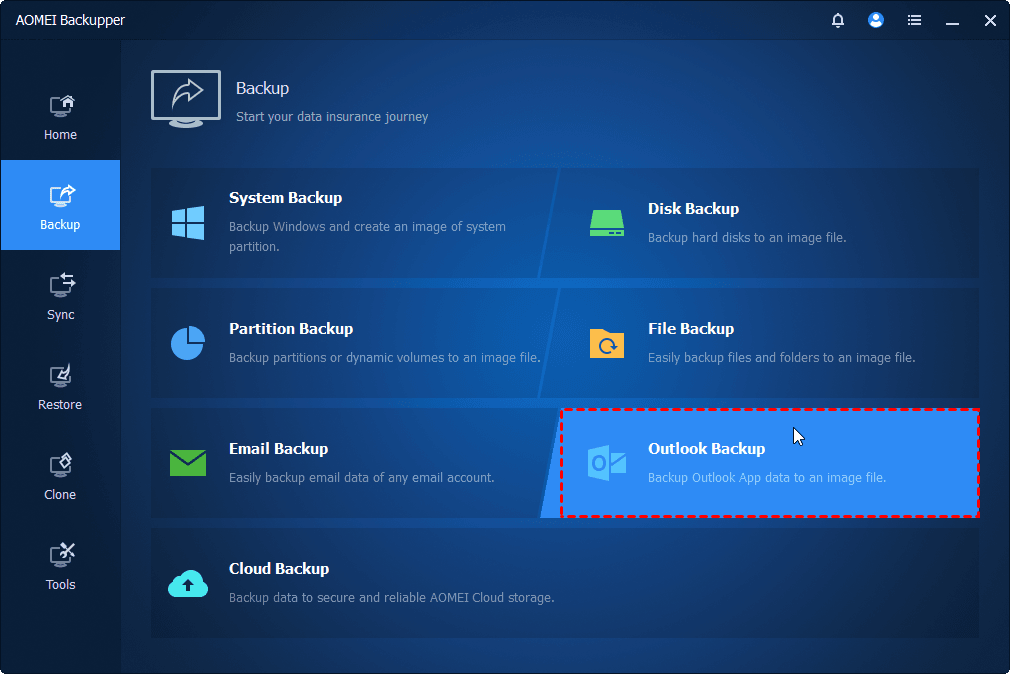
Step 1. Launch the program and click on Backup, then select Outlook Backup.
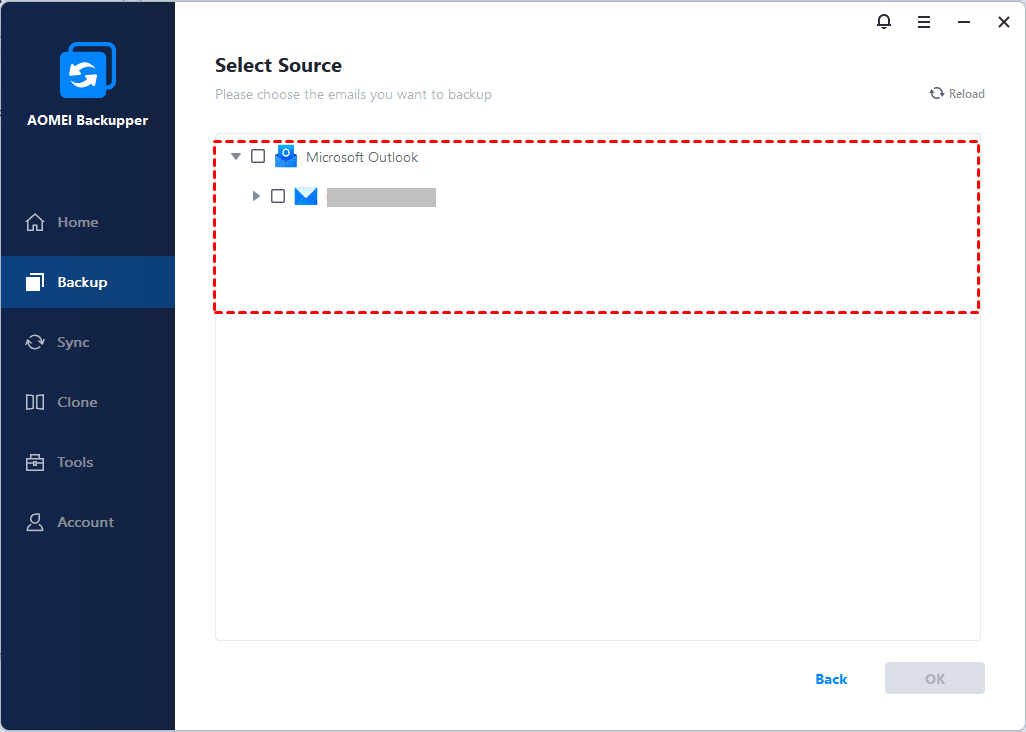
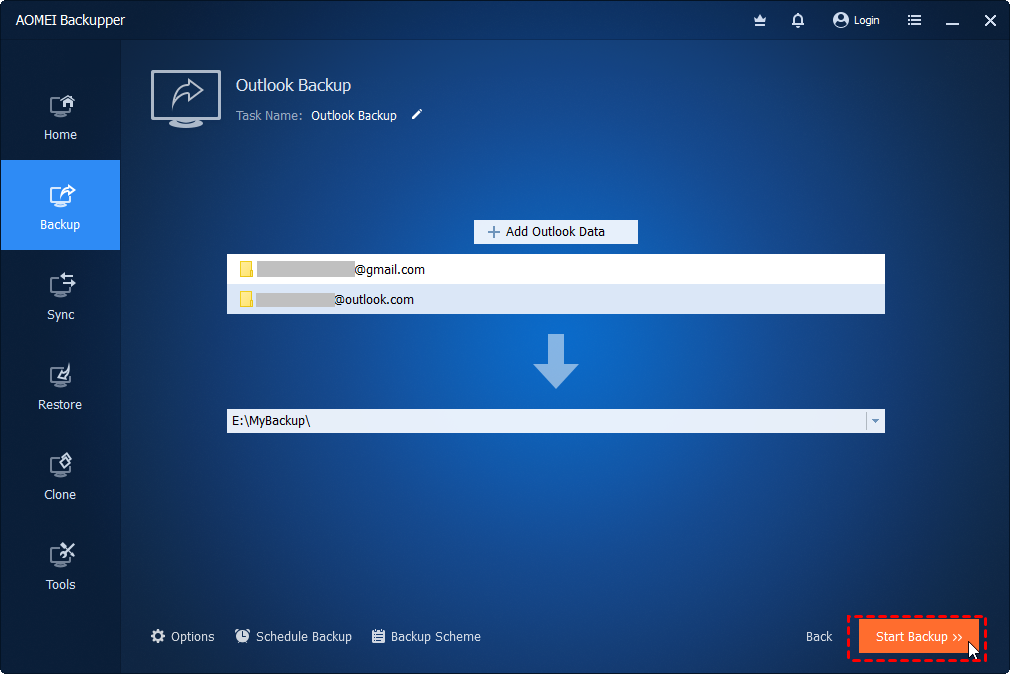
Step 2. To save data in Outlook 365, begin by clicking on Add Outlook Data and choosing the specific data you wish to preserve. Afterward, simply click OK to proceed.
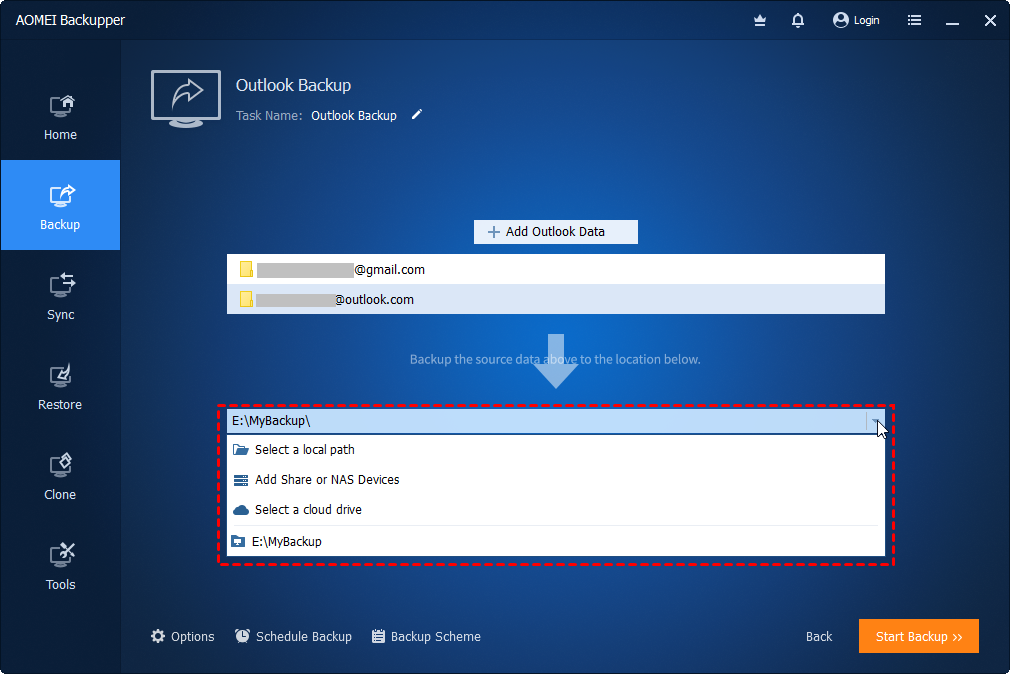
Step 3. To designate a storage location for Exchange 365 mailbox emails and other items, click on the second box. From there, you can choose a local path, incorporate a network or NAS location, or utilize a cloud drive for saving purposes.
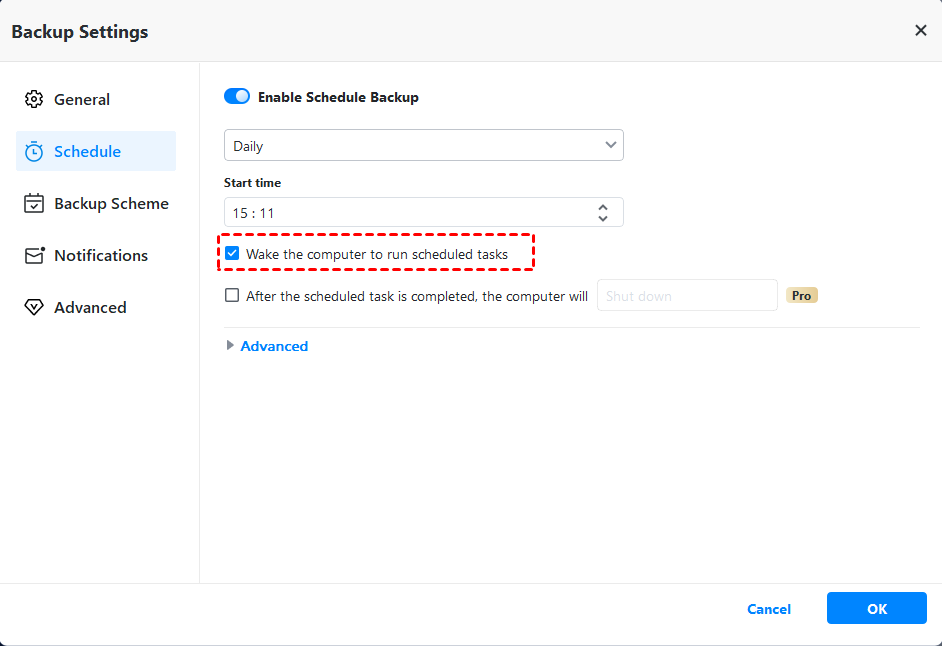
Step 4. To enable scheduled backup, select from the options of Daily, Weekly, Monthly, Event triggers, or USB plug in frequencies. Additionally, ensure that the Wake the computer to run scheduled task option is checked to guarantee proper execution.
Step 5. Please ensure that you have selected all the email folders and then click on Start Backup to initiate automatic backups of Exchange 365.
Note: Backup Scheme: You can optimize your backup process by utilizing either incremental or differential backup methods, which help reduce backup time and the size of the backup image. To address the concern of a full backup disk, you can enable automatic backup cleanup methods that regularly delete older backup images.
Summary
This article provides you with how to back up Exchange mailbox to PST. And recommends you the best email backup software- AOMEI Backupper. Its Outlook backup feature can backup all Exchange 365 mailbox. Moreover, you can back up any property of your choice from Exchange 365 instead of the entire PST file.
In fact, AOMEI Backupper is much more than just Outlook backup software. It is also powerful disk cloning software that enables you to transfer data from your old hard drive to a new one such as clone Windows 11 to new SSD when you perform a hard drive upgrade or replacement. Try it out now!

