Full Guide: Install Domain Controller on Windows Server 2012
The guide tells you how to install Domain Controller and offers reliable backup software for Windows.
By Maggie Updated on May 19, 2023
Overview of Domain Controller
Domain Controller is a type of server under the Windows Server operating system that provides a centralized way to manage users, computers, security policies, and other resources within a computer domain. It is one of the core components of the Microsoft Active Directory (AD) service.
Domain Controller plays a crucial role in a Windows domain by maintaining user accounts and computer accounts in the domain, granting users access to get resources in the domain, and ensuring security in the domain. By centralizing all users accounts, computer accounts, and other resources in a single domain. In a word, Domain Controller simplifies the process of managing and maintaining the network and improves security and scalability.
Benefits of Domain Controller
There are several benefits to performing Windows Server 2012 Domain Controller setup:
๑Centralized management: Domain Controller can possess requests for authentication from users within a single domain. Put it in a simple way, it enables you to create users accounts and groups, assign permissions and access rights, and manage security policies from a single location.
๑Simplified administration: Domain Controller is intelligent in automatically managing administrative tasks, such as user and computer configuration, software installation, and updates.
๑Ensure scalability: Domain Controller makes it easier to manage a constantly growing network. As your organization expands, you can add additional Domain Controllers to handle the increased load and ensure high availability.
๑Enhance security: Domain Controller manages the authentication and access control for users to get resources and other important data.
Since Domain Controller mediates all access to the network, then how to install Domain Controller in Windows Server 2012?
Step-by-step guide to installing a Domain Controller on Windows Server 2012
This part is going to perform a step-by-step guide about how to setup a Domain Controller server 2012 R2.
☞Preparations:
▪ Make sure you have installed the new Windows Server 2012 and can run as an administrator.
▪ Configure your Server’s IP address to correspond to the target domain and ensure the existing Domain Controllers where DNS is installed and configured are visible by your Windows Server 2012.
Step 1. Open Server Manager and select Add Roles and Features.
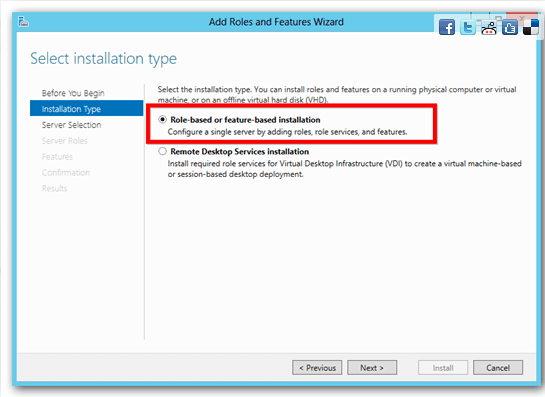
Step 2. On the left Installation Type tab, select Role-based or featured-based installation and click Next.
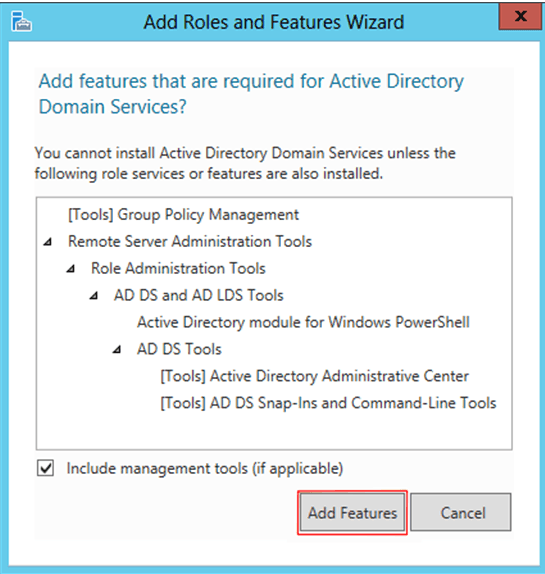
Step 3. Select Active Directory Domain Services on the server roles page. Then a pop-up window notices you to add features that are required for Active Directory Domain Services. Then click Add Features and then click Next.
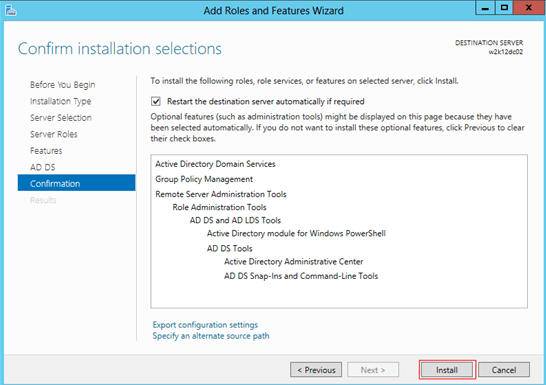
Step 4. On the confirmation page, you need to click Install button. If you want the server to reboot automatically select the box Restart the destination automatically if required.
Step 5. At this point, Active Directory Domain Services should be installed. Wait for the process to prompt and click Close button once it has finished.
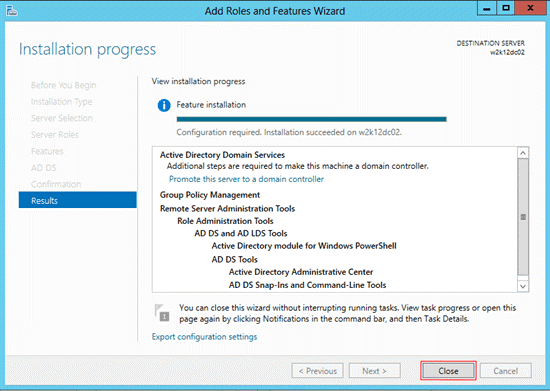
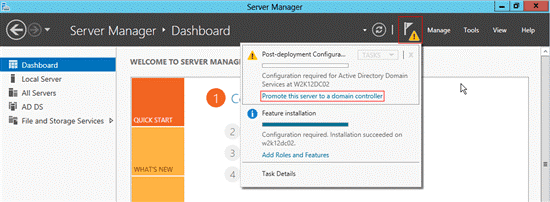
Step 6. Once completed, you will see a notification on the dashboard highlighted by an exclamation mark. Select it and amidst the drop-down menu select Promote this server to a Domain Controller.
Step 7. Select Add a domain controller into an existing domain.
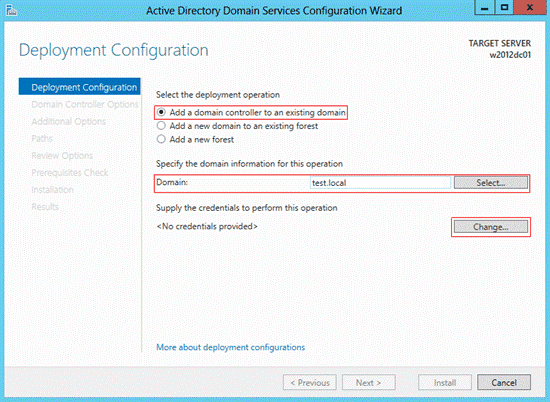
Step 8. Ensure the target domain is specified. If it is not, please either select the proper domain or enter the proper domain in the field provided.
Step 9. Click Change, provide the required Enterprise Administrator credentials and click the Next button.
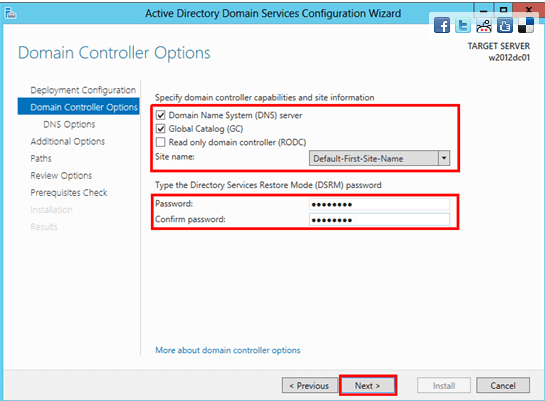
Step 10. Define if server should be a Domain Name System (DNS) server and Global Catalog (GC), and select the site to which this DC belongs. Define Directory Services Restore Mode (DSRM) password for this DC.
Step 11. Click the Next button on the DNS options screen.
Step 12. In the Additional Options screen, you are provided with the option to install the Domain Controller from Install From Media (IFM). Additionally, you are provided the option to select the point from which DC replication should be completed. The server will choose the best location for AD database replication if not specified. Click the Next button once completed.

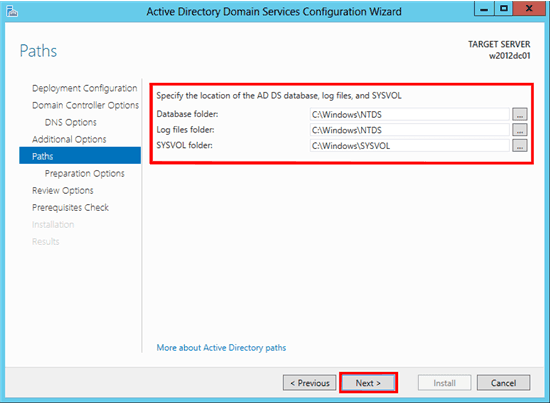
Step 13. Specify the location for AD DS database, log files and SYSVOL. Click the Next button.
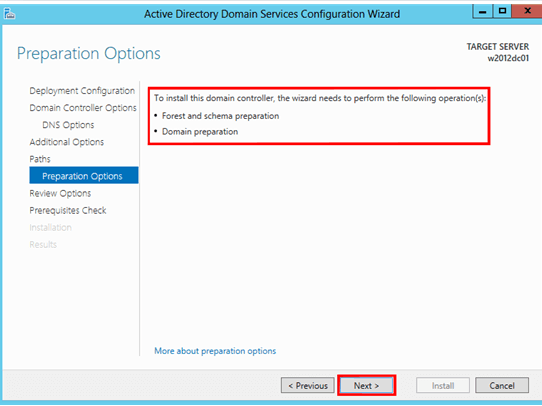
Step 14. Next up is the Schema and Domain preparation. Alternatively, one could run Adprep prior to commencing these steps. However, if Adprep is not detected, it will automatically be completed on your behalf.
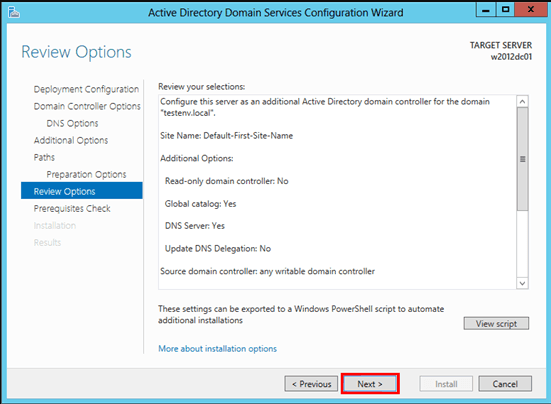
Step 15. Finally, the Review Options screen provides a summary of all of the selected options for server promotion. Click the Next button to continue.
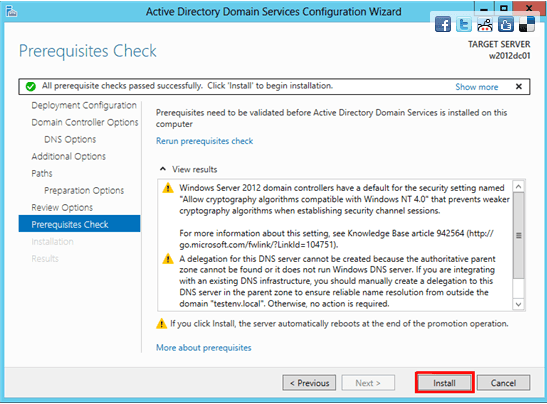
Step 16. Should all the prerequisites pass, click the Install button to start the installation.
Step 17. Reboot the computer and then install Domain Controller Windows Server 2012 is successfully completed.
Bonus tip: backup Domain Controller via the best backup software
As we all know the importance of the Domain Server. However, if a Domain Controller fails, it may prevent users from logging in, accessing resources, or even causing a complete system crash. Backing up a Domain Controller ensures quick system recovery in the event of failure or data loss and can protect important domain info. AOMEI Backupper Server, a well-performing software that can provide mature and full-featured backup solutions. For example, it serves as a powerful helper when Windows backup failed to get an exclusive lock.
✿It is embedded with a schedule backup feature, which means that you can automatically backup your Domain Controller with ease with Daily\Weekly\Monthly\event trigger\USB plug-in mode.
✿It is equipped with various options, you can backup your files, systems, disk partitions and so on per your needs.
✿For capacity option, you can compress the backup image to a smaller one or choose to back up only changed files with incremental and differential backup.
Now download AOMEI Backupper and have a try. Here are the detailed steps about how to backup your Domain Controller with its System backup function:
Step 1. Select System Backup after you choose Backup on the left page.

Step 2. Then the required system partition is selected by default. You just need to choose the destination path to store the backup files. Confirm your options and click Start Backup.

Summary
Installing Domain Controller Windows Server 2012 is time-consuming and a little bit complex. However, you will enjoy a distinguished computer experience and manage computer issues peacefully and confidently after installation. AOMEI Backupper Server is a professional backup and restore software that can erase any data loss worries if your Domain Controller fails unexpectedly. Also, it is the best alternative to Dropbox to help realize backup file storage.

