LSASS.exe High CPU in Windows Server 2016: 5 Fixes and 1 Tip
If you're facing the LSASS.exe high CPU issue, here are 5 potential solutions. Also, learn about additional upgrading tip to enlarge the storage locations.
By Maggie Updated on December 4, 2023
What is LSASS.exe?
LSASS.exe stands for Local Security Authority Subsystem Service is a crucial process on an Active Directory domain controller, managing tasks like Active Directory database lookups, authentication, and replication. Additionally, LSASS.exe enforces the security policy on Windows by handling password changes, creating access tokens, and updating the security log.
However, some users reported issues like LSASS.exe high CPU Windows Server 2016, if you meet one of the below symptoms, it indicates that you need to make some changes on the current existing ISASS.exe.

Signs of lsass.exe high CPU usage include:
- A triggered System Center Advisor alert indicating significant CPU utilization by Lsass.exe.
- Slow or unresponsive domain controller to client service requests for authentication or directory lookups.
- Active Directory domain clients frequently switching to different domain controllers for services.
- Performance monitoring tools like Perfmon.msc or Task Manager showing consistently high CPU usage by the Lsass.exe process (% Processor Time counter).
If facing LSASS exe high CPU Windows Server 2019/2016 issues, continue reading for solutions
How to fix local security authority process high CPU
Fix 1. Run Active Directory Data Collector
To address the LSASS.exe high memory/CPU problem, use the Performance Monitor's Active Directory Data Collector Set on Windows Server 2008 or later. Follow these steps:
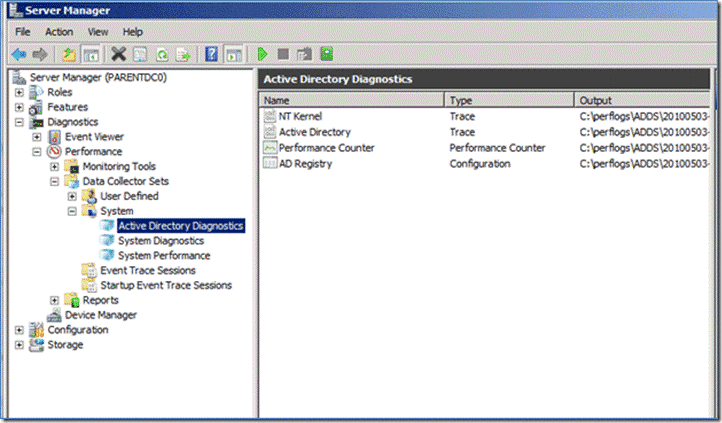
Step 1. Open Server Manager or run Perfmon.msc from Start > Run box.
Step 2. Expand Diagnostics > Reliability and Performance > Data Collector Sets > System.
Step 3. Right-click on Active Directory Diagnostics and select Start to gather data and compile the report.
Step 4. Once compiled, view the report at Diagnostics > Reliability and Performance > Reports > System > Active Directory Diagnostics.
▶Tip: In the Diagnostic Results section, focus on general performance concerns to identify areas for investigation and pinpoint the exact cause.
Fix 2. Run Antivirus Program to check for malware
The LSASS.exe file is frequently imitated by malware. Its original location is typically C:WindowsSystem32 on the system partition (C drive). If you notice a CPU-intensive process with a similar name but a different location, indicating potential malware, conduct a full system scan using trustworthy antivirus software for resolution.
Fix 3. Check Certificate
A user reported that their lsass.exe high CPU issue stemmed from unintentionally replacing a 2048 SSL certificate with a 4096 certificate, impacting server headroom. In such cases, reverting to the original certificate resolves the problem.
Fix 4. Delete a User File
Some users suggest deleting “C:Usersappdataroamingmicrosoftprotect” to address the issue, but it may need to be done under each local account. However, users have reported mixed success, with some noting the file reappearing shortly after deletion. There are warnings that this method might corrupt the user profile.
If this approach proves ineffective, alternatives include using System File Checker to replace a potentially damaged lsass.exe file or updating the operating system or virtual machine to the latest version.
Fix 5. Run SFC scan in Safe Mode
Step 1. Press and hold the Shift key while you select Power > Restart from the Start menu.
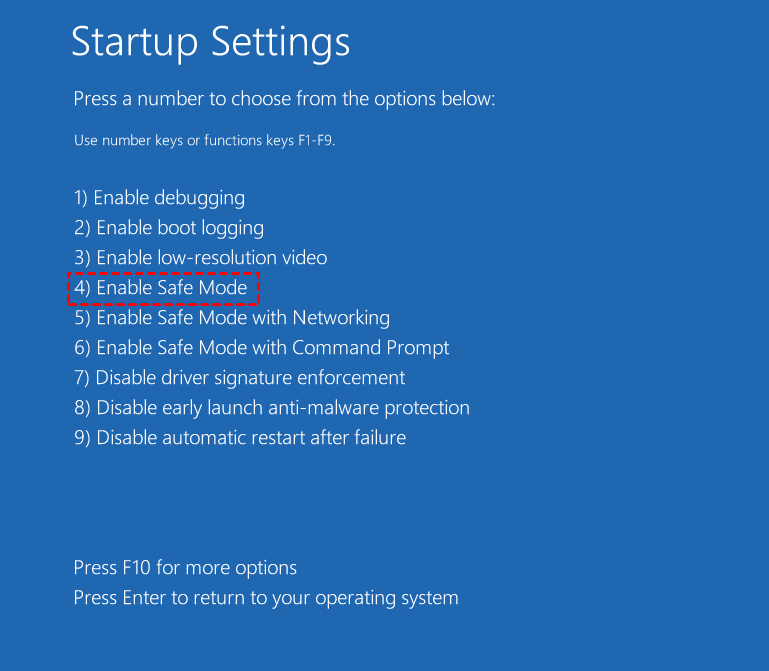
Step 2. After your PC restarts to the Choose an option screen, select Troubleshoot > Advanced options > Startup Settings. Then, click Restart at the lower-right corner of the Startup Settings screen.
Step 3. When the Startup Settings menu appears, press the 4 or 5 key to boot into Safe Mode.
Step 4. Once in Safe Mode, open a Command Prompt with administrative privileges by right-clicking the Start button, selecting Windows PowerShell (Admin) or Command Prompt (Admin), and then run the SFC scan by entering the command: sfc /scannow and press Enter.
Step 5. After the scan is complete, restart your computer.
Bonus tip: upgrade to a larger hard drive without reinstalling
If your valuable files are filling up your disk, upgrading to a larger hard drive is a practical solution. The traditional method involves reinstalling Windows, which is time-consuming. However, with hard drive cloning software, you can upgrade your hard drive to a larger capacity without reinstalling Windows or reconfiguring your system. Cloning the hard drive is a simpler and more efficient way to replace the C drive with a larger one while retaining all your data and settings.
Things you need before upgrading:
▶ A Larger HDD or SSD: To store all the cloned system files and data from the old hard drive.
▶ A SATA-to-USB Cable: To connect both the old drive and the new HDD/SSD to your computer.
▶ Reliable Cloning Software: AOMEI Backupper Server is recommended for cloning to a larger hard drive without the need for reinstalling everything.
After you get things ready, you can follow the steps below to replace C drive with larger SSD/HDD without reinstalling Windows Server.
Step 1. Connect the new hard drive to your computer, either internally or externally. Download and install AOMEI Backupper.
Best Windows Server backup and cloning software.
Step 2. In AOMEI Backupper, go to the Home screen, click Clone > Disk Clone.
▶ Tip: To migrate the OS disk, try System Clone instead.

Step 3. Choose your original hard drive as the Source Disk and click Next.

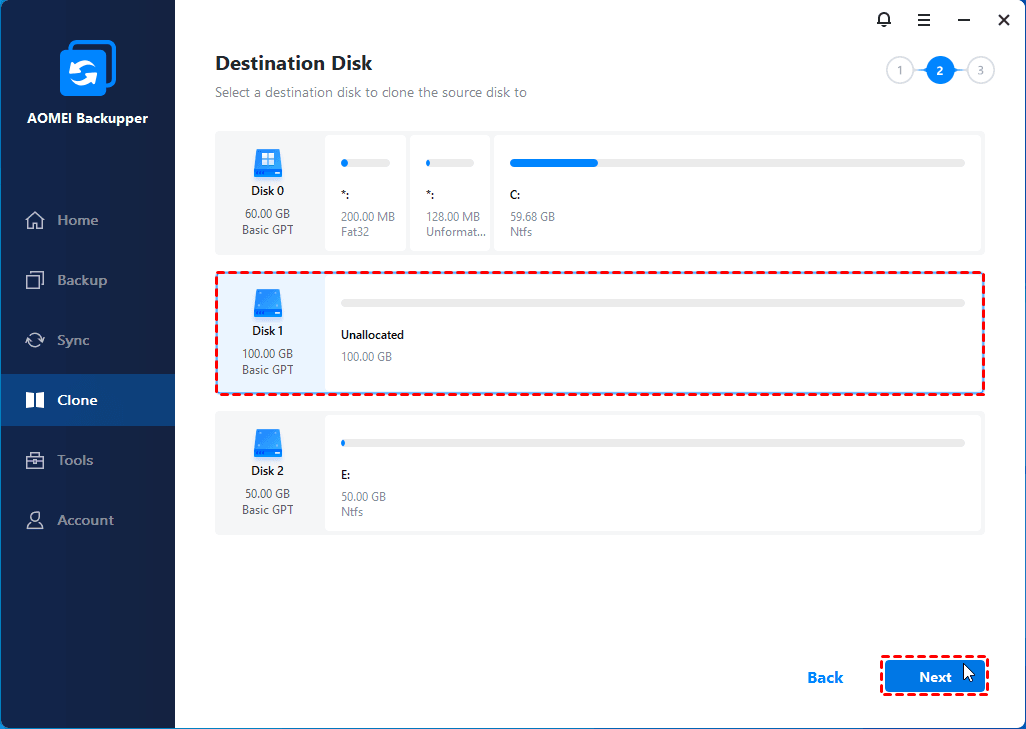
Step 4. Select the larger hard drive intended for replacement as the Destination Disk and click Next.
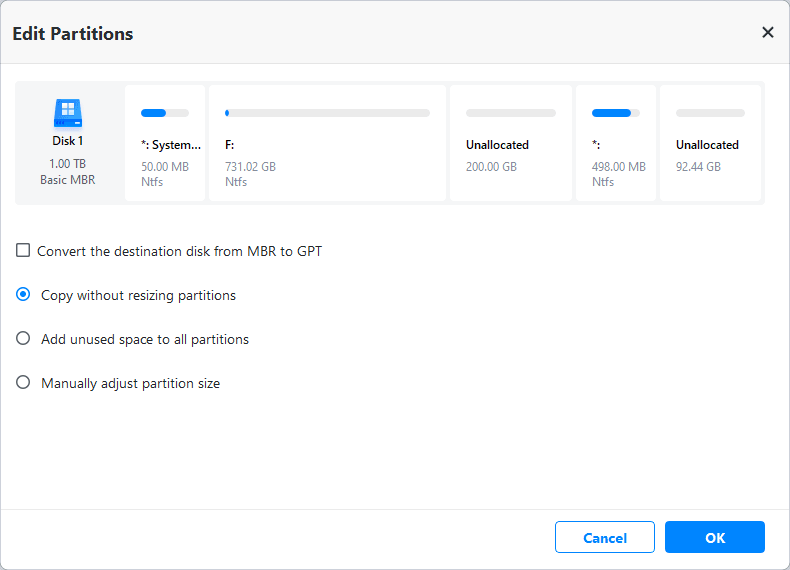
Step 5. Optionally, enable Edit Partitions to optimize space usage and click Start Clone to initiate the cloning process.
To sum up
That concludes the guide on LSASS.exe CPU Windows Server 2016 troubleshooting. Apart from the traditional fixes, you can use AOMEI Backupper Professional to upgrade your older hard drive into a bigger one.
Besides cloning, the software offers the option to back up your old hard drive and restore it to a larger one for seamless data migration. Additionally, it enables creating a bootable media, facilitating the restoration process when both drives can't be connected simultaneously to your computer.
FAQ
1. Can I disable LSASS?
While disabling lsass.exe is not recommended and can lead to system errors, if you encounter multiple instances of lsass.exe and suspect malware, it's advisable to disable and remove the fake files. You can verify the authenticity of a lsass.exe file by checking its Digital Signature.
2. Is LSASS.exe a virus?
As the lsass.exe process is frequently targeted by malware and imitated, it's crucial to verify its authenticity. The genuine file is typically located at C:\Windows\System32 when C: is your system partition. If you observe a process with a similar name in Task Manager but with a different location, it's a clear indication of a potential threat exploiting your computer's security.

