How Do I Backup Office 365 Emails Without Outlook? (2 Ways)
Can I backup Office 365 emails without Outlook? Absolutely! Scroll down to learn the top two ways here.
By Lily Updated on September 5, 2023
Why backup/export Office 365 mailbox?
Office 365, now known as Microsoft 365, is a suite of cloud-based productivity tools and services developed by Microsoft. It helps individuals and organizations work more efficiently and collaboratively. It is necessary to backup/export Office 365 mailbox for the following reasons:
- Data protection: Protect your important emails from hacker attacks or other security breaches.
- Transfer account: If you intend to delete or transition to a different Office 365 account, it's essential to export all your mailbox data to maintain uninterrupted workflow.
- Technical support: When troubleshooting problems with your Office 365 account, exporting your mailbox data can offer valuable insights for support technicians.
No matter what your reason is, learn how to backup Office 365 mailbox in detail below.
How to backup Office 365 emails without Outlook
If you prefer to backup Office 365 emails without Outlook, here are two ways to go: use Content Search eDiscovery or a professional email backup tool. To be honest, method 2 is much easier to operate than method 1.
Method 1: Office 365 export mailbox to PST via Content Search eDiscovery
Content Search eDiscovery tool enables you to search and find data from the mailboxes/public folders of Exchange Online. Later, you can export this data to PST files for future use. The whole process is shown below:
Step 1. Allocate required permissions
1. After logging in to your Office 365 portal, access the Microsoft 365 admin center.
2. In your Microsoft 365 admin center, expand Admin centers and click Security.
3. In the Microsoft 365 Defender admin center, go to Permissions > Email & collaboration roles > Roles and click eDiscovery Manager role group.
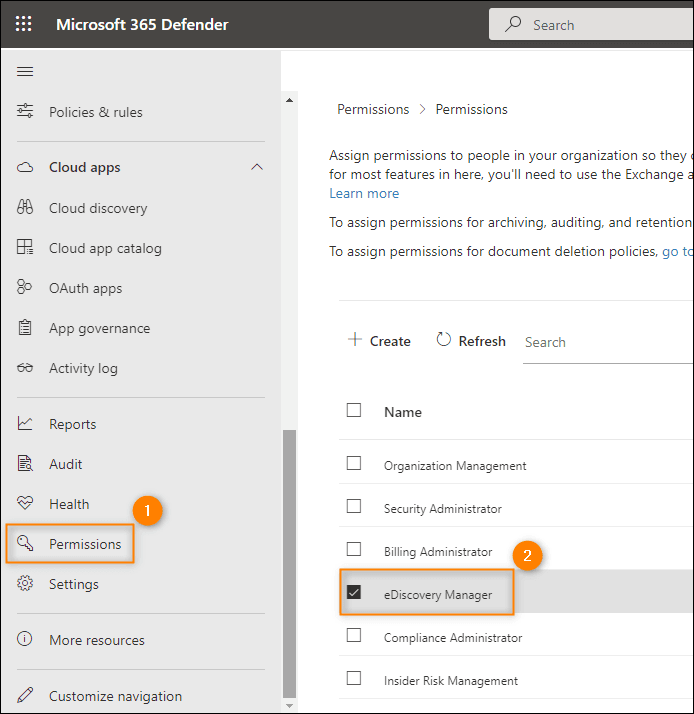
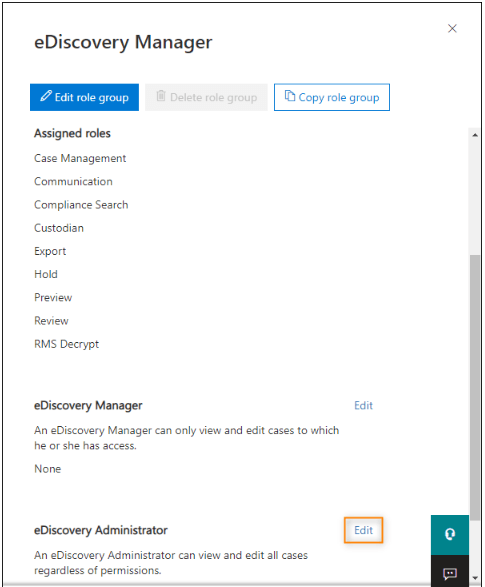
4. In the eDiscovery Manager role group properties pane, add your account to the eDiscovery Administrator list using the Edit button and following a few simple steps.
Step 2. Create a new content search
1. Now, log in to the Microsoft Purview compliance portal, go to Content search, and click the New search button.
Note: If you are missing the Content search option, it is most likely related to the eDiscovery permissions you set in the previous steps. Changes in the eDiscovery permissions might take even up to 24 hours to apply.
2. A wizard that lets you customize all aspects of a content search opens.
- Name and description: name your search and describe it as necessary.
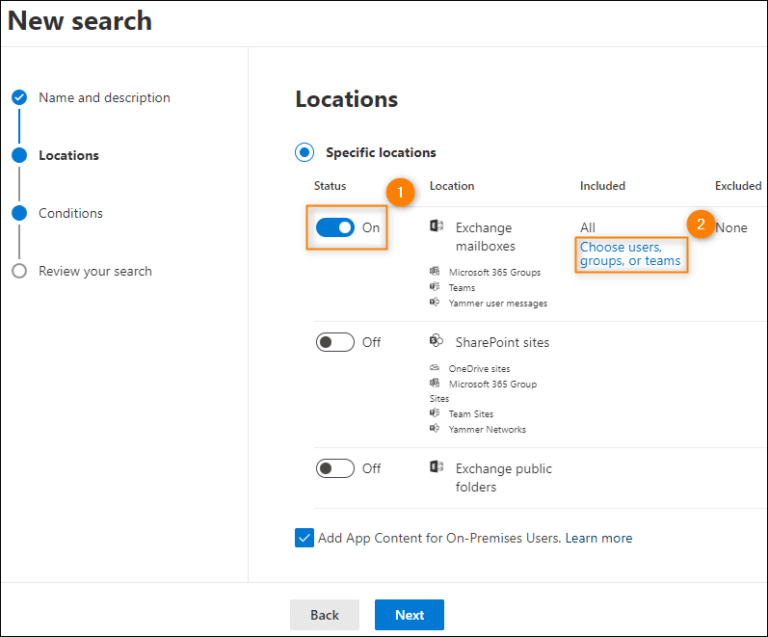
- Locations: specify which mailbox data you wish to export. If you want to export data from all mailboxes, select Exchange mailboxes. You can narrow down your search to specific users, groups or teams by clicking the link and selecting specific items in a picker pane.
- Conditions: further narrow down your search with the available filtering options.
- Review your search: click Submit and Done to close the wizard and start your search immediately.
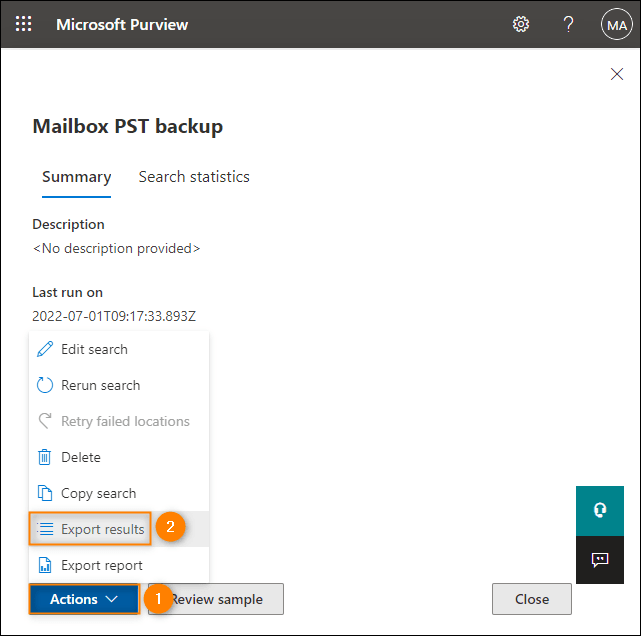
3. The search will be performed in the background. In the pane that pops up, you can see if the search has been completed and the details concerning its result. Click the Actions button and choose Export results when it’s completed.
4. In this window, you can choose if you want to include encrypted files. You can also decide how to export the Exchange content. Here I keep the default options. Click Export at the bottom of the window when you are finished.
Note: Do NOT check the Enable deduplication option, unless you want the search results to be exported to a single PST file.
Step 3. Download in PST format
1. The wizard starts to export data. Go to the Export tab and choose your search again to see its progress.
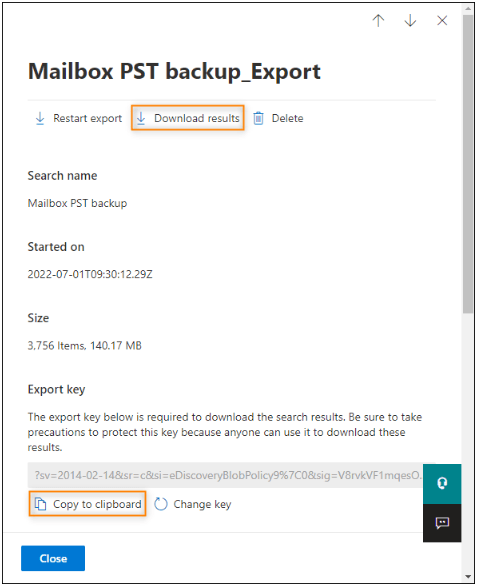
2. Click Download results. If you start to download the results before the export is completed, the download and export tools should finish at the same time. Remember to copy the special Export key which will be required in the next step.
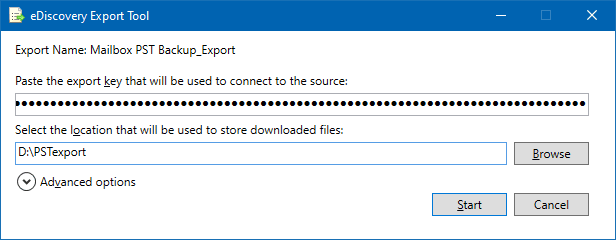
3. The eDiscovery Export Tool will start. Paste the export key copied in the previous step and specify a folder where you want to save the PST files. Then click Start to begin the export.
Method 2: Backup Office 365 emails with the best email backup software
As you see, it involves so many steps to export O365 mailbox to PST via Content Search eDiscovery. If you just want to create a backup for Office 365 emails, you can try the best email backup software– AOMEI Backupper Professional. It offers you all-around email backup solutions:
✦ It allows you to backup various mailboxes, including Office 365 mail, Outlook Mail, Hotmail, Gmail, Yahoo Mail and iCloud Mail, etc.
✦ It supports backing up the whole mailbox or only selected email folders. What’s more, you can backup multiple folders at once.
✦ You are able to choose various backup storage devices, such as backup Windows 10 Mail to external hard drive. Local disk, USB flash drive, and NAS device are also supported.
✦ You are allowed to create automatic email backup using the “Schedule Backup” feature.
Now follow the instructions below to backup Office 365 mailbox using AOMEI Backupper:
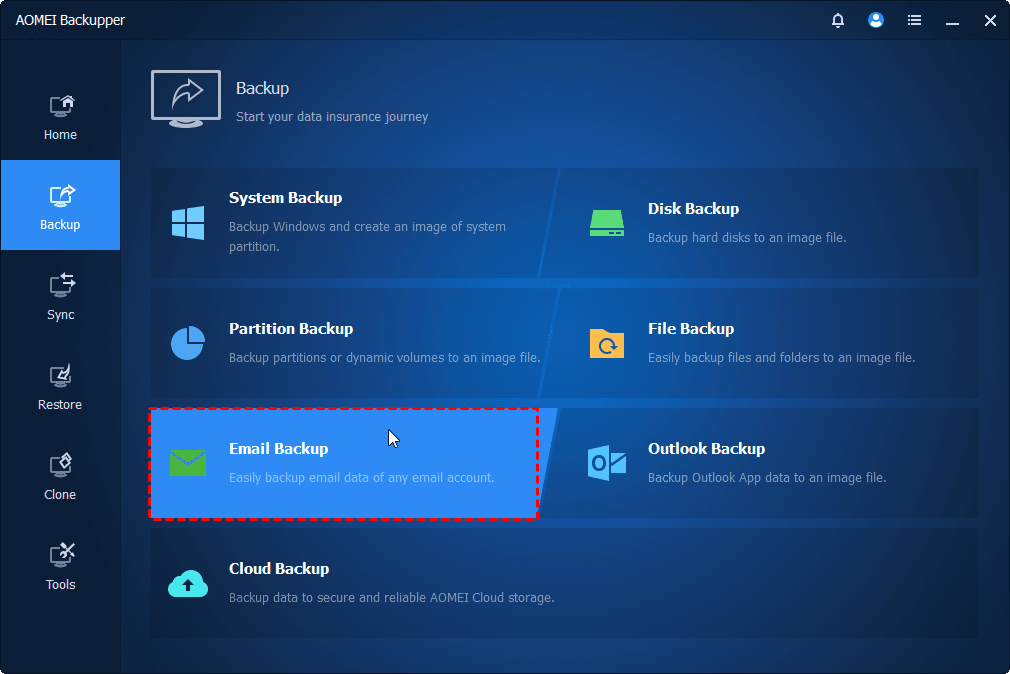
Step 1. Download, install and run AOMEI Backupper. Then, click Backup and select Email Backup.
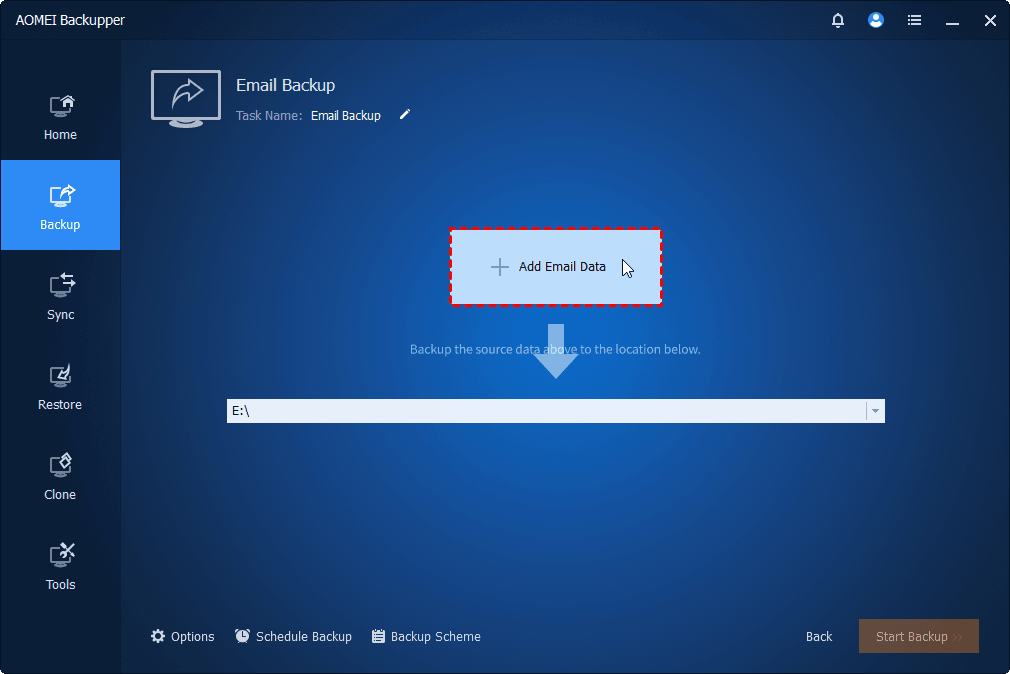
Step 2. Name this backup task as per your need. Then click Add Email Data.
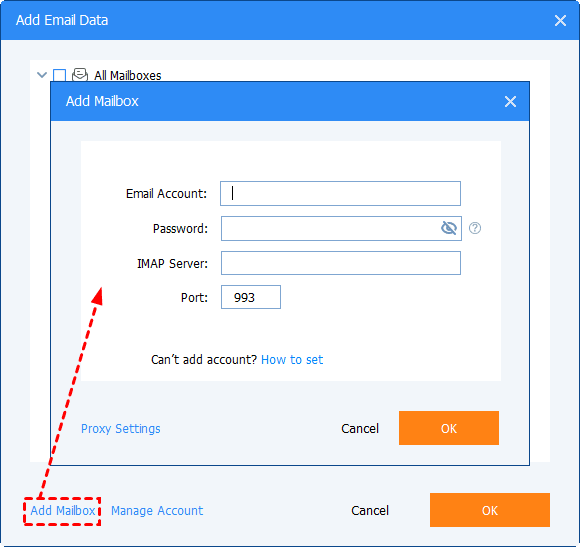
Step 3. Click Add Mailbox and enter your Office 365 email credentials to add it. After your Office 365 mailbox is added successfully, you can select one or more email folders to be backed up.
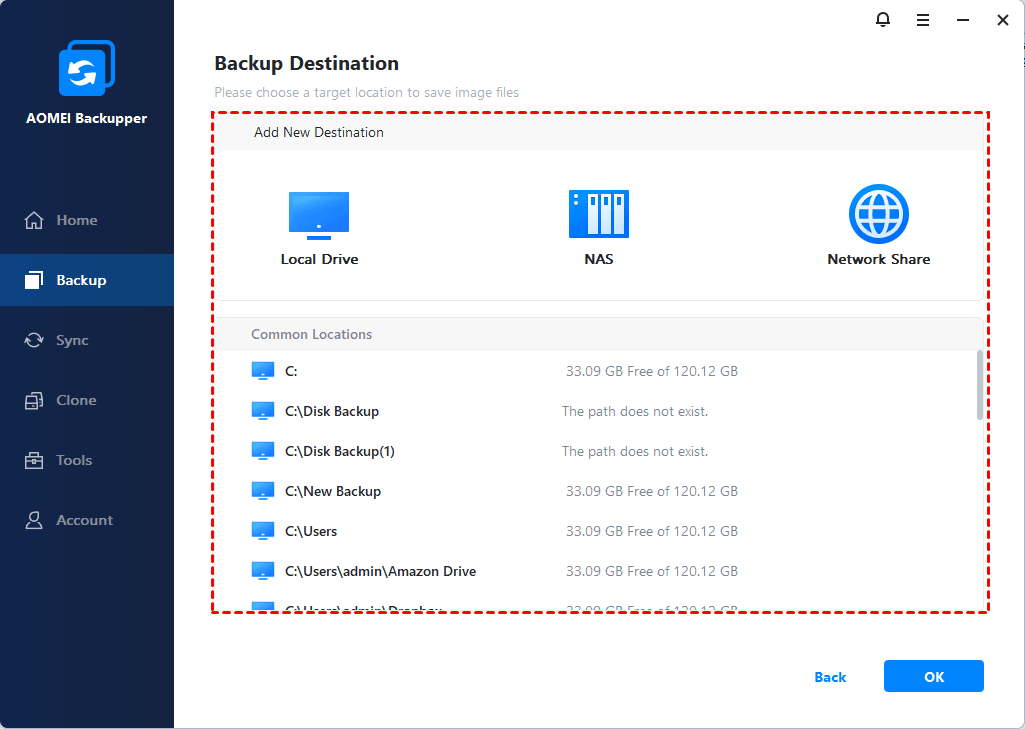
Step 4. Select a destination path to save the backup image. There are three suboptions: Select a local path, Add Share or NAS Devices, and Select a cloud drive.
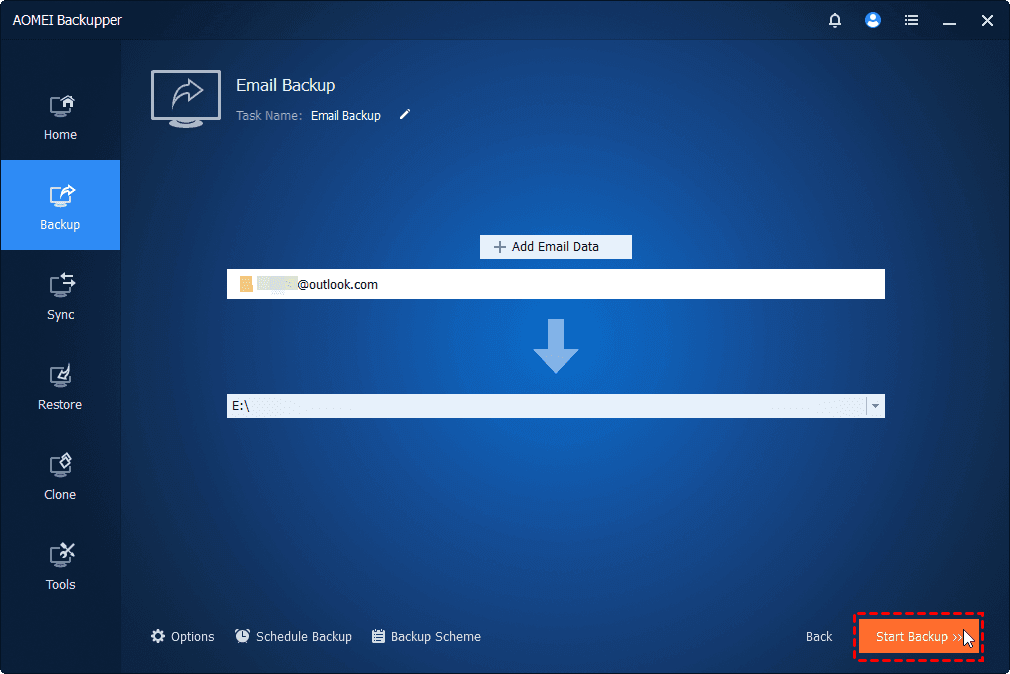
Step 5. To have the backup task run automatically, click Schedule Backup to configure it. Finally, click Start Backup to begin backing up Microsoft 365 mailbox.
FAQs about Office 365 email backup
To sum up
If you want to backup Office 365 emails without Outlook, try the Content Search eDiscovery tool or AOMEI Backupper. It is recommended to backup emails with AOMEI Backupper for easy operations. What’s more, AOMEI Backupper is the best Samsung SSD transfer program. You can use it to transfer everything from HDD to Samsung SSD. Just give it a shot!

