
How to Recover Deleted Photos in Windows 11 Quickly (6 Proven Ways)
There are 6 proven methods to recover deleted photos in Windows 11, which are useful even if the deleted files are not in the Recycle Bin.
By Ivy / Updated on May 18, 2026
Accidentally deleted precious photos on your Windows 11 PC? Don’t panic just yet. Even if the photos are no longer in the Recycle Bin, they may still be recoverable.
In many cases, deleted photos are only temporarily removed and can be restored using built-in Windows features like Undo Delete, Recycle Bin, File History, or Backup and Restore. Even permanently deleted photos still have a chance to be recovered before they are overwritten by new data.
Whether your photos were deleted accidentally, removed after emptying the Recycle Bin, or lost due to formatting or system errors, this guide will walk you through 6 proven ways to recover deleted photos on Windows 11 quickly and safely. Scroll down to find the method that works best for your situation.
- Undo Deletion - Photos just deleted (A few seconds ago)
- Check the Recycle Bin - For recently deleted photos
- Try FastRecovery - A professional data recovery software for all scenarios (except for severely damaged drives)
- Check Backup and Restore (Windows 7) - require a backup
- Check File History for backups - require a backup
- Check Previous Versions - File History or System Restore must be enabled.
How to Recover Deleted Photos on Windows 11 (Step-by-Step Guide)
Here are 6 free, practical methods to recover deleted photos on Windows 11, along with step-by-step instructions.
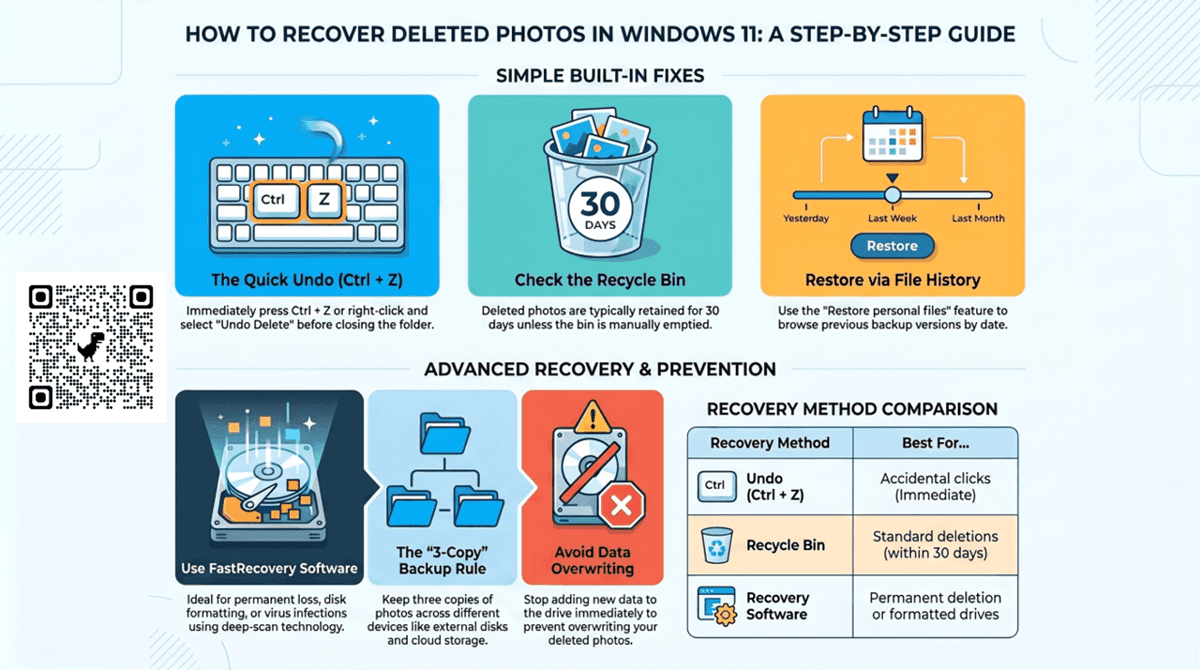
Method 1: Undo Photo Deletion
If you accidentally deleted photos in Windows 11, but don’t close the picture folder or photo editor, press Ctrl + Z to undo the deletion action quickly. Alternatively, right-click on the blank space within the folder and select "Undo Delete" to recover deleted photos in Windows 11.

Method 2: Restore Deleted Photos from Recycle Bin
Also, recovering deleted files from Recycle Bin, such as photos, will be another good choice. The deleted photos will be retained for 30 days unless you empty it.
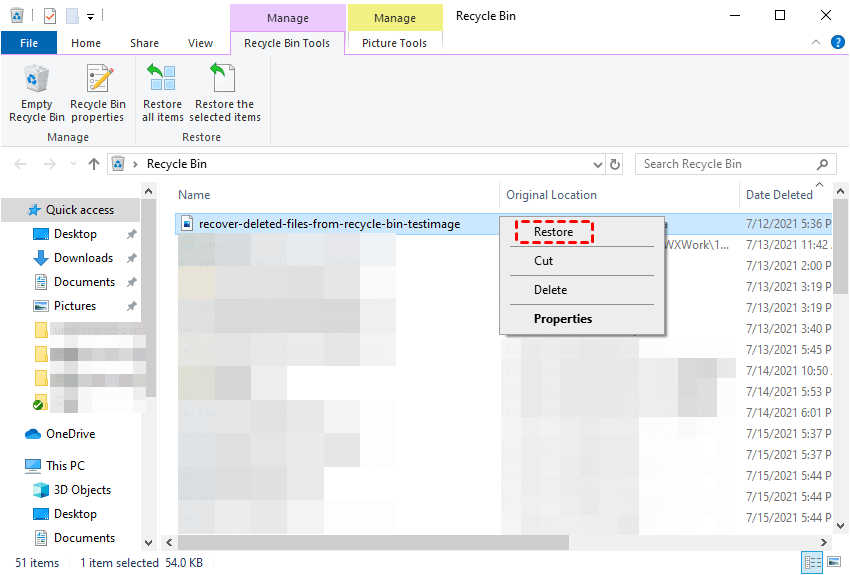
Step 1. Open the Recycle Bin, either from the Desktop or File Explorer. Locate the photos you accidentally deleted from Windows 11.
Step 2. Right-click the deleted photos and select Restore. It will be restored to its original location. You can also select multiple photos at the same time.
🔥 Method 3: Get Back Deleted Photos using Data Recovery Software
If you still can’t get the deleted photos back, they may be deleted permanently. Try powerful image recovery software - FastRecovery to recover deleted photos in Windows 11 if you don't have a valid backup.
It has a high success rate and fast recovery speed. Meanwhile, it can handle data loss in different scenarios well, such as accidental deletion, disk formatting, virus infection, etc. Also, there are some useful data recovery features:

- Integrate Quick Scan and Deep Scan to find all the deleted or other missing files easily and quickly.
- Recover deleted PNG files, JPG/JPEG, TIF, GIF, PSD, X3F, SVG, ARW, and many more image formats.
- Display all recoverable data by Type or Path, allowing you to sort, search, filter, and preview files.
- Recover deleted photos in Windows 11, 10, 8, 7, and Windows Server for free over 500MB.
Now, please download the best image recovery software - FastRecovery and install it. Then, follow the steps below to recover deleted photos in Windows 11.
- Don't download and install FastRecovery on the drive where you store deleted files, as this may cause data to be overwritten.
- Any newly added data or disk formatting can overwrite data. Please avoid these operations after deletion.
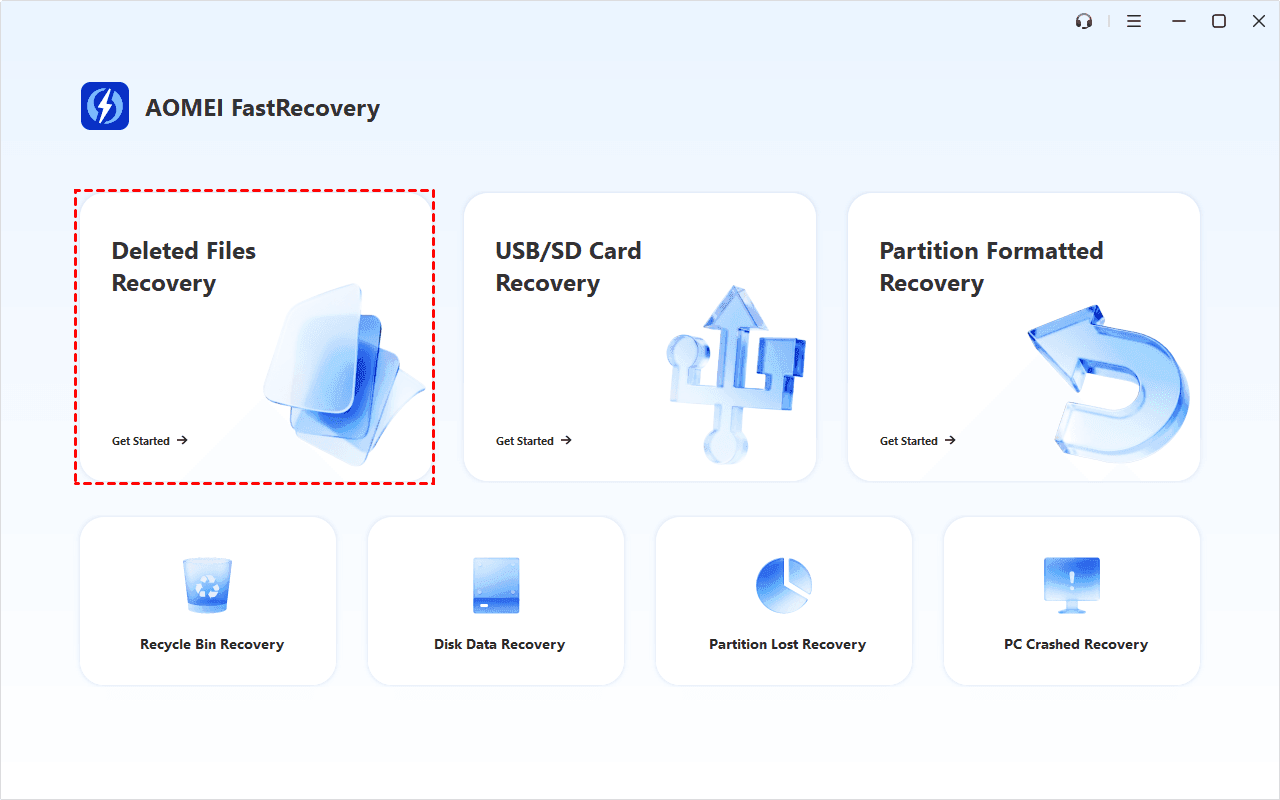
Step 1. Open FastRecovery after installing. Click Deleted Files Recovery.
Step 2. Hover the mouse over the drive and click Scan to get started.

Step 3. It will start a quick scanning process automatically and display all recoverable files. To locate deleted photos, switch to the Type section and check Images, including all image formats. You can uncheck the unwanted image formats.

Step 4. Select the deleted photos you want once found and click the Recover button. You are allowed to recover them during the scanning process saving time and effort.

Step 5: You will then be asked to select a location. Please select a new location instead of the original location, which may cause file corruption or permanently deleted files.
Method 4: Recover Deleted Photos from Backup and Restore
Windows 11 also includes the previous backup software - Backup and Restore (Windows 7) that backup all the user files as well as other personal data such as pictures. If you set up a backup task using this software, it’s worth trying to restore photos from backup image.
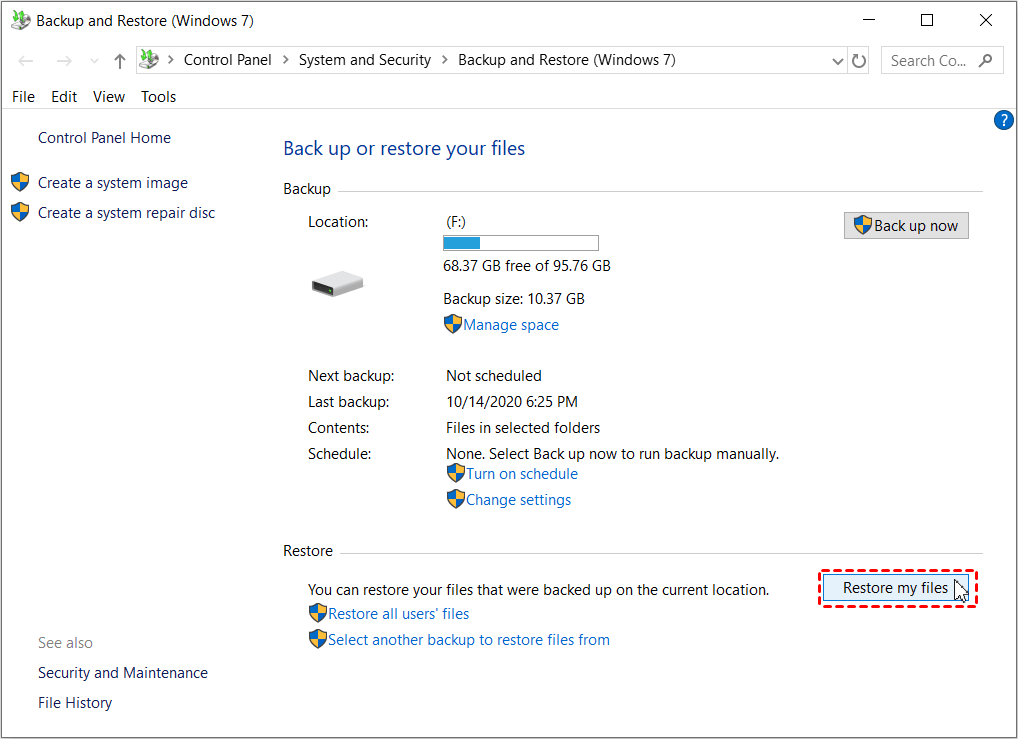
Step 1: Connect the backup drive containing copies of your files including your precious pictures. Search for Control Panel in the start menu and select System and Maintenance > Backup and Restore (Windows 7).
Step 2: Choose Restore my files.
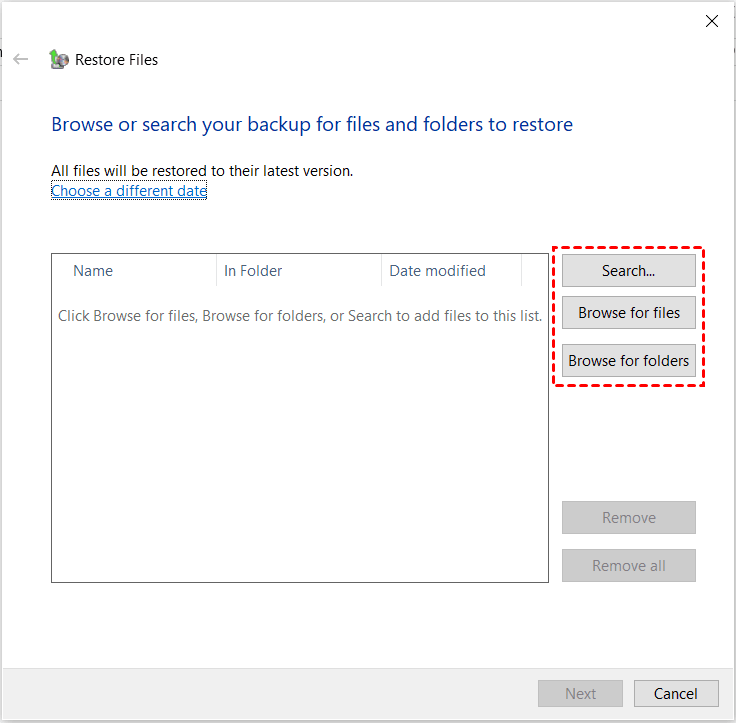
Step 3: Click Browse for files or Browse for folders and select the target files. Then, click Next.
Step 4: Choose the location to restore your photos - original location or new location. Then, click Restore to retrieve deleted photos in Windows 11.
Method 5: Retrieve Deleted Photos from File History
File History is dedicated file backup software to backup specific folders such as Pictures, Documents, Desktop, etc in Windows 11. It also includes the option to add a folder and backup any files you want. Try this if enable File History in advance.
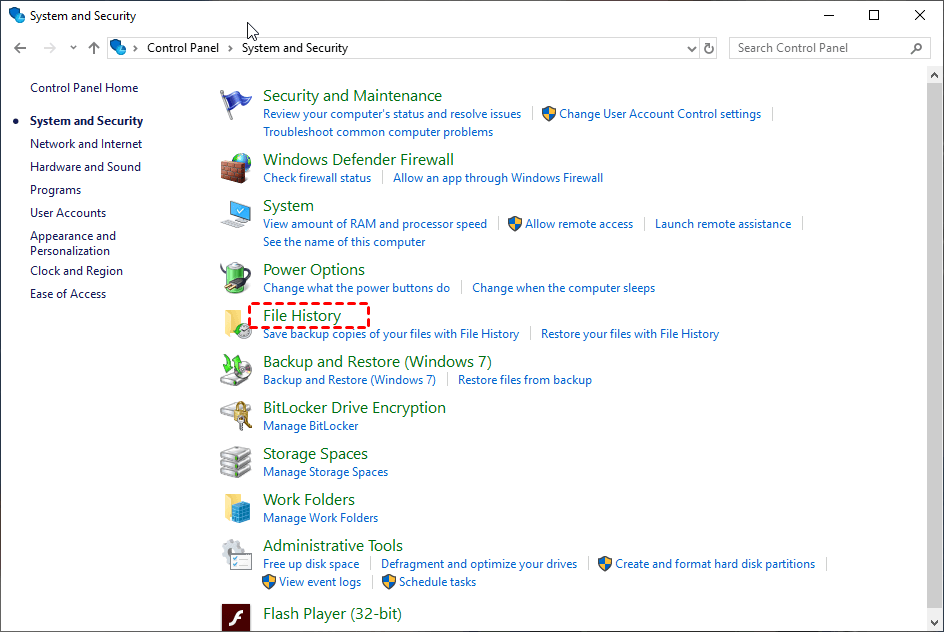
Step 1: Open the Control Panel from the Start menu. Navigate to System and Security and File History.
Step 2: In the left pane, click Restore personal files.
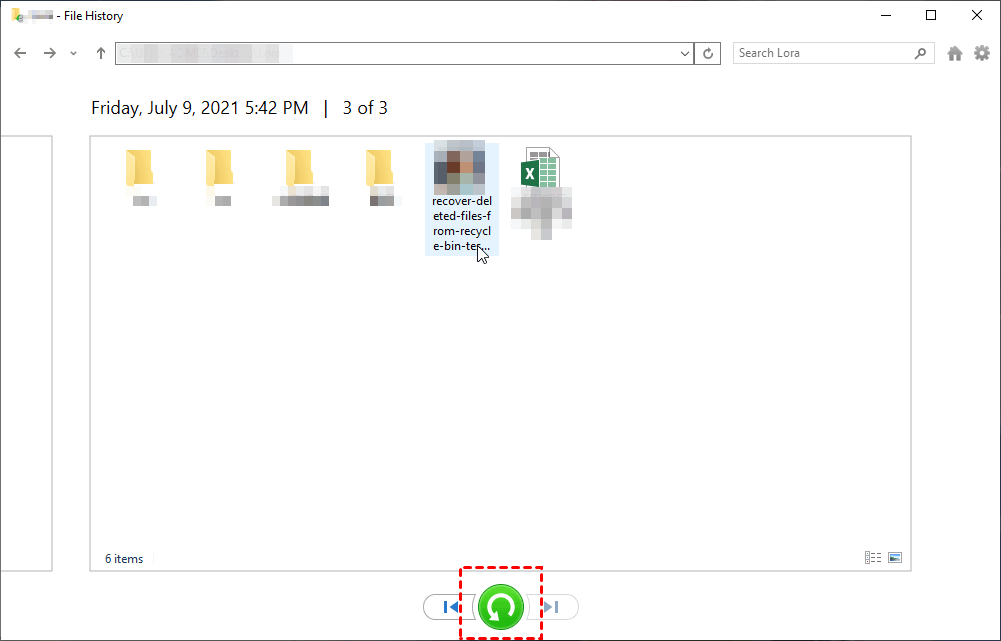
Step 3: It will direct you to the File History window and display the most recent backup. You can click the left or right arrow to find the backup version you want based on the dates. Finally, click the green restore button to retrieve your photos. The images will be restored to their original location.
Method 6: Recover Deleted Photos from Previous Versions
Instead of directly recovering deleted photos in Windows 11 from File History, you can also try previous versions. It saves copy of your files from File History backup.
Step 1: Right-click on the folder containing deleted photos and select Show more options > Restore previous versions.
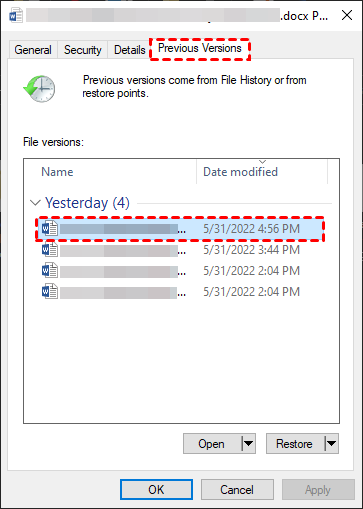
Step 2. It will direct you to a previous version window and display all the available previous versions of files and folders. Select the desired previous version based on the backup date.
Step 3: Click Open to confirm it is the desired version. Then, click Restore to restore deleted photos in Windows 11. You can save the deleted photos either at the original location or a new location.

Quick Comparison of Multiple Photo Recovery Methods
Here is a quick navigation of 6 proven methods in the following comparison table. You can check the pros and cons of them as well as the best uses for each.
| Method | 👍Best For | ✅ Pros | ❌ Cons |
|---|---|---|---|
| Undo Delete (Ctrl + Z) | Quick reversal of the last delete action | Instant recovery, no tools needed | Only works if the folder/app hasn’t been closed |
| Recycle Bin Recovery | Recently deleted photos | Easy to use, no technical skills, bulk restore | Doesn’t work if the Recycle Bin is emptied or bypassed |
| FastRecovery | Permanently deleted, formatted, or lost photos, etc., without backup | High recovery rate, deep scan, cross-device, OS, and format, preview, selective recovery, etc. | Require extra installation |
| Backup & Restore (Windows 7) | Users who previously created system backups | Reliable full system and data recovery | Requires prior backup setup, not useful if no backup exists |
| File History | Protect users' folders, like Pictures, Documents, etc | Version-based recovery, selective recovery | Must be enabled in advance, limited to protected folders |
| Previous Versions | Folder-level recovery | quick access, fast | You must enable System Restore or File History first. |
Recover Deleted Pictures in Different Scenarios (with Ease)
Whether your pictures were accidentally deleted, permanently deleted, hidden, etc, there are effective solutions to recover deleted pictures in different photo loss scenarios, not only Windows 11, but also external hard drives, USB drives, etc.
📌 How to recover permanently deleted photos for free
Deleted photos permanently and thought they were gone forever, especially after emptying the Recycle Bin or using Shift + Delete? But in reality, Windows 11 often leaves recoverable traces until new data overwrites them. This guide focuses on free, practical ways to recover permanently deleted photos.
📌 All my pictures disappeared from my computer
“All my pictures disappeared from my computer” is one of the most common data loss scenarios. Unlike simple deletion, this usually points to deeper issues such as system updates, hidden user profiles, file system corruption, or drive errors.
This article helps you quickly diagnose why your pictures suddenly disappeared and guides you through 5 proven methods. You can even recover all types of image files with just one click.
📌 Find pictures on external hard drive
Can’t find photos on external hard drive? What's worse, you don't have any backup as Microsoft's built-in backup tools do not back up files on an external hard drive. Relax, you need to figure out if your pictures are deleted, hidden, misplaced, or inaccessible, and recover them using File Explorer, CMD, data recovery software, etc.
📌 How to recover deleted JPG/JPEG files
JPG/JPEG files are the most common photo format, but they are also among the easiest to lose through accidental deletion, formatting, or device transfer errors. This article provides users with 4 quick, easy methods to recover deleted JPG/JPEG files. You can even specify the entire JPG/JPEG format or a single file to recover in a few clicks.
Quick Tips to Protect Photos on Windows 11
Except for accidental deletion, there are many reasons for deleting photos, such as disk format, virus infection, etc. You can choose to scan your system for viruses regularly, avoid accessing malicious websites, etc., to prevent data loss as much as possible.
However, it cannot help you get back the deleted photos in Windows 11. To make it possible, try the best Windows backup software - AOMEI Backupper Standard. Its File Backup feature is able to back up your photos and allows you to create multiple backup copies.
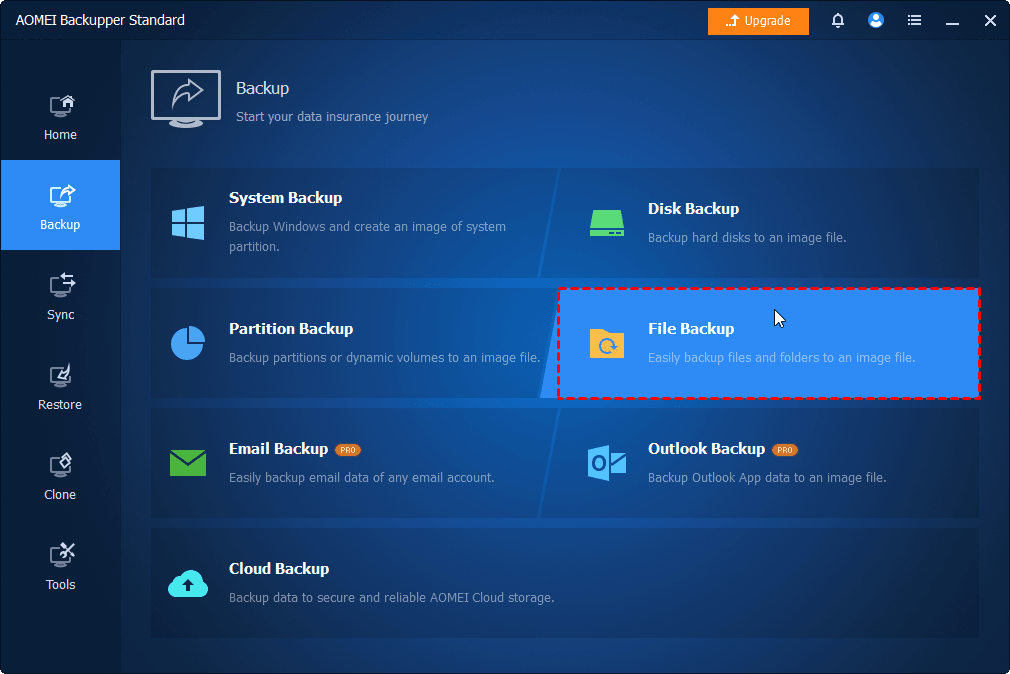
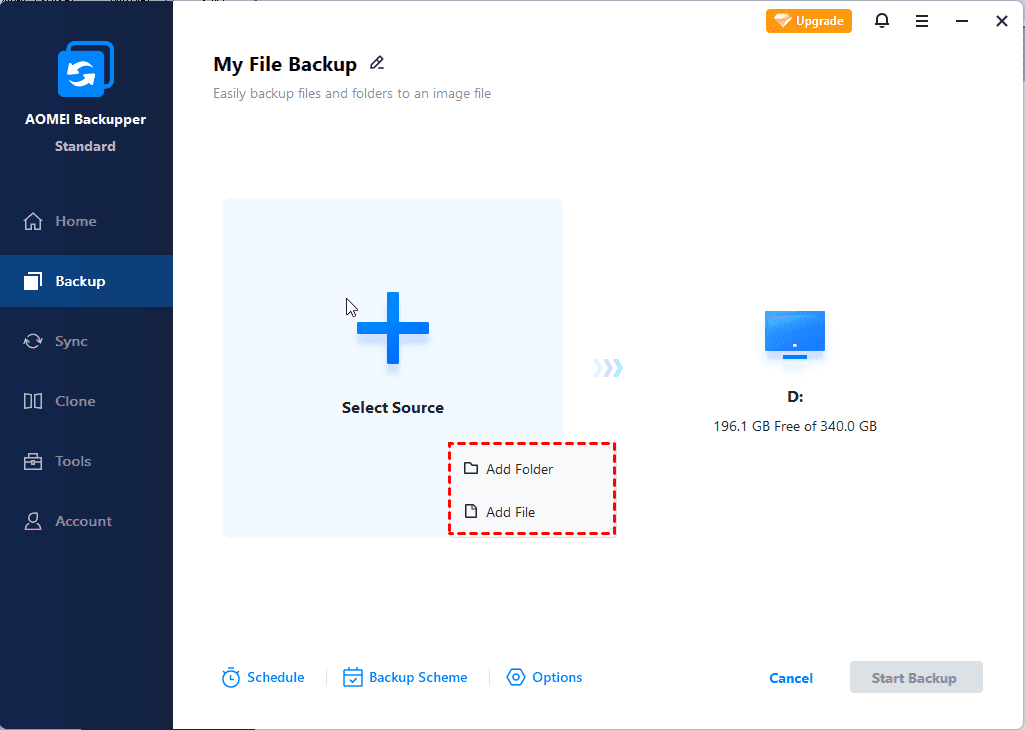
Open this backup software after installing it on your computer. Click File Backup under the Backup tab and click Select Source > Add File or Add Folder to select photos. Then, select the local path, share or NAS devices, or cloud drive like OneDrive, Google Drive, or Dropbox. Finally, click Start Backup.
To create 3 copies of your photos, except for the original photos, you still need to set two backup tasks with the help of the File Backup feature. You can choose to save the backup copies on different storage devices, for example, one is on the external disk and the other is on network drive, NAS, or cloud drive.
FAQs
Q1. How can I recover permanently deleted photos for free on Windows 11?
Q2. How to restore deleted photos after emptying Recycle Bin?
Download and install FastRecovery. Then, click Deleted Files Recovery.
Select the drive containing deleted photos and click Scan.
Just wait. Then, check the Image data type and specific formats.
Select deleted photos and click Recover to start photo recovery.
Q3. Where do permanently deleted photos go on Windows 11?
Q4. How to Perform photo recovery from formatted hard drive on Windows 11?
It will be easier if you have a backup. If not, consider using a professional data recovery software.

