How to Recover Data from Quick Formatted Hard Drive (Updated)
Accidentally quick formatted hard drive Windows 10 and lost some important data? Want to know how to recover data from quick formatted hard drive? You have come to the right space and here we will show you how to unformat a hard drive to recover lost data.
By Zoey / Updated on March 9, 2026
Accidentally hit Quick Format for my hard disk, help!
How to recover data from quick formatted hard drive on Windows 10? I performed a quick format on my hard drive and it houses many of my important documents. Is it possible to recover the files? If I can't get them back, I might lose my job. Please assist me. Any suggestions would be greatly appreciated!

What is the difference between Quick Format and Full Format?
A Quick Format is just that, quick. To make the formatting process quick, it removes files from the partition without scanning the disk for bad sectors. And a quick format will only delete the journaling part of the file system, and then lay a new, simple, and blank file system on top. NTFS, ext3, and ext4, as well as HFS+ are all journaling file systems.
While a Full Format includes an extra step that checks the hard drive for bad sectors. When a drive is fully formatted, its partition table is overwritten, no matter, if it’s MBR (Master Boot Record), GPT (GUID Partition Scheme) or APM (Apple Partition Map), and the previous file system, is replaced with a new one.
In short words, a Quick format is easy and less time-consuming and removes files from the partition without scanning the disk for bad sectors. Full format, on the other hand, completely erases files from the volume you are formatting and the hard drive for any bad sectors.
Can you recover data after a Quick Format hard drive?
After reading the previous part, I believe you’ve already had the answer to this question. Still, we want to make a brief introduction of what makes it possible to recover data from a quick formatted hard drive. You can recover data in a quick format because:
- Only data entries are removed by quick formatting.
- It does not overwrite the data, unlike the full format.
- Only the file system is rebuilt.
- The information is still in the memory location.
- The directory is only cleared of data details.
Also, here's a suggestion. Before you begin recovering files from a formatted hard drive, you should immediately stop writing new data to the hard drive, as this may overwrite the original data, rendering the data unrecoverable.
How to recover data from quick formatted hard drive [3 options]
To recover data from quick formatted hard drive, you can use data recovery software or backup utility once you meet the accidentally formatted hard drive on Windows 10.
Option 1. Recover data from quick formatted hard drive via a data recovery tool
How to recover data from quick formatted hard drive? FastRecovery is the first option for recovering data from a quick formatted hard drive.
No matter what data loss situation you meet, including disk format, accidental deletion, virus attack, etc. FastRecovery can scan your hard drive and find all lost files and deleted files for you to recover.
Shining Points of FastRecovery
- Supporting an extensive array of over 200 file formats, this tool empowers you to seamlessly recover a diverse range of data. Whether it's the retrieval of deleted X3F, HEIF, or JPG images, the restoration of X3D, MXF, MP4 videos, or the recovery of DOC, DOCX, TXT, XLS documents, or any other commonly used file type, this software has got you covered.
- FastRecovery can perform well in many storage devices like hard drives, SD cards, USB flash drives, and more.
- Moreover, its File Filtering feature provides you with a swift means to fine-tune your search, allowing you to pinpoint specific file categories, such as images, videos, documents, audio, emails, and compressed files. Additionally, you have the flexibility to set criteria based on modification date and file size.
- For a comprehensive data recovery experience, this tool employs two advanced scanning methods, ensuring the retrieval of as many files as possible. Whether you've encountered data loss due to various scenarios, this software can efficiently recover files from an SD card formatted as internal storage, delivering a complete data retrieval solution.
📍 A crucial reminder: If you detect any data loss on your hard drive, it's imperative to cease using it immediately. Continuing to use a hard drive may result in data overwriting, rendering any recovery attempts futile. Additionally, refrain from adding new data or formatting the hard drive during this period to maximize the chances of successful data recovery.
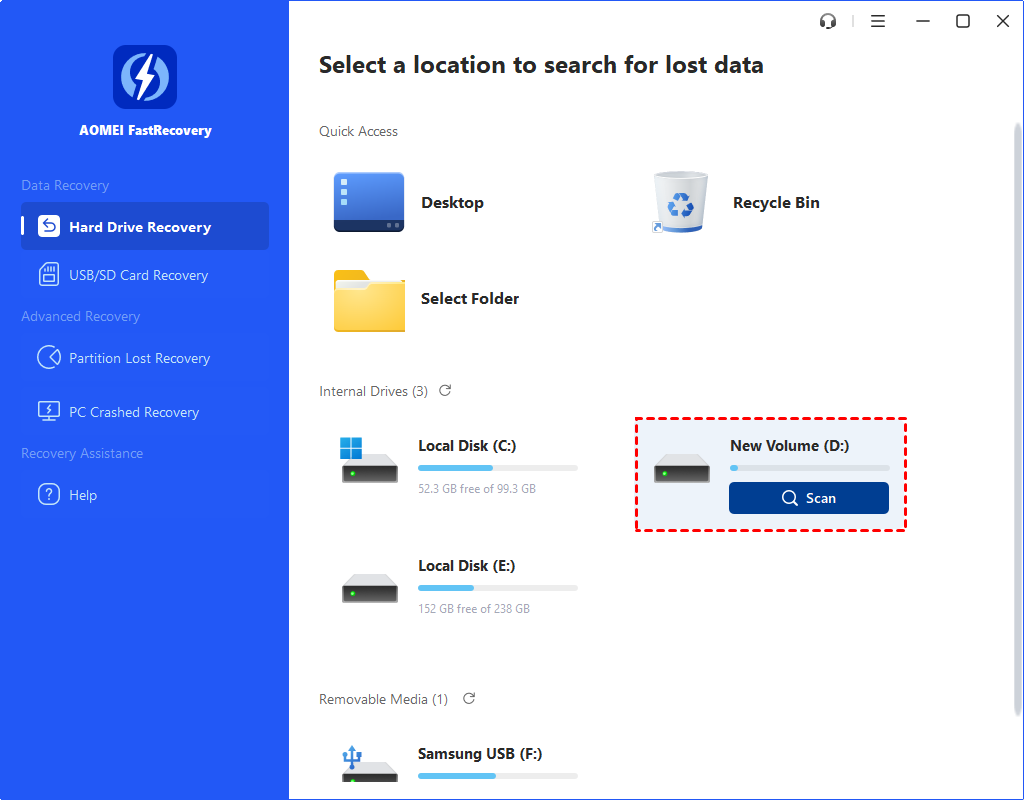
Step 1. Download, install, and launch FastRecovery on your computer.
Step 2. Hover the mouse over the hard drive that has been quickly formatted. Click Scan to scan.
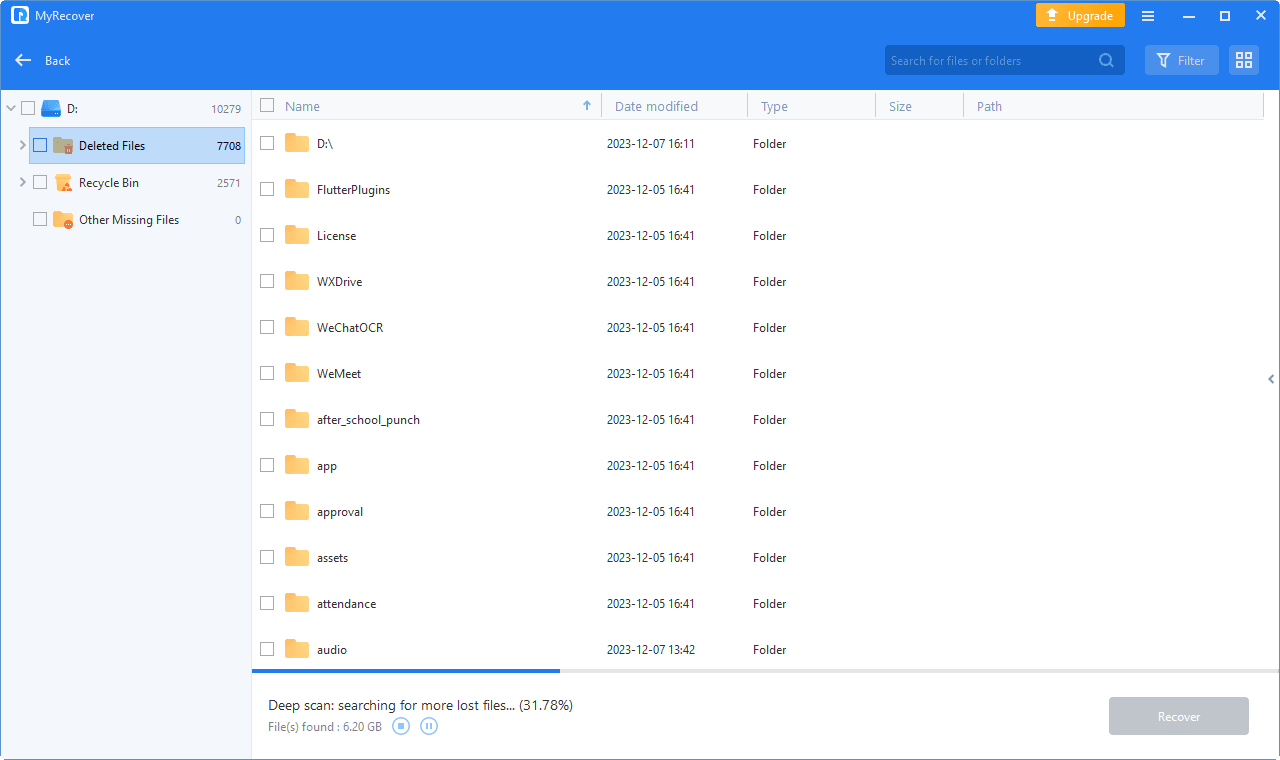
Step 3. Then the scanning process will start automatically. You don’t need to wait for the process to complete if you find the data you want to recover.
📌 You can also use the Filter feature to search the Word files to locate deleted files faster. It has 3 options in the following:
- Type: It will contain all the file types in the local drive, such as, images, videos, documents, mails, webpage, compressed files, etc.
- Data Modified: It supports today, yesterday, last 7 days, last 30 days, and custom. To recover deleted files at a specific time period, try the last option.
- Size: It allows you to filter file size from less than 128KB to 128KB ~1MB to 1MB ~ 512MB and above, or custom.
Step 4. Choose the data that you want to recover. Click Recover xx files and choose a destination path to save the restored data.
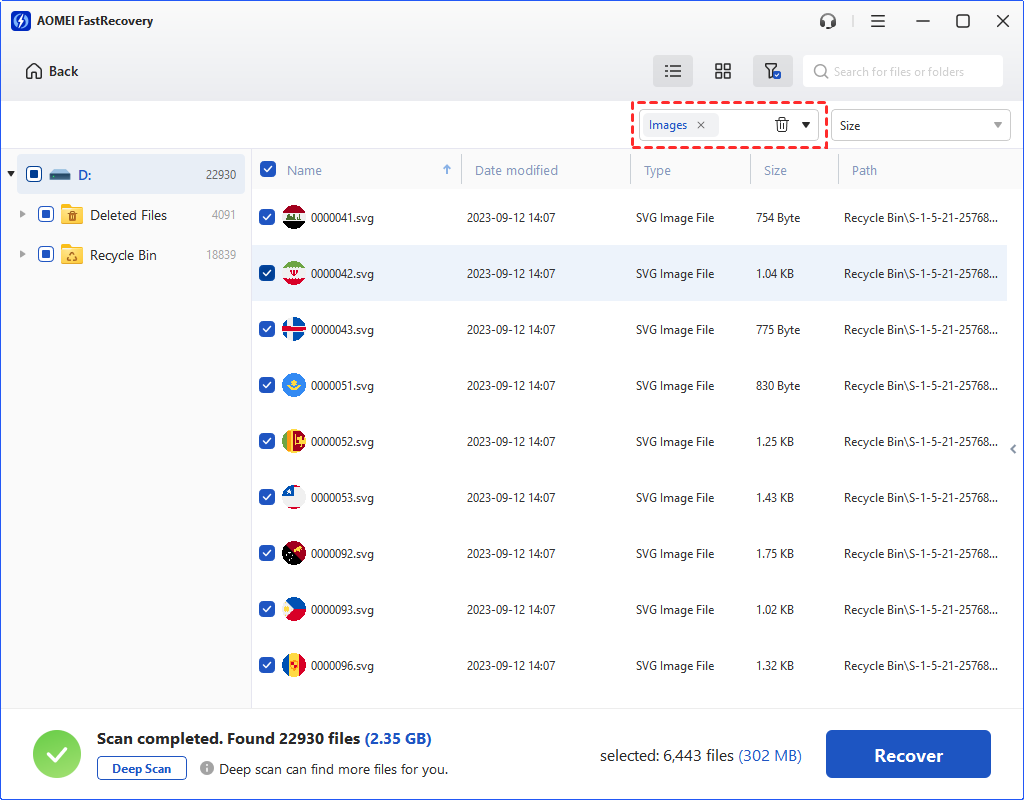
- Please choose a new location to save your recovered files to avoid data overwriting.
- FastRecovery will display the number of files to be recovered and their entire size. You can recover files up to 500MB for free. To recover unlimited files, please upgrade FastRecovery.
Option 2. Restore formatted hard drive data via Backup and Restore utility
If you have the Windows built-in Backup and Restore utility enabled, then you can also recover data from quick formatted hard drive from a Windows backup.
Step 1. Input Control Panel in the Windows search bar, and start it.
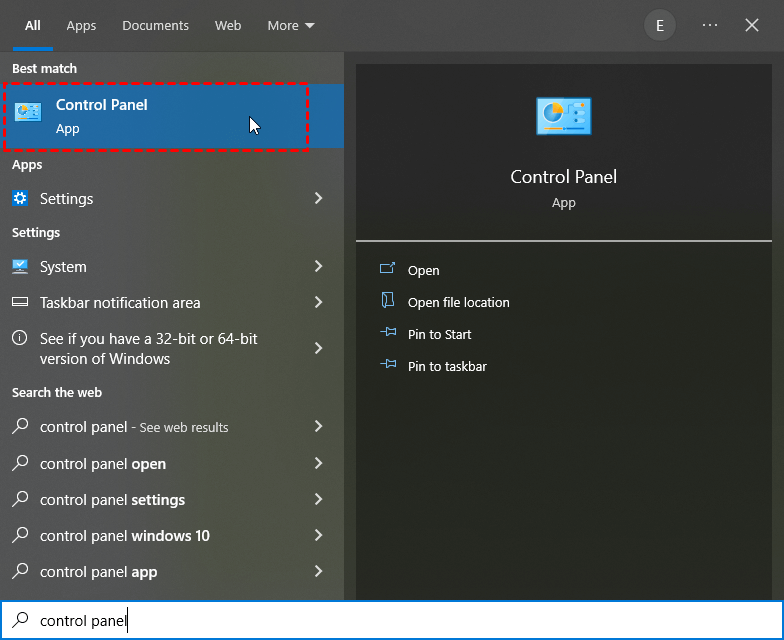
Step 2. Click System and Security and then Backup and Restore (Windows 7).

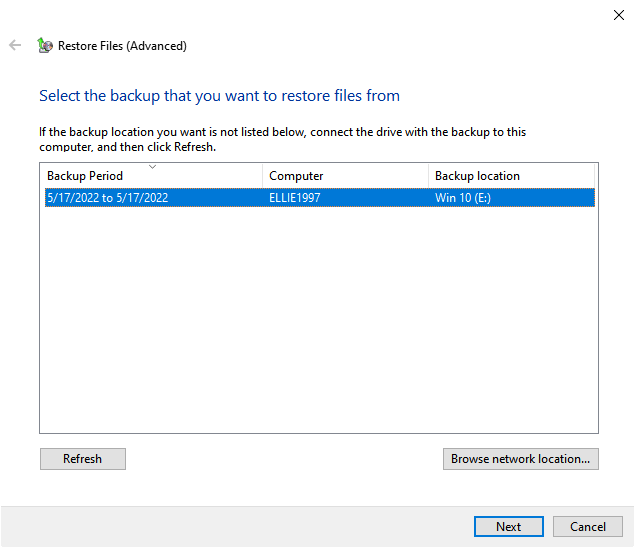
Step 3. Click Select another backup to restore files from.

Step 4. Select the backup and then click Next.
Step 5. Search for your missing files by using the Browse for files or Browse for folders option.
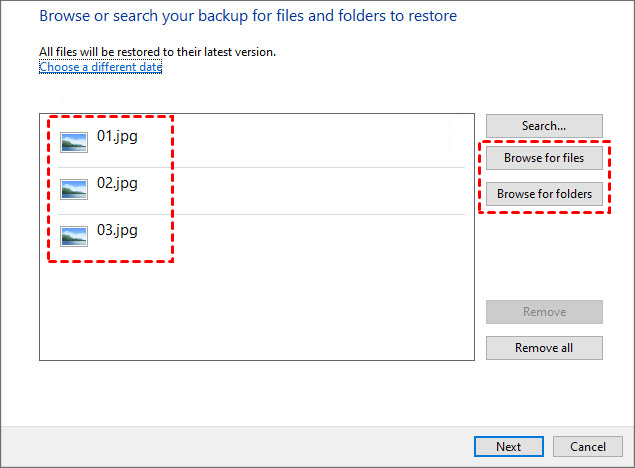
Step 6. Choose a location to save the backup, select your files and click Restore to recover them.
Option 3. Using File History to retrieve formatted hard drive data
How to recover quick formatted hard drive? Another service that Windows offers you to retrieve formatted hard drive data is to use the File History, which allows you to get back your files from the backup copies of them. But you need to make sure that you have turned it on. Please note that this feature is only available on Windows 8 and above.
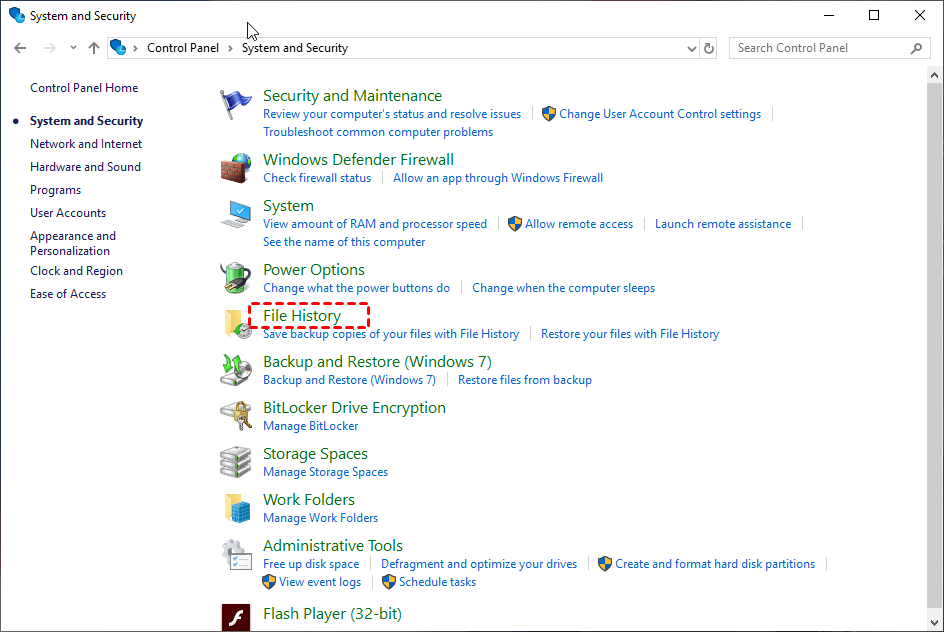
Step 1. Go to Control Panel > System and Security > File History.
Step 2. Click Restore personal files.
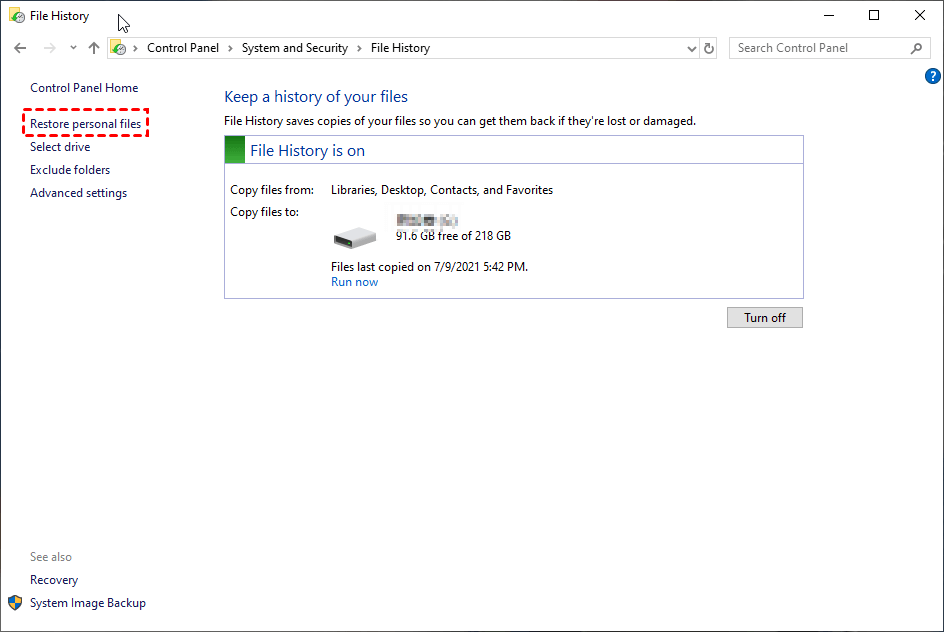
Step 3. Select the files you need to recover and then click the Restore button.

How to format your hard drive without losing data
If you want to perform a quick format on your hard drive without losing data, you can check some advice as follows.
Way 1. Make a hard drive backup with AOMEI Backupper
Even if you have known how to recover all data from formatted hard disk, we still think that the safest way to keep your data is to make a backup. Here we recommend the free data backup and restore software AOMEI Backupper, which allows you to back up all your data in just a few simple clicks and then restore files from the backup whenever you want to avoid something unexpected happens. It has the following advantages over other data backup tools:
-
Backup disk automatically. It supports daily, weekly, and monthly schedule backups, so you can choose to back up the disk with one of them.
-
Incremental Backup. By default, this software supports incremental backup, which backs up only changes since the last backup.
-
Other useful tools. It allows you to create bootable media with CD or USB disk, so you can boot your PC from the bootable media to a backup hard drive even when the system crashes.
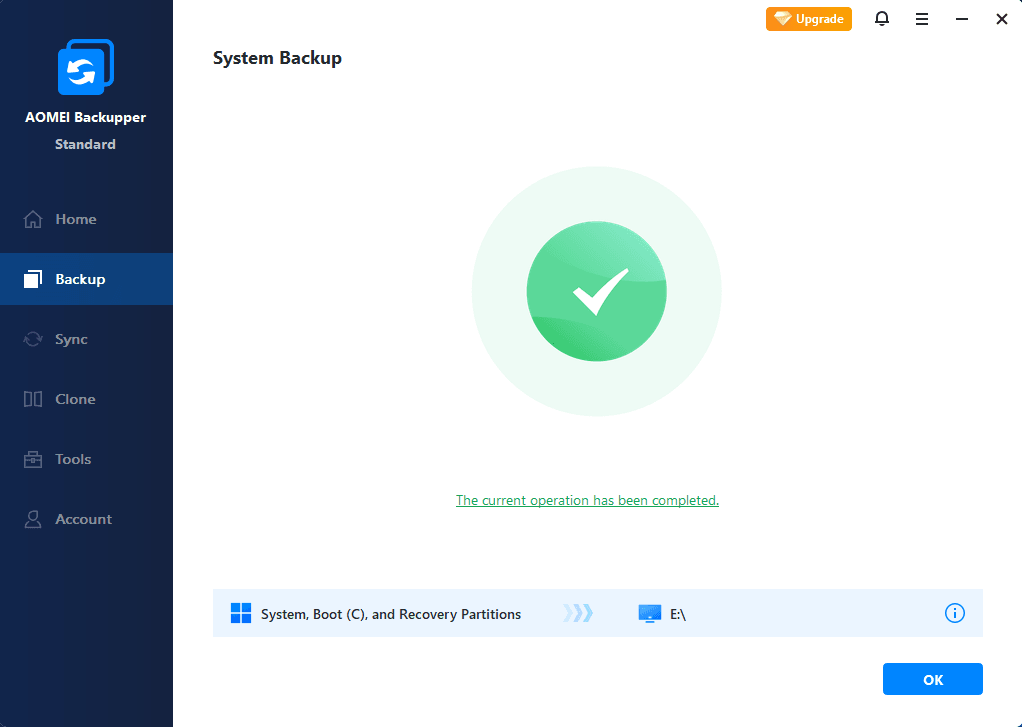
Step 1. Download, install and launch AOMEI Backupper for Windows on your computer.
Step 2. Under the Backup tab, select the Disk Backup option.

Step 3. Click Add Disk to choose the external hard drive. You can also change the Task Name here to help you distinguish backups from each other.

Step 4. Select a location for the disk image by clicking the folder-shaped button.

Step 5. Click Start Backup to carry out disk backup and wait until the operation is complete. Click Finish to exit the interface.
Way 2. Use the default file system
When quick formatting a disk and there's no specific requirement to alter the file system, it is advisable to stick with the default file system provided by Windows. Here, we'll guide you on how to swiftly format a hard drive through Disk Management:
Step 1: Begin by connecting the external hard drive to your computer.
Step 2: Next, right-click on "This PC/My Computer," navigate to "Manage," and select "Disk Management."
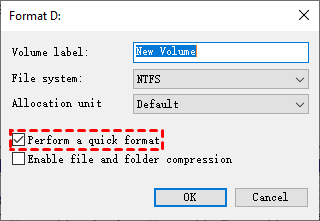
Step 3: Locate the target drive in Disk Management, right-click on it, and choose the "Format" option.
Step 4: In the formatting dialogue box, ensure to check the box that says "Perform a quick format." Then, click "OK" to initiate the speedy formatting process for your chosen drive. Please refrain from modifying the file system; simply proceed with the default format for your drive.
FAQs
Conclusion
You should have understood how to recover data from quick formatted hard drive after reading this post. Among al the recovery methods, professional data recovery software like FastRecovery can be the best assistant for you.
Please pay attention to the tip we mentioned, which is to stop writing any new data on the formatted hard drive so that they can be recovered. Also, always making a backup of your data is a good way to avoid data loss.