Detailed Guidance for You: How to Check USB Drive [4 Ways]
In this tutorial, you will see how to check USB drive in 4 different ways. In addition, we provide a solution to recover data from any USB drive easily.
By Zoey / Updated on March 9, 2026
Certainly, your trusty USB companion has faithfully accompanied your photos, videos, and music on countless journeys. However, the convenience it offers can be thrown into doubt when an unforeseen error arises, barring your access to precious data.
Periodically checking your USB's health is a prudent practice, given that Windows might not always alert you to impending issues. Continue reading to learn some ways to check USB drive with detailed steps so that you can find lost files on USB in time.
About USB Flash Drive Health Check
Initiate a USB health check when you detect any unusual behavior. Warning signs might encompass:
- Slow performance: Similarly, if your computer's speed slows down upon USB connection.
- Vanishing or duplicating files: Compromised USB drives could exhibit sporadic disappearance or multiplication of files and directories.
- Appearance of error messages: Be vigilant about error notifications upon USB insertion, especially those urging an examination or repair of the USB drive.
- Inaccessible files or folders: Check USB drive health if its stored content remains stubbornly inaccessible in hard drive.
- Physical damage indicators: Scrutinize the USB's connection point and exterior for signs of harm that could expose internal components.
- Interrupted read-write procedures: Sudden power loss during data operations necessitates an immediate USB health check.
- Potential vendor deception: Certain USB drives might be altered to masquerade as higher-capacity units than they genuinely support.
How to Check USB Drives on Windows
Once you've ascertained the veracity of your USB drive's information, explore these techniques for checking USB drives.
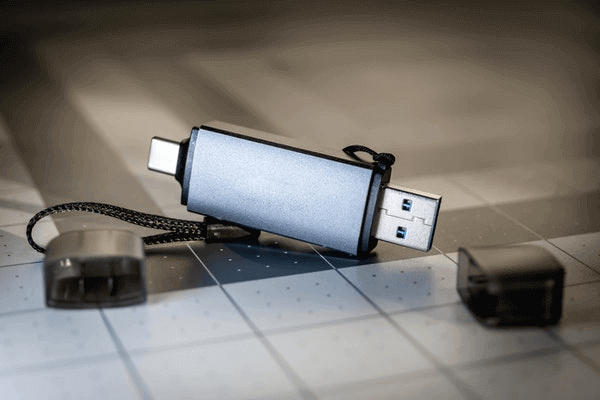
Method 1. Visual Examination
Kick off with a visual examination. Assess the USB's housing for potential problems. Subsequently, shift your focus to the connection point. Is it bent or compromised?
Although USB connectors are built to be robust (given their hot-swappable nature), severe damage could impair data pins and even trigger short circuits, causing memory damage and rendering the USB unusable.
Also, if your USB boasts indicator lights, check their functionality when connected to a computer.
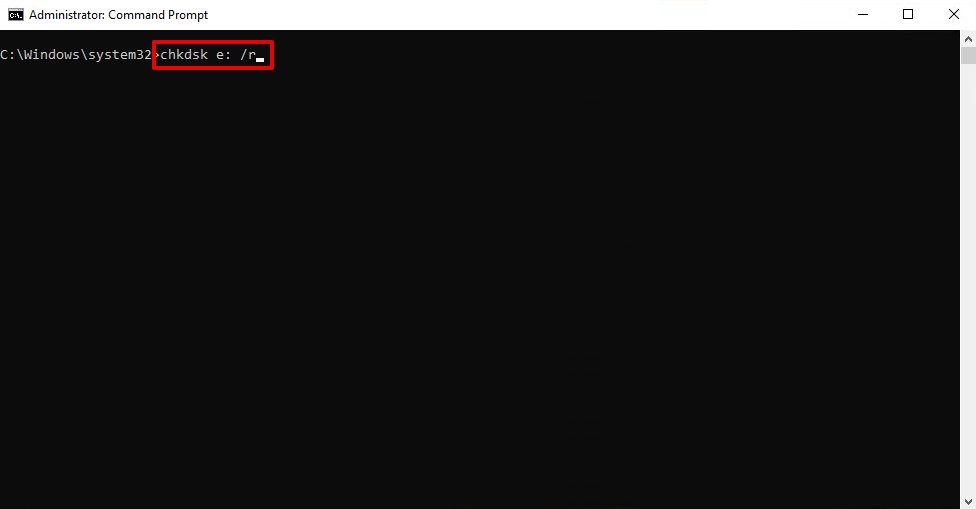
Method 2. Command Prompt (CMD)
For diagnosing and rectifying USB drive issues, CheckDisk stands as a dependable tool. It possesses the capability to fixing bad sectors by mapping them to operational ones. To utilize it, the Command Prompt is necessary, along with equivalent applications like PowerShell or Terminal for Windows.
Execute the following steps to run CheckDisk through Command Prompt:
1. Initiate by clicking Start and searching for Command Prompt. Open the target.
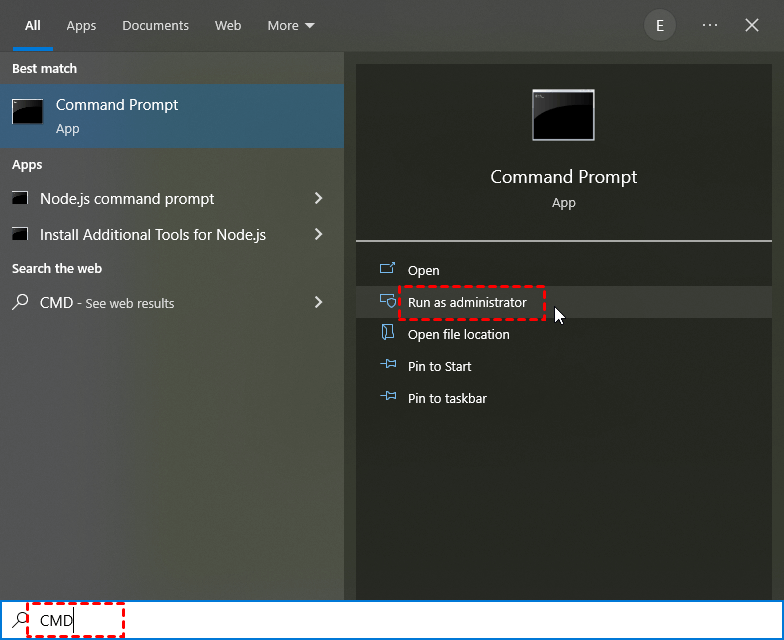
2. Type in chkdsk e: /r. Replace e with your USB drive's letter, then hit Enter.
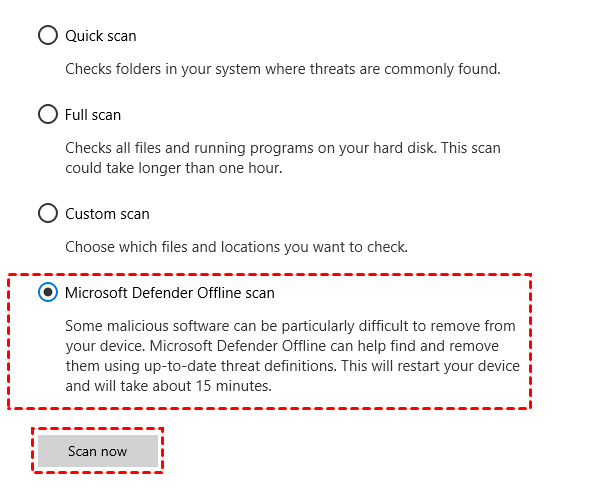
Method 3. Antivirus Scan
Safeguard your USB drive from potential virus contamination. Employ the built-in antivirus utility, Microsoft Defender Antivirus, to scan your USB for malicious software.
Adopt these actions to conduct a virus scan via Microsoft Defender:
1. Launch File Explorer, right-click on your USB drive, and select Scan with Microsoft Defender. For Windows 11, click Show more options initially. This step triggers an automatic quick scan.

2. To conduct a thorough scan, opt for Microsoft Defender Antivirus (offline scan) and initiate a Scan now. This offline scan transpires within a trusted environment, external to the Windows kernel, targeting malware attempting to tamper with the master boot record.
Method 4. Disk Error Checking
Disk error checking effectively serves as a graphical user interface for CheckDisk. Windows empowers you to inspect connected drives for file system-related anomalies. If any irregularities are detected, you'll have the opportunity to rectify them.
Follow these instructions to execute disk error checking on your USB flash drive:
1. Launch File Explorer, right-click your USB drive, and choose Properties. Accessing USB flash drive properties.
2. Navigate to the Tools tab and select Check.
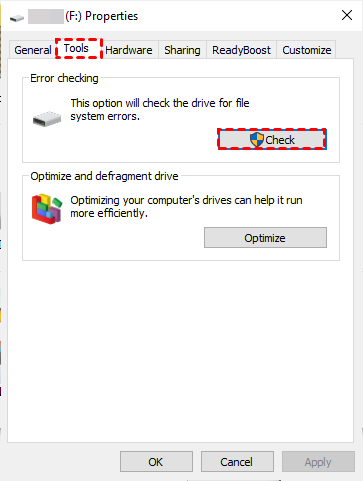
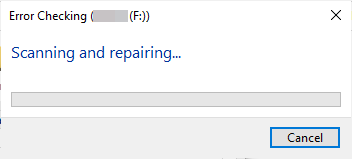
3. Click on Scan and repair drive.
How to Recover Data from a Corrupted USB Flash Drive
In the event of a USB failure without preceding indications, data recovery becomes the focus. Employ a USB data recovery software for this purpose.
Opt for a reliable data recovery software like FastRecovery. This proficient tool restores over 200 file types from corrupted drives across various Windows versions, including Windows 7, 8, 10, and 11, as well as Windows Server. It offers a commendable success rate.
FastRecovery’s shining advantages:
- Offers two advanced scan methods: Quick Scan and Deep Scan, swiftly identifying lost or deleted files such as Word documents, Excel sheets, PDFs, emails, and more.
- Provides swift file filtering and recovery, bypassing the need for complete scan completion.
- Preserves lost files' original attributes, including names, formats, quality, and paths.
To embark on data recovery from a compromised drive, download and install FastRecovery on an operational PC. Accomplish the following steps:
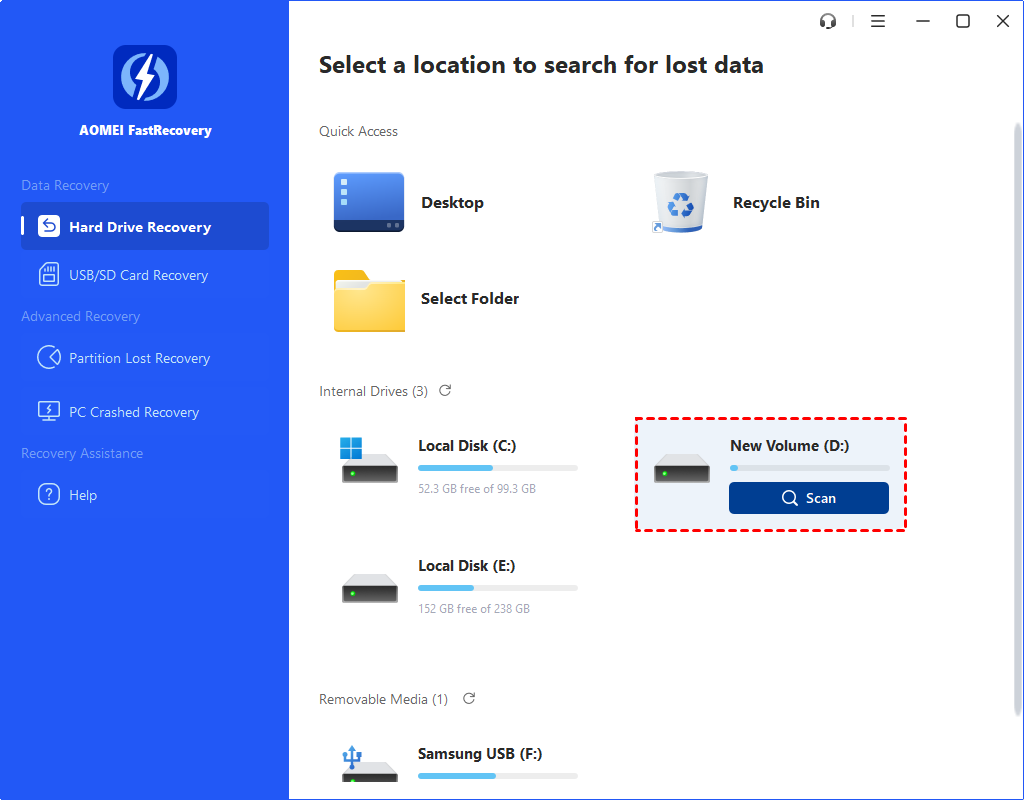
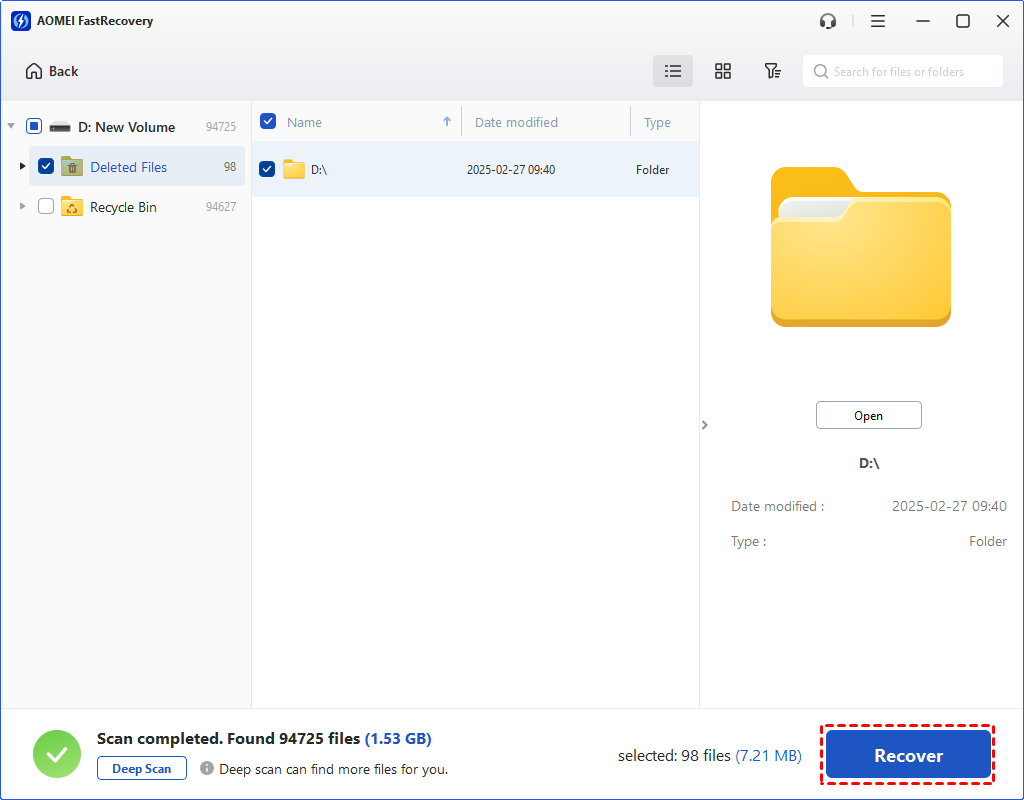
Step 1. Link the USB flash drive to the functional PC containing FastRecovery. Hover the mouse over the affected drive or partition, then initiate Scan.
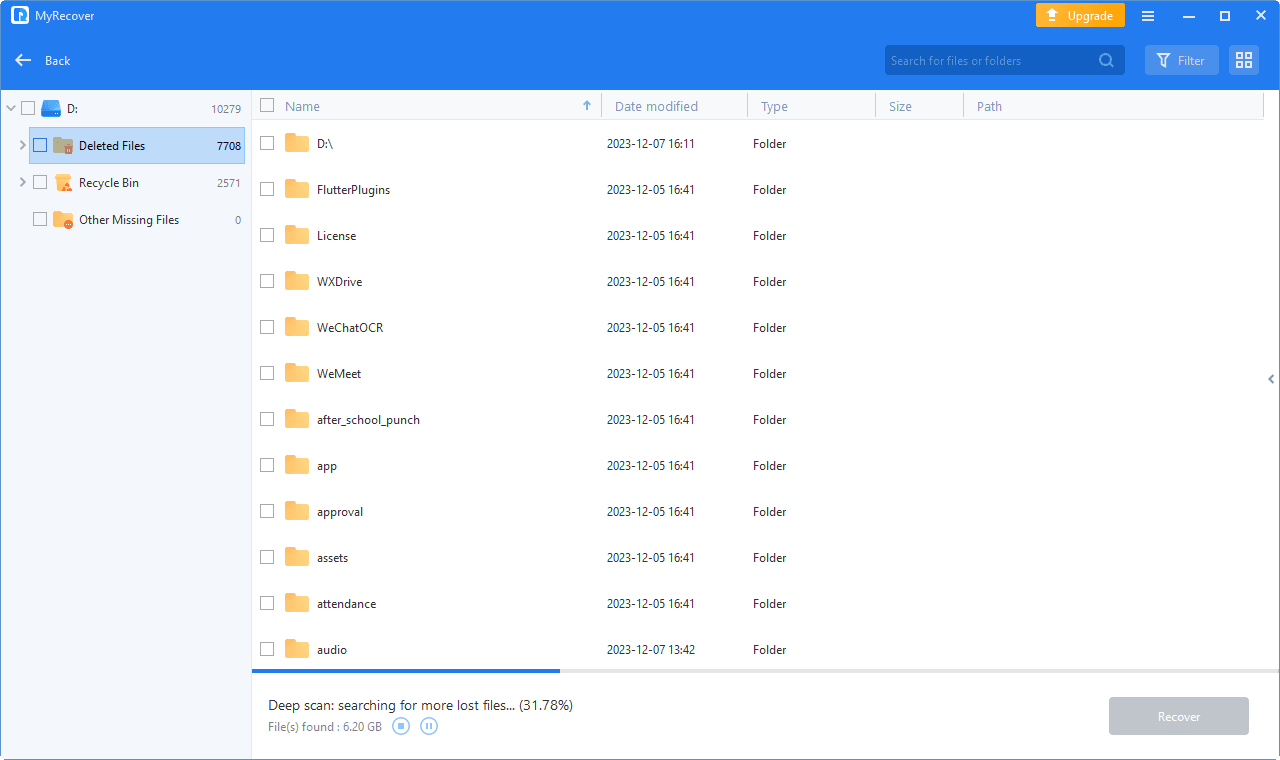
Step 2. The combined power of Quick Scan & Deep Scan will automatically scrutinize all lost or deleted files. Identified files are presented below.
For expedited file retrieval, explore two efficient choices:
📌 1: Employ the Search for files or folders box to input specific file names.
📌 2: Employ the Filter feature for broader searches, utilizing options such as Type, Date Modified, and Size.
Example: To recover deleted Word documents, opt for Filter > Type > Documents. Then, input DOCX in the Search for files or folders box to display identified Word files.
Step 3. Select desired files for recovery and click Recover x files. Designate a location for storage, and the retrieval process will commence.
📍 Notes:
- FastRecovery outlines the number of recoverable files and their cumulative size.
- Choose a new storage location for recovered files to prevent overwriting and data loss.
- FastRecovery extends its data recovery prowess to formatted hard drives, external drives, and USB drives.
- In addition to various Windows versions, FastRecovery caters to Windows Server 2016, 2019, 2022, etc.
In Conclusion
When embarking on the process of check USB drive, begin with a visual inspection to detect any physical defects. Subsequently, undertake multiple evaluations, involving CheckDisk scans, Microsoft Defender virus checks, and disk error assessments.
For instances where USB failure has already occurred, promptly back up your data and embark on recovery with tools like FastRecovery. Upon USB data recovery, restore your USB to its original state through formatting.