Full Guide to Lenovo IdeaPad Gaming 3 SSD Upgrade (15ACH6)
Want to upgrade SSD on your Lenovo IdeaPad Gaming 3 but have no clues? Read this article to get a complete guide.
By Lily Updated on January 31, 2024
User case: IdeaPad Gaming 3 15ACH6 RAM & SSD Upgrade
“I've been searching for a definite answer about this and haven't found anything. My laptop comes with 512Gb SSD on the 2242 slot and 1x16Gb RAM stick. Lenovo says that on the 2280 slot maximum SSD capacity is 1Tb and that maximum RAM is 16Gb.
BUT it says that ‘The system may support more memory as the technology develops.’ I want to install a 2Tb SSD on the 2280 m.2 slot and an extra 16Gb RAM stick and I can find no real reason why this would not be possible. Can anyone confirm that my assumptions are correct and this upgrade is possible?”
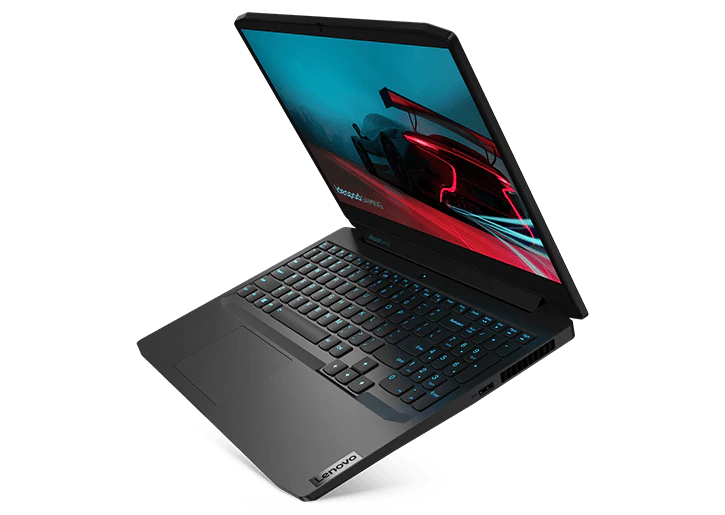
Lenovo IdeaPad Gaming 3 is an affordable gaming machine. It runs faster and cooler than previous generations, with a raised thermal ceiling that dissipates 41% more heat. To improve the gaming experience and expand storage space, you may want to upgrade SSD on the machine. How to do it? Please read on.
Preparations for Lenovo IdeaPad Gaming 3 storage upgrade
Upgrading the storage on your Lenovo IdeaPad Gaming 3 can enhance its performance and allow you to store more files, games, and applications. Here are the general steps to prepare for a storage upgrade:
1. Choose the right SSD
IdeaPad Gaming 3 has two M.2 slots, a 2242 slot and a 2280 slot. Your laptop may come with an M.2 2242 SSD or M.2 2280 SSD, depending on your model.
My IdeaPad Gaming 3 15ACH6 is equipped with an M.2 2242 SSD, and I want to add an M.2 2280 SSD. So, I purchase a Crucial T500 2TB SSD.
2. Gather necessary tools
- A Phillips #1 screwdriver to open the laptop case.
- A standoff screw to install an additional SSD.
- An opening pick to release the clips.
3. Pick a disk cloning utility
If you're gearing up for IdeaPad Gaming 3 SSD upgrade without reinstallation, meet AOMEI Backupper Professional. It is a versatile disk cloning software designed to facilitate various backup and cloning tasks, including disk imaging, system migration, and data protection.
- Disk Cloning: AOMEI Backupper enables users to clone entire disks or specific partitions effortlessly. This feature is particularly useful when upgrading to a new SSD, allowing for a seamless transfer of data, operating system, and applications.
- Flexible Cloning Options: AOMEI Backupper offers flexible cloning options, allowing users to clone disks of different sizes and formats. It supports various storage devices, including SSDs, HDDs, M.2 drives, and external drives, providing versatility and compatibility.
- Sector-by-Sector Clone: For a meticulous replication of your disk, AOMEI Backupper offers a sector-by-sector clone option. This ensures that every sector is copied, including unused or bad sectors, providing a true and exact replica of your original disk.
- Intelligent SSD Alignment: Maximizing the performance of your upgraded SSD is a breeze with AOMEI Backupper's intelligent SSD alignment. This feature optimizes partition alignment on the new SSD, ensuring enhanced system responsiveness.
How to do IdeaPad Gaming 3 15ACH6 SSD upgrade
In my case, I will add an M.2 2280 SSD in IdeaPad Gaming 3 and transfer everything from the old SSD to the new SSD. Here are the detailed steps:
Step 1. Install the new M.2 SSD
1. Power off IdeaPad Gaming 3 completely and disconnect it from any power source.
2. Use the Phillips screwdriver to remove the 10 screws securing the lower case.
3. Insert the opening pick between the lower case and the chassis on the front right edge. Then, slide the pick along the front edge to release the clips securing the lower case.
4. Remove the lower case and disconnect the battery.
5. Locate the M.2 2280 SSD slot, insert the new SSD into the slot (making sure it's properly aligned), and secure the SSD in place with the screw you prepared.
6. Close the lower case.
Step 2. Transfer data from old SSD to new SSD
Cloning your Lenovo IdeaPad Gaming 3 old SSD to a new SSD using AOMEI Backupper is a straightforward process. Here are the detailed steps to perform the cloning operation:
1. Power on your laptop. Download the latest version of AOMEI Backupper and install the software on your Lenovo IdeaPad Gaming 3.
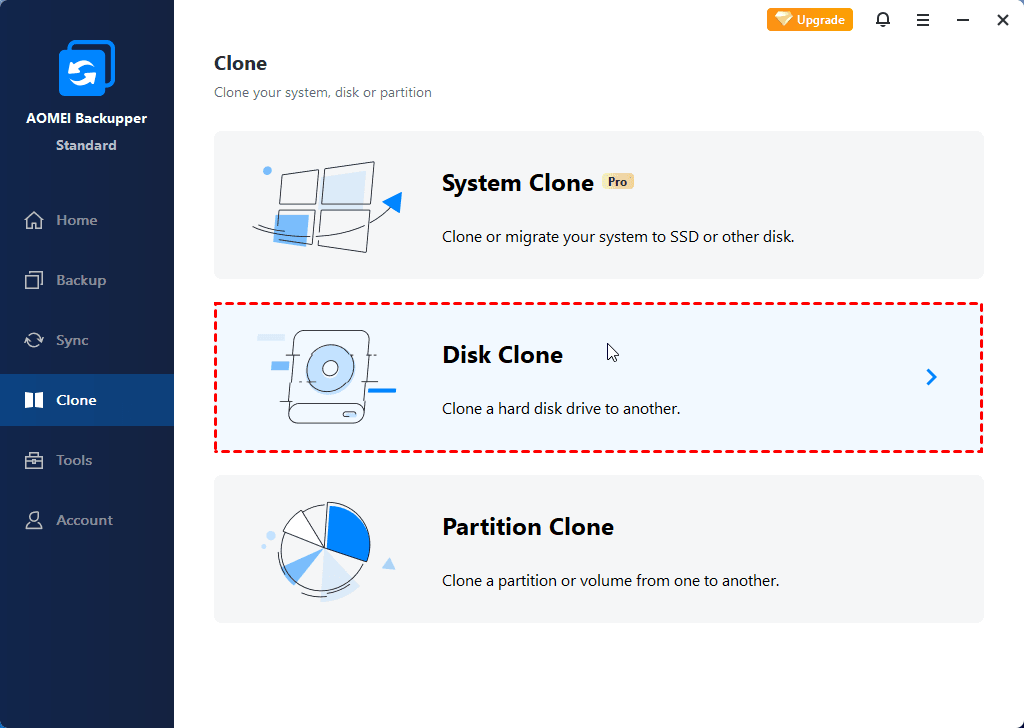
2. Open AOMEI Backupper. In the main interface, click on the Clone tab and select Disk Clone from the options presented.
3. Select the original SSD as the disk you want to clone. Click Next to proceed.
4. Choose the newly installed SSD as the target disk for cloning. Click Next to continue.
5. Check the SSD Alignment option to optimize the destination SSD performance. Review the summary of your cloning settings to ensure they are accurate. Finally, click Start Clone to begin the cloning process.
Step 3. Boot from the new SSD
1. Restart the computer. Press F2 repeatedly to open the UEFI/BIOS setup utility.
2. Navigate to the Boot menu.
3. Follow on-screen instructions to set the new SSD as the first boot device under Boot Priority Order.
🌟 Bonus tip:
If the new SSD works properly after a period of time, you can wipe the old SSD for reuse. AOMEI Backupper can also help you with hard drive erasing. Click Tools > Disk Wipe and follow the wizard to complete the process.
Verdict
This guide outlines the necessary preparations and detailed steps for the Lenovo IdeaPad Gaming 3 SSD upgrade (15ACH6), covering installation, data transfer, and boot configuration. These steps ensure a successful and efficient upgrade process for improved storage performance.

